Growing dill: planting dates, proper care. When to sow dill before winter
Fragrant dill greens or long bushes with umbrellas are an indispensable seasoning for use in fresh and conservation. By the middle of summer, the harvest of spicy greens planted in the spring has long been harvested and disposed of. Sometimes, in July, only a few umbrellas left for pickles stick out in the garden. They are collected in bunches along with horseradish leaves, young sprigs of currants, cherries and walnuts and are used for cucumbers, tomatoes, zucchini and squash. Dill can be sown on any sunny areas vegetable garden from early spring to late autumn. Seeds planted before winter will give an early harvest next season, and thanks to summer crops, you can enjoy the taste of spicy grass until the onset of frost. To obtain bountiful harvest re-sowing dill should follow a number of rules, which will be discussed later.
How to sow dill in July-August?
Large beds freed from under early ripening crops (radishes, early cabbage, leafy greens, new potatoes, winter garlic etc.), it is not advisable to take it under dill. They, as a rule, are already filled with repeated plantings of root crops, berry and vegetable plants.
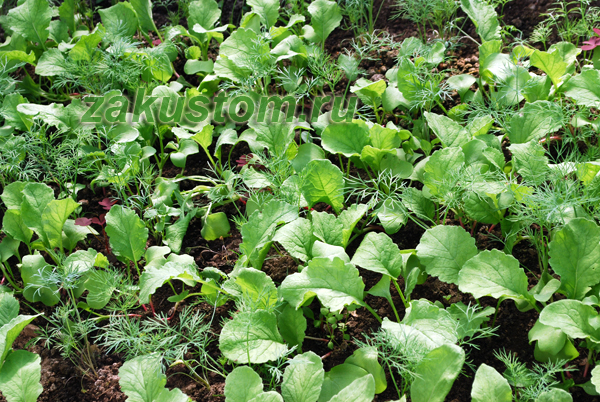
But to sow plantations with fragrant grass, cabbage, garden strawberries, eggplant, pepper between the rows – perfect way rational use of every free patch of fertile land.
And dill also grows well along fences and fences, with dense sowing, completely displacing even the perennial ubiquitous leek and other weeds.
Joint plantings with dill bring triple benefits:
- improving the taste of ripening fruits;
- prevention of growth and development of weeds (couch grass, colza, purslane, etc.);
- protection cultivated plants from some pests, due to phytoncides released into the air and soil.
Plant variety selection
According to reviews experienced gardeners, summer planting dill closed structures inexpedient. Greenhouse dill quickly withers after cutting and contains much less fragrant volatile substances that form the basis of the aroma and usefulness of the plant.
If you grow dill for greens, then use branched, bushy, sprawling varieties for sowing, for example:
- Gribovsky,
- Richelieu,
- amazon,
- Diamond,
- Max,
- Salute,
- Grenadier,
- Redoubt,
- Mischievous.
And if you need to get umbrellas and to collect seeds for the next season, it is recommended to plant Uzbek, Alligator, Hoarfrost or Armenian dill.
Pre-sowing seed treatment
Dill seeds are covered with a dense layer of essential oils, which is why they wake up in the ground for so long. The first sprouts after sowing dry planting material appear after 3-3.5 weeks. When planting a crop in summer, you want to get the harvest as quickly as possible, therefore seed germination can be accelerated by pre-treatment, the purpose of which is to remove the protective layer.
Put the selected crop varieties in a gauze bag and rinse them for 3 minutes in hot water(temperature around 60°C). Next, soak them in water at room temperature for 56-72 hours. Do not forget to change the water several times a day to prevent acidification and remove the released essential oils. Rinse during shift planting material under running cool water.
Sowing and caring for plantings
After soaking, dry the seeds before sowing to a state of flowability. Such planting material germinates already for 4-5 days, delighting gardeners with juicy greenery.
Sowing is carried out in loose, well-moistened soil, evenly scattering seeds over the surface, and sprinkled on top with a centimeter layer of dry fertile soil, crumbly, peat or well-rotted mullein mixed with coarse sand. Choose the landing day by.
Watering the surface of the beds is not required. First watering warm water sprinkling method, for example, from a spray gun or through a fine watering sieve, is carried out after the appearance of mass seedlings. Dill is a drought-resistant plant, but the amount of greenery on each bush increases with regular watering as the soil dries up, especially during the drought period.

Harvesting
Leaves should not be plucked if you are growing a crop for the purpose of obtaining seeds and powerful spreading umbrellas that ripen in 2 months. Dill for greens is ready for cutting in 30-45 days (the period depends on the precocity of the variety indicated on each package with seeds).
You can pull out bushes growing in the aisles of the main crop before, using fragrant greens to add to soups, boiled potatoes, side dishes, salads and other cold snacks.
Unpretentious dill growing in the garden is always will find application for culinary purposes. Try planting fragrant greens in the middle of summer, and enjoy the pleasant taste of the plant throughout the summer season. Happy harvests!
Usually, growing dill is not difficult. It can grow like a weed, propagating by self-sowing, sprouting in beds occupied by other plants.
However, growing dill lush and fragrant is not so easy, especially during off-season.
Preparation before boarding
When growing dill, attention should be paid to pre-planting work.
Choosing a place in open ground
It is best to grow dill outdoors.
If you need an early harvest, then the best option there will be temporary transparent shelters, which are installed immediately after the snow melts and removed when warm weather sets in.
Landing dates
Autumn sowing of dill should be carried out as late as possible so that the seeds do not have time to germinate ahead of time. By heat, beds are prepared and grooves are cut, and after the first frost, seeds are sown on the soil and covered with frozen ground. In the middle lane, planting in the fall begins no earlier than the end of October.
Planting in the spring open ground begins as soon as the soil warms up to at least + 10 degrees - in the middle lane it is usually the twentieth of April. You can use a special trick and warm the soil under the black plastic wrap and thereby ensure that dill can be sown in open ground already a week after the snow melts.
When grown in an apartment, the sowing time depends on whether there is additional lighting. If there is, then dill can be sown at any time. If it is not there, then the sowing time is limited to the period March-August.
Landing methods
In most cases, the crop is planted by direct sowing in the ground, but sometimes dill is grown in seedlings.
Planting seeds for seedlings allows you to:
- get more yield per unit area per season;
- reduce seed consumption, as thinning is excluded;
- speed up the production of greenery by 1-2 weeks.
Landing
Seeds in open ground are sown in pre-cut grooves to a depth of 2 cm. The distance between rows is 20 cm, and when sowing seeds - 45 cm. Rows can be cut both along and across the ridge. In spring, the seeding rate is 1 g/sq.m., in autumn 2 g/sq.m.
AT winter greenhouse dill is cut one leaf at a time, preventing the bush from growing, so they use a thickened planting scheme - 2 g / m2.
Fragrant, vitamin-rich fluffy bushes, unpretentious in cultivation and growing in any conditions - dill familiar to everyone. To obtain early fresh greens, especially valuable in a meager spring diet, you should know the nuances of planting in the open field and care. Knowing when and how to plant dill, at what stage of development and how to fertilize, will help to reap a rich harvest.
Varieties: which one to choose
Types of culture differ in many characteristics, of which the most significant is the ripening period. To continuously obtain a fresh product, a conveyor method of growing it from seeds is practiced by repeated crops every 10-14 days.
At the end of May, early varieties are sown in order to get the "umbrellas" necessary for conservation by mid-summer, and in July - late-ripening ones.
Knowledge of varieties is necessary, because how to grow good dill it is possible, using only those of them that are zoned for breeding in a given region:
- the early ones include Dalniy, Redut, Gribovsky. The period from germination to the beginning of stalking under conditions middle lane takes them 35-40 days. The number of formed leaves is 4-6. They switch to flowering immediately upon reaching marketable ripeness (in heat and drought - faster);
- mid-season include Lesnogorodsky, Richelieu, Borey and others. Stem formation begins 5-10 days later than the early ones. Leaves also form more - 6-10 pieces. They manage to form everything - greens, umbrellas, seeds of wax ripeness;
- more leafy rosettes of late-ripening varieties contain more than 10 leaves. The period between germination and stemming takes 65-70 days, because the yield of dill late varieties- Alligator, Hoarfrost, Amazon - the highest. it bush species crops, so the agricultural technology of their cultivation is different from early varieties: they are sown not so densely and must be thinned out, leaving a distance of 15-20 cm.

When to sow dill
In fact, there is not much difference when to plant dill: in order to obtain both greenery and seeds, it is sown in the fall before winter and in spring, as soon as the snow melts. Frosts are not terrible for a vegetable, it can withstand temperatures drop to -4 ° C, and it will germinate only when the thermometer steadily shows at least + 3 ° C. Winter crops are sown in open ground at the end of October - the first decade of November. Growing dill in this way allows you to get greens to the table in the early stages.
Read also:
When can I plant seedlings in the garden
Vegetables can be sown throughout the season - plant as many times as you like until mid-August. It grows quickly, and although the total harvest of summer plantings is lower than autumn-spring, it will have time to grow not only greens for eating, but also umbrellas used in conservation. In late autumn, being touched by frost, it dries up and changes color, becoming brown-red.

Knowing how to properly plant dill of the selected variety is important: agricultural technology for growing vegetables on greens is usually focused on early, early-ripening varieties. Their economic shelf life is less than a week, and therefore they are sown thickly and harvested quickly.
Late varieties are more productive, but require more planting, and therefore are more oppressed by weeds. So that it takes less effort and time to grow a vegetable and take care of it, after sowing dill on beds in open ground, it is useful to carry out pre-emergence treatment (a day or two before sprouts appear) with Roundup.
The shelf life of seeds for planting is 2-3 years.
Preparing the beds and seeds
Using the knowledge of how to grow dill correctly, you can get a pleasing look, a bountiful crop of culture with the least investment of effort.
Soil Requirements
When growing dill in open ground beds, it is advisable to choose a well-lit area. It will grow in the shade, but in the light the volume of greenery will be greater, its color will be saturated.
The plant loves neutral, loose soils, well ventilated and hygroscopic. The vegetable does not require fertility, being content with top dressing received by its predecessors last year - almost any vegetable, except for celery.
- organics - humus or compost, a bucket per square meter;
- mineral preparations - superphosphate, 2 tablespoons for the same area);
- potassium salt, a tablespoon is enough.
If in the spring they stagnate on the site melt water, beds for vegetables, it is desirable to make high.

Seed preparation
Podzimny sowing of dill is carried out with dry seeds (in autumn they do not need to germinate, but in spring there is enough moisture in the soil), and for effective spring and summer sowing, you should know how to prepare it for planting.
The corresponding work aimed at making the dill rise faster begins six days before the sowing time:
- fold into thin fabric or gauze and soak the seeds in hot water (50°C) for 3 days. At least 5 times a day, change the water to fresh;
- lay out the seeds on a cloth moistened with water, sprinkle a little with wet sawdust and leave for another 4 days at room temperature+20°C;
- dry a little and start sowing.
Read also:
Hamburg parsley

Treating seeds additionally in hydrogen peroxide not only promotes them accelerated germination, but also disinfects, strengthens the immune system and the ability to tolerate temperature changes, increases germination. A tablespoon of a 3% peroxide solution is diluted in half a liter of water. The seeds are wrapped in cloth and dipped in the solution for 12 hours. It is advisable to change it to fresh every 4-6 hours.
Such preparation allows you to speed up germination and get seedlings in 5-6 days, and knowing how to plant dill will allow you to do it correctly and efficiently.
Spring sowing technology
When planting dill seeds in open ground, they make grooves about 2 cm deep on a prepared flat surface. Leave 20 cm between them. To facilitate vegetable care, it is better to make the grooves wide and lay the seeds in a zigzag. For fast shoots sown in moist soil.
In order to avoid excessive thickening, no more than 1 g of seeds is consumed per square meter, and even less for late varieties. Sprinkle with loose earth and do not water for the first 2 days, so as not to wash off the streams of water and not to deepen the sown material more deeply.
How long dill sprouts sprout after planting depends on the depth of their embedding. Subject to agrotechnical rules, they will appear in 5-10 days.

Podzimny sowing of dill
Even beginners in gardening know how to sow dill before winter: they do it with dry seeds in open ground in the fall, at the very end of it. There is no exact date for the winter planting of dill - you need to have time to finish it before frost. Shoots in the spring appear among the first, giving an early harvest of greenery.
A few secrets of growing dill before winter, which will speed up germination and increase yield:
- seeds are laid in the soil a little deeper than in spring, deepening them by 3-3.5 cm;
- their consumption is increased by a quarter;
- the beds after sowing are mulched with loose material.
dill care
The culture is unpretentious and requires little care. She needs nutrition, loosening and watering. Bushes should also be inspected for early detection of diseases and pest attacks.
How to feed dill
The plant is responsive to feeding, however, it accumulates the nitrates necessary for its own to a harmful level, so it is better to use natural, natural supplements. Fermented nettle infusion will become a harmless nitrogen fertilizer for dill.
Growing herbs in the garden is not particularly difficult, even a beginner can get a good harvest of dill, parsley or cilantro. Dill is the least demanding of care, and thanks to its ability to propagate by self-sowing, it will sprout every year in the most unexpected places, albeit in small quantities. However, it is worth considering that the “wild” greens partially lose their taste and aroma. Therefore, real gourmets and those who grow dill for sale should provide it with proper care.
Planting dill at their summer cottage
Dill grows very fast to get regular fresh harvest, gardeners sow seeds every 3 weeks. The first planting can begin in April, as soon as the snow melts, and continue until mid-August. The last, pre-winter sowing is carried out in the 20th of October or in early November to get fresh greens in early spring.
Seed preparation
For better germination of seeds, they are soaked before planting. Each gardener has his own methods, some recommend keeping planting material in water for only 3 hours, others - 2-3 days. In both cases, the water needs to be changed periodically. For convenience, the seeds are poured into a small bag of gauze or thin chintz before immersion in water.

Soil preparation for growing dill
How to grow dill in a summer cottage, what soil composition is needed? When planting it in open ground, light, fertile soils should be preferred. For example, you can sow seeds on the ridges where cabbage or cucumber lashes were grown, since these vegetables are usually planted in soil well-flavored with manure or humus. For more good harvest you can add mineral fertilizers to the soil (per 1m²):
- urea - 20 g,
- potassium salt - 20 g,
- superphosphate - 30 g.
Sowing dill seeds
After fertilizing, the soil is dug up, loosened and slightly moistened. It is more convenient to grow greens in rows, so grooves are made on the ridge, keeping a distance of 20 cm. Before planting, the seeds need to be dried a little by spreading them out on a clean cloth that absorbs moisture well. They can be planted as soon as they become crumbly. Seeds are placed in grooves and sprinkled with a layer of earth of 2-3 cm. Usually, about 5 g of seed is consumed per 1 m². At a temperature not lower than +5 ° C, the first shoots will soon appear.

Many gardeners, in order to save space on land plot, prefer joint planting of some vegetables. So, dill can be sown along the rows with cabbage, it will improve its taste and scare away pests such as aphids or caterpillars. Dill planted between cucumbers will increase their fruiting period. It is also recommended to sow spicy grass with tomatoes, onions or celery.
Features of dill care
Growing dill is a simple task, care for it can be entrusted to a child, as practical lesson in natural history.
Lighting and temperature conditions
If the culture is grown in open ground, then a well-lit area should be selected. When planting in a greenhouse or greenhouse, you will need to carefully monitor the lighting and air temperature. The greens will grow well and acquire a bright, saturated color at an air temperature of +18 to +21 ° C, with sunlight for at least 12 hours.
Watering and loosening the soil
How to grow high quality dill - juicy and fragrant? Most importantly, provide him with regular, but moderate watering. It is enough to carry out the procedure 2 times a week, spending only 6 liters of warm water per 1 m2. Watering is carried out from a watering can with a fine sieve or from a hose with a garden sprinkler. If the summer turned out to be hot and dry, then the garden bed can be watered more often; in moist soil, the greenery grows more fragrant, with a thin and delicate stem.
Important components good care are: regular weeding, loosening the soil and thinning. Thinning is especially important in the case when the sowing of seeds was carried out not in rows, but in a continuous carpet. With such a planting, taller bushes should be taken for eating or for sale, leaving less developed ones for further growth.

Fertilization
Knowing how to grow dill in a summer cottage, do not neglect top dressing. This is especially true if fertilizers were not applied to the soil during digging. You can prepare a solution using urea (25 g) and potassium salt (20 g), diluting the components in 10 liters clean water. With this solution, it is enough to pour dill in the active growth phase 1-2 times. After fertilizing, you need to water the bed again, but with clean water.
The growth of dill slows down with a lack of such a trace element as nitrogen. This is easy to determine by the yellow-green, ugly color of the leaves. In this case, take 20 g of nitrogen fertilizer, dissolve in 10 liters of water and water the bed.
How to harvest dill?
Having mastered the technology of growing dill, you should pay attention to how to properly collect it. To serve fresh herbs to the table, it is best to cut it early in the morning. If you need a small amount, then you can simply pick a few branches from adult plants that have reached a height of 30 cm.
For pickling vegetables or cooking spicy dishes, fragrant dill sprigs are used. Young plants are not suitable for this purpose; only flowering specimens at the age of 2 months are cut.

To prevent self-seeding throughout summer cottage and on next year do not fight wild dill, like a weed, you need to collect seeds in time. If seed is needed for next season's cultivation, wait until the umbels of the inflorescences become hard and acquire a grayish tint. Such seeds are carefully collected, and then dried in a draft, spread out on a newspaper sheet or cardboard.
Greens can be successfully grown at any time of the year, especially if the gardener has a heated greenhouse at his disposal. This is most relevant if further spicy herb sold on the market. How to grow dill in greenhouse conditions?

- Seeds are sown shallow, no more than 1.5 cm.
- A new batch is sown every 2 weeks to regularly receive fresh greens.
- The soil is watered with warm water and loosened, at least once a week.
- Mineral fertilizers are applied every 2 weeks.
- It is better to plant seedlings in the greenhouse, not seeds, this reduces the ripening time of dill to 6 weeks.
- Artificial lighting (fluorescent lamps) must be installed in the greenhouse, the daylight hours must be at least 12 hours.
- The air temperature in the greenhouse is maintained at + 16–18 ° C.
If the greenhouse is unheated or equipped with too weak heating elements and the ground is in winter time freezes, special boxes are used to grow dill. They are placed on some elevation, where they gather warm air. The main condition is that the boxes must be deep enough and with several drainage holes, arranged in a checkerboard pattern.
Obviously, with proper planting planning, dill will not take up much space on the site and will not require special care. But throughout the spring-summer period, it will be able to supply the summer resident with vitamins that are beneficial to health.
growing dill how to grow dill Description: How to grow dill: seed and soil preparation, planting technology. Features of care and cultivation in the open field and in the greenhouse: watering, fertilizing, temperature regime, lighting, harvesting.
Video how to grow dill
For some, this plant grows like a weed, appearing every now and then on the beds occupied by other crops, and someone puzzles over how to plant dill so that the plants are not so weak and lifeless. Although this culture is considered to be unpretentious and simple enough to grow, not every gardener gets it lush and fragrant, as we would like.
Dill is an unpretentious garden crop that grows well in any soil and does not require careful maintenance. It is characterized by such features:
Given these features, it becomes clearer how to plant dill, what place to allocate for it on the site, and what to look for when growing it.
Video: proper cultivation of dill
Pre-sowing treatment of seeds is the key to friendly seedlings
It is known that seeds that have overwintered in open ground germinate better and faster than those sown in spring. Essential oils are to blame, making it difficult for seeds to germinate. Therefore, before sowing dill, it is necessary to prepare the seeds properly.
Put the seeds in a gauze bag and soak for three days in water, the temperature of which is about +50 degrees. The settled water will need to be drained up to five times a day. This technique will help to disinfect the seeds and accelerate the emergence of sprouts.
After processing hot water put the seeds on the same gauze bags, cover with pieces of damp cloth or steamed sawdust and leave for four days at a temperature of +20 degrees, until sprouts appear on some seeds. Before sowing, the seeds are slightly dried for half an hour and sown in well-spilled soil.
Additionally, it is possible to carry out hydrothermal aeration of seeds, as well as bubbling during the day in water saturated with oxygen. At home, a compressor from an aquarium is suitable for these purposes.

Before sowing, dill seeds are slightly dried for half an hour and sown in well-spilled soil.
If it is important for you to get an early harvest of dill, you can grow seedlings on the windowsill and transplant them into open ground 35 days after planting. There will be more hassle, but you will be able to save seeds and grow much more high-quality, dense greenery.
Growing on a windowsill is a simple matter, since it does not require special efforts from a person. The main thing is to be smart about choosing a variety and arranging a place on the windowsill so that the plant can get enough heat and light. For more information on how to grow dill at home step by step, read our article:
Dill - how to plant, and in what time frame?
Due to the fact that the plant is able to tolerate frosts down to -4 degrees, its seeds can be sown in the middle of spring, as soon as the snow melts from the garden. Seed germination is possible at a temperature of +3 degrees, and optimum temperature for growing greens + 15 + 20 degrees.
For early harvest dill planting can be started in the first decade of April at a suitable temperature, oversowing seeds every two weeks to ensure a constant production of fresh greens. Most often, in the conditions of the Russian climate, gardeners sow a plant in the twentieth of April.

For an early harvest, planting dill can be started in the first decade of April.
Dill grows best on neutral, loose soil; it is undesirable to grow it on heavy soil. Prepare the bed in the fall so that you can sow the seeds early in the spring. Digging the ground to a depth of 20 cm, add humus and mineral fertilizers to it. In the spring, it remains only to carefully level the surface of the earth, make grooves on it 2 cm deep, leaving 20 cm between rows, moisten the ground and sow the seeds. Sprinkle the seeds on top with loose earth, slightly compacting the soil. It is not necessary to water the crops, otherwise the seeds with water will go deeper than necessary.
How to choose the time of sowing
Given the ability of seeds to tolerate frosts down to -5 0 C, their sowing begins immediately after the snow melts in the garden. For central Russia, this corresponds to the middle - the end of April. The upcoming frosts are not terrible, because seedlings will begin to germinate only after a stable temperature is established above 3 degrees. Winter sowing in open ground has proven itself well. To do this, the soil is prepared 1-2 weeks before the onset of frost: they dig, fertilize, remove weeds. Seeds are planted in late October - early November to a depth of 1.5-2 centimeters and a distance between rows of 20 cm, and the top layer is not compacted. In spring, seedlings themselves will stretch to the desired depth and sprout immediately after the snow cover has melted. This method allows you to get the earliest fresh dill from open ground. summer sowing fresh seeds gives noticeably worse results without prior preparation. Summer heat has a bad effect on the growth of dill - plants require constant intensive watering. It is used most often for growing fresh herbs for the table, and spring dill is used for harvesting for the winter.
 The choice of neighbors in the garden
Dill plants love correct location in the garden and are sensitive to the choice of neighbors. Planting next to potatoes, cucumbers, cabbage, onions and garlic goes well. Neighborhood with cumin, parsley, carrots is not recommended.Pre-sowing preparation of seeds
It is used for summer planting and growing seedlings on the windowsill of the house. It's all about essential oils that make it difficult to open the seed coat. Overwintered seeds have no problems with this. Prepare planting material as follows:
 - We place the seeds in a gauze bag and soak with warm water (about 50 degrees), we change the water several times a day for 3 days. This technique will help get rid of the oily film on the surface of the seeds.
- We take it out of the water and lay it on a damp gauze, cover it with a cloth or sawdust. We keep them for 4 days, periodically moisturizing. The first shoots should appear.
- Dry the seeds for half an hour and sow in the ground. The first shoots will appear in 14 days.
The greens are cut when they reach 15-20 cm, and the flower-bearing shoots are immediately removed. These measures allow you to get up to 2 crops from one root.
Greenhouse cultivation of dill
In protected ground, you can get fresh greens all year round. It is enough to provide a temperature of 15-20 degrees and additional lighting in winter period. Sodium or LED-based phytolamps are used as backlighting lamps. These light sources give the most correct emission spectrum and contribute to best growth. And dill is a light-loving plant.Advice! To enable artificial lighting use a timer that will light up 2-3 hours in the morning and 3-4 hours in the evening. This is enough for rapid growth.pros greenhouse cultivation dill:
- Year-round production of fresh herbs that can be used for sale;
- Frost protection;
- Ease of harvesting and sowing, independence from weather conditions;
- yield from one square meter higher than in open ground.
 Growing dill in greenhouse conditions begins with soil preparation and application mineral fertilizers. It is more convenient to fertilize the ground in between plantings. The distance between the grooves is no more than 20 cm, and the seeds are rarely planted and thinned out after germination. Plant care does not differ from open ground: abundant watering, weeding, cutting off overgrown stems. For closed ground it is best to use varieties that allow repeated cutting. Every two weeks we sow a small amount of new seeds on a new bed, for continuous provision fresh herbs. Popular varieties are Gribovsky, Borey, Salut, Umbrella and others.
 Winter and winter sowing
In order for fresh greens to appear on your table as early as possible, the seeds are sown before winter. To do this, the garden bed is prepared in the fall, seasoning with mineral and organic fertilizers. Before the ground freezes, dill is sown, while increasing the seeding rate by 25%, and the seeding depth by one and a half centimeters. The bed is covered with mulch to protect against the formation of a crust, which will prevent the emergence of seedlings. Compact the soil winter sowing greenery is not required.
Video about growing a plant
It is also possible to plant dill in winter:
- a bed prepared in advance is freed from snow;
- seeds are scattered over its surface;
- from above, the crops are covered with a layer of humus or earth mixed with humus;
- during the spring snowmelt, the seeds are drawn into the ground along with the melt water and soon germinate.
During winter and winter landing it is advisable to throw covering material on the crops in the spring, securing it around the edges. Compared with spring plantings dill greens sown in winter or autumn can be cut a week or two earlier.
The article was updated on 01/30/2018