How to prepare a bed for vegetable crops. Proper preparation of beds for carrots in spring
Despite the seeming simplicity, growing carrots on garden plot- a process that is very responsible and requires a certain amount of knowledge, skills and abilities. Of particular importance is the preparation of beds for carrots in the spring. Experienced gardeners start planting carrots in mid-April or early May (depending on the region). Optimal period- when the daytime air temperature ceases to fall below +10-12 degrees, and at night - below +5 degrees. On the beds sown at this time, the crop will ripen in July.
What should be the soil
Preparing a bed for carrots in spring
Before planting a crop, you should understand what kind of soil carrots love. Practice shows that each carrot variety, without exception, to such a condition as soil, is very demanding. Firstly, the earth should not contain anything superfluous: no pebbles, no roots, no solid debris. Under no circumstances should the soil be acidified. The acidity index should not go beyond the normal range. If the earth is clayey, or planting is carried out in black soil, it is recommended to add sand to the composition of the soil for carrots at the rate of 1 kilogram per 1 square meter beds. If the soil is too sandy, humus, manure or potato skins will come to the rescue. Yet exactly sandy soil for carrots is considered to be more preferable. This is due to the high breathability of sand and its unique ability to absorb moisture.
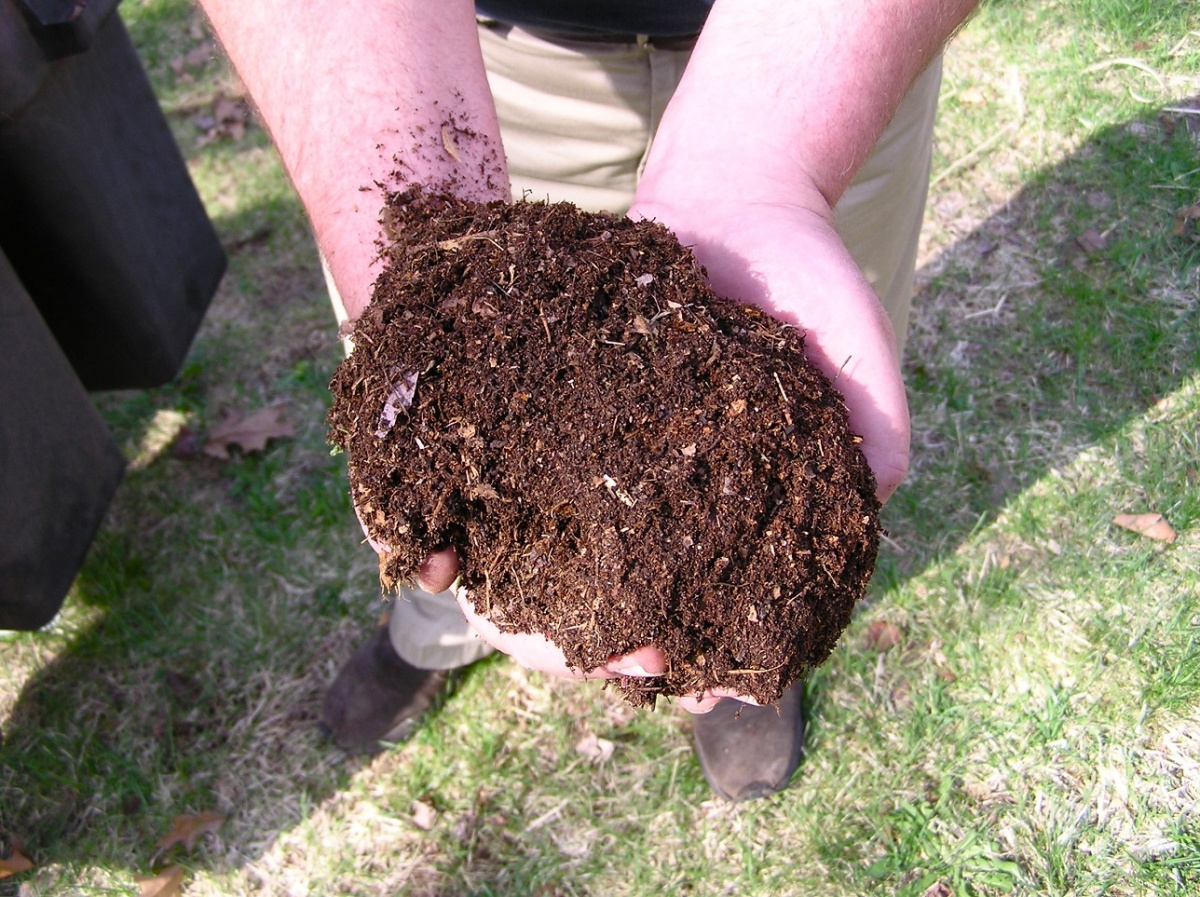
Important! Carrots grow more even if they grow in loose soil. In hard ground, crooked and deformed root crops often ripen.
When choosing soil for carrots, attention should be paid, first of all, to sunny areas. No crop variety will give an extensive harvest if planted in the shade. The following are also expressly excluded:
- soil with a high dryness index;
- inclined areas;
- areas overgrown with weeds.
Speaking in general, then optimal soil for carrots open field should perfectly pass oxygen and moisture, do not contain weeds and the remains of the root system of other plants and be saturated with nutrients.
How to prepare a garden
After choosing the soil, it's time to find the answer to the question of how to properly prepare a bed for carrots in the spring. The process of preparing the soil for planting carrots begins with a mandatory check of the site for its ability to pass moisture. To do this, you need to do the following: pour about 8 liters of water onto the soil that has not yet been dug up for carrots measuring 50x70 centimeters. If an hour after watering spots are visible on the surface, then the soil is unsatisfactory (too dry and with a high acidity index), and the carrot will most likely not take root in it. If there is no spot, and the condition of the earth is such that you can make a lump out of it without any extra effort, then everything is in order, and you can start sowing crops without hesitation.
Having figured out what kind of land carrots love, it's time to start spring work on open ground. It is most expedient to do this just half a month before the start landing work. First you need to remove all the weeds from the garden and leave it to "rest" for a couple of weeks. Then the site will need to be dug up two, and even better three times, while saturating it with useful substances. Pebbles in the process of digging should be removed, and earthen clods should be broken.
If the soil is poor enough, it requires fertilizing with humus and careful additional digging, despite the fact that experts recommend fertilizing with organic fertilizers in autumn period
Advice. With each application of fertilizer, the earth must be dug up. This is necessary so that useful substances and trace elements are at a depth of at least 15 centimeters. Otherwise, they can burn the root system of plants.
Fertilizing the soil
The main answer to the question, what kind of soil is needed for successful cultivation carrots, refers us to an indicator of fertility. Accordingly, fertilizing the soil is one of the necessary steps towards obtaining a good harvest.
As already mentioned, organic matter is best applied in the autumn, after harvest. But mineral fertilizers in the spring will be as appropriate as possible. Correct term top dressing - two weeks before planting seeds in the garden. At the same time, it is very important that the technology for preparing the fertilizer composition is observed (as a rule, all the necessary instructions are available on the fertilizer’s factory packaging).
If crops are grown in small volumes for personal use, it is quite acceptable to limit yourself to organic. In this case, ordinary humus or manure is suitable.
In the spring, it is allowed to treat the soil with fertilizers based on nitrogen, potassium and phosphorus. All of the above is chemistry, but it has a positive effect on the growth of carrots. If the soil is acidic, it must be further treated with any alkaline component, such as lime. After such treatment, the acidity of the soil quickly normalizes. As with growing onions, carrots should not be overdone with manure. Otherwise, you can forget about the garden with carrots, at least for a couple of years.
How to land

Usually the width of the beds is made from 90 to 100 cm, and the height - from 15 to 20 cm.
Everyone who has grown onions at least once will also cope with planting carrots without problems. In addition, making a bed for carrots is not particularly difficult. The most important thing to do is to calculate right size and prepare the ground for carrots in advance.
Usually, the width of the beds is made from 90 to 100 cm, and the height is from 15 to 20 cm. If they are close at the landing site ground water, the height of the beds is strongly recommended to be increased to 35 centimeters (to its lower border). The length can be completely arbitrary, it all depends on the wishes and needs of the gardener, as well as the size of the plot. You will definitely need to make a wooden side, which will prevent water from running off and blurring the beds during irrigation.
To place the seeds, it is necessary to form special grooves, the depth of which will not exceed three centimeters. Be sure to observe a gap of 20 centimeters between them. As for the distance between root crops, it can vary from two to four centimeters.
Important! The seed furrow should never be too shallow or too deep. In the first case, it is highly likely that the seeds will be blown away by a gust of wind, and in the second, that they simply will not be able to break through the thickness of the earth to the surface.
Ideally, you should sow the seeds in such a way that later you do not have to deal with thinning. It is quite difficult to achieve this, but you should still try. Indeed, otherwise, the smell of tops when pulling the root crop out of the ground will inevitably attract the attention of such harmful insect like a carrot fly.
Immediately before sowing carrot seeds, each groove must be thoroughly moistened. Because the planting material carrot is very light, often mixed with sand for convenience. In those places where the seeds are too thick, experts recommend spreading the contents of the groove with a brush.
After planting the seeds is completed, sprinkle the groove with mulch:
- humus;
- biohumus;
- compost;
- coconut substrate.
After the sprouts hatch through the mulch, it must be removed, and the seedlings should be watered.
Important! Until seedlings appear, it is not recommended to water the sowing site in order to avoid blurring the seeds.
Carrot growth is quite slow, in addition, as already mentioned, it does not like excess moisture. If you organize beds-ridges, raising the site for planting by 30-35 centimeters, the problem can be solved. If the soil dries well, simple grooves are sufficient.
Before planting, the seeds should be soaked, and after planting and abundant watering, cover plastic wrap. This step is necessary in order to save the heat and moisture necessary for seed germination in the soil. If all manipulations are performed correctly, the first shoots will appear in less than a week. It is very important not to forget to remove the film after the very first shoots appear.
Planting in narrow beds

Planting in narrow beds
AT last years Among gardeners, the method of planting carrots in narrow beds, also known as the Jacob Mittlider method, is very popular. Such beds have a significant difference from the standard options. They are characterized by high side walls and relatively wide aisles. The task of narrow and high beds is to protect the sown carrots from weeds and winds in the most reliable way. In addition, purely visually, such a bed looks just perfect.
To equip a narrow bed you will need:
- two containers that will be used for mixing fertilizers;
- narrow rake (no more than 30 centimeters wide in the area of the working part);
- wooden pegs;
- hoe;
- shovel;
- wooden planks for making boards.
The algorithm of actions in this case will be approximately as follows:
- Mark the beds and use pegs to mark their boundaries. The optimal width of the beds will be no more than 45-50 centimeters, the length can be any (usually gardeners choose in the range from 3 to 9 meters);
- Make wide enough (about 1 meter) passages between the beds;
- Pin wooden boards around the perimeter. The height of the resulting sides should be 10 centimeters, and the width - 5 centimeters;
- Fill the paths between the beds with gravel or carefully compact in such a way as to reduce the likelihood of weed growth and the appearance of moles to zero.
Important! It will be best to place a narrow bed in the direction from the east side to the west. This will enable carrots to constantly receive required amount sunlight.
Competent use narrow beds allows you to get a much larger yield (about twice) than using standard planting methods.
Secrets of experienced gardeners
Properly prepare the soil, build a garden bed and, as a result, grow an excellent harvest of carrots, the advice of experienced gardeners who have been cultivating this crop for several years and have managed to achieve some success in this field will help. Consider the most interesting recommendations in details:
- If you grow carrots after cucumbers, you will need to add at least one and a half kilograms of cow manure and 5 kilograms of crushed corn leaves for every square meter of beds. When growing carrots on black soil, it will be necessary to add potato husks and river sand to the indicated one - 1 kilogram per square meter of planting;
- It is important to track and remember how previous crops grew in the selected area. So, for example, if cabbage grew there before carrots, and the harvest did not please, the likelihood that a similar story would happen with carrots is quite high. Help fix the situation abundant top dressing mineral and organic fertilizers;
- If the tomatoes grown earlier on the plot for carrots turned black during the growth process, planting carrot seeds does not make sense. It is better to sow the area with parsley or beets;
- To get rid of the carrot fly, it will be useful to plant carrots as early as possible and in the same bed as onions. Such a move would prove beneficial to both cultures;
- For even distribution of seeds, it is more efficient to mix not with sand, but with a clover. If the latter add some mineral fertilizers, the benefits (and, accordingly, germination) will be much higher. It is most convenient to place such a mixture in the grooves using a confectionery syringe;
- Too wet soil will promote the occurrence of carrot diseases. Therefore, stagnant water on the site should be avoided by all means;
- If the farm has a sufficiently large amount of compost and physical strength, it is possible to prepare beds for carrots in a fundamentally different way: a trench is dug at least 30 centimeters deep, filled with compost mixed with fine river sand, and seeds are poured into this fertilized soil.
Despite the fact that carrots are an integral part of the daily diet of a large number of our compatriots, growing them with your own hands is not as easy as it might seem at first glance. But if you prepare the garden bed properly, avoid mistakes when sowing seeds and provide the crop with proper care, a decent harvest will not keep you waiting.
Potatoes grown on the market usually go industrial ways using mineral fertilizers and pesticides. Real gardeners will never buy such a product, but they will try and grow excellent carrots in their own garden plot. If you strictly follow the recommendations given, there should be no problems with cultivating the culture.
Video
Many novice summer residents towards the end of autumn days begin to get away from various troubles and consider that vegetable gardens do not need careful maintenance before the arrival of spring. Those who have been following the site for many years now say that in what condition it will start wintering will determine, to a large extent, new crops. You also need to take care of the irrigation system for the next year and we recommendaquadusya start buy .
In autumn, you need to carry out types of operations that will lay the growth and fruiting of vegetables, and leave less worries in the next spring. Summer residents consider accuracy to be the main condition. Attached great importance clean beds, because the dominance of insects and diseases depends on them. Because most of these pests not only plant plants during the season, but also move to parts of them, overwinter and switch to crops of the new season. It is necessary to clear the area and from the remaining parts. Even with careful harvesting and weeds, wind-blown grass and litter remain on the beds. They can be added to the compost pit, and unhealthy plant remains are best burned or carried away from the site.
There are rules:
- digging in autumn preparatory stage to spring plantings. In addition to upper cleansing, deep digging is required for the soil. There are opinions of summer residents on this score, but if you take into account the number of pluses, then there will be more of them than minuses. How to evaluate it?
- After digging, the soil freezes deeper, so it will more likely be cleared of fungi, bacteria, and insects remaining in it.
- Oxygenation in progress.
- The structure of the soil becomes softer.
- Holds snow.
- Moisture lingers in the spring.
- Separate weed seeds that have fallen into the depths cannot germinate from it.
- In the spring, such a bed requires less maintenance.
- Moreover, fertilizers such as clay, lime and others are applied for digging, which improve the soil.
- In autumn, it is customary to cultivate new lands by plowing them. This technique is especially important for acidic, heavy clay soils. In autumn, digging has its own tasks compared to spring. Only light loose soils can do without these measures. They can only be loosened superficially in the fall.
Soil preparation process
The first step is to clear all plants. The second is loosening to stimulate the growth of new weeds. The third is digging. This is usually done at the beginning of cold weather (September to the end of October). It is important to have time to do this before the rainy season. The soil that came out from under the shovel is not loosened, but left in breasts. In this form, it will freeze deeper and collect more snow. In sloping places it will delay melt water spring. The depth of digging is on average about 20 cm, but can reach up to 35 cm. In areas where it is necessary to increase the fertile layer, the depth is increased by 5 cm once every 3 years. The layer must be turned over and the earth fertilized.
Disinfection
It happens that garden plants were heavily infected with diseases, so the soil after them must be disinfected. Good advice is not only deep digging and turnover of the layer, but sowing plants such as mustard, manure, ash, and anti-infection drugs, pouring boiling water. If there are no funds at hand, you can spread the straw over the area and burn it.
From organic fertilizers, the introduction of mullein is a priority. It is spread from 3-6 kg per square meter, and dug to a depth of 15 cm. The effect will appear within 5-7 years. Therefore, it is not necessary to make it every season. It is allowed to do this once every 3-4 years. Moreover, crops treat it selectively, therefore they apply manure to areas of crops that are responding - tomatoes, cucumbers, potatoes. More greater effect gives a combination of organics with mineral fertilizers. You just need to know that nitrogen is fertilized in the spring, and phosphorus and potassium - also in the fall. Potassium sulphate contains a lot of sulfur, but no chlorine, so it is suitable for any soil.
It is also good to apply special fertilizers, which are called autumn. They are also for individual crops - grapes, strawberries.
Warm beds
A good summer resident uses all methods. During the collection of plant remains, many do warm beds. Everything is put into dug-up grooves - plant tops, leaves, branches. Over the winter, it will rot and become food for new plants.
So that the soil is not empty
On slopes in areas with strong winds a good reception is the planting of sirepatov - colza, rye, oats. Their roots loosen the soil, and the mass becomes fertilizer. They will hold snow in the ground, and the soil will not be washed out and carried by the wind. And strawberries, for example, will be protected from frost. They start planting at the end of summer. If planted later, the plants will sprout in the spring, but still perform their function. For irrigation, use the irrigation systems placed on Crops planted in the fall will sprout half a month earlier than usual. In addition, they will be already hardened and resistant to infections. Having gained time, it will be possible to carry out a secondary sowing. Usually they plant beets, lettuce, carrots, parsley, as well as garlic and onion sets. Planting begins when the temperature drops to 0 degrees, and carried out until stable frosts on prepared beds.
Regardless of whether you are going to grow vegetables, flowers or shrubs and trees, the first step is to prepare the soil. In well loosened soil, the roots will be able to develop optimally, it easily seeps into such soil rainwater and water from irrigation, and exactly where you need it - directly to the roots, and excess moisture is easily removed. Soil with small clods is the optimal cradle for yours.
If you didn't do deep loosening in the fall, you can do it in the spring. However, it must be carried out in a timely manner, when the soil is not frozen and is no longer too wet. After all, after loosening, the soil should settle a little more and compact - only after that you can plant it in it. Try not to trample loosened soil as much as possible. For example, work mostly in reverse and lay a board if you still need to step into the garden.
Preparing beds and other areas for planting
Compost is slow but takes a long time to deliver nutrients and generally improves soil properties. And the plants after planting begin to grow well. But it is necessary to use mature, mixed with the ground and sieved compost, which was “ready” last fall (especially for seedlings). It is best to apply it a couple of weeks before sowing. First spread the compost with a shovel or bucket over the area to be planted in a layer of about 1 cm, and then mix it into the soil, but do not bury!
Prepare the beds - loosening in the spring: give air, weeds away
If deep loosening of the soil was carried out in autumn, light loosening is enough in spring to ventilate its upper layer:
- To do this, use a grubber, cultivator or ripper.
- In dug up soil, you first need to crush large clods of earth with a pickaxe.
- At the same time, carefully collect the roots of weeds - these efforts will pay off in any case.
It is best to loosen a couple of days before planting, so that the soil has time to settle again.

How to get loose soil - an important point in preparing beds for sowing and planting seedlings
Rotary cultivator, or star roller, - practical tool for crushing lumps and lumps and removing weeds. It will be especially useful on soils prone to clumping; in other cases, you can get by with a rake.
Expert Tip: Put large clods of earth on top - they'll serve you well.

Level the ground well
Some soils are sometimes very difficult to level. To do this, you have to work with a rake up and down on the surface and rake large clods to the side. The fact that the soil is again slightly compacted does not harm the plants at all, on the contrary, it provides the seeds and roots of the plants with better contact with the ground.
Expert Tip: Level holes that get waterlogged because they can damage seeds and seedlings.
Paths and borders between beds
If the aisles are not paved with anything, then it is best to trample them down well, and then cover them with bark mulch or rubble. To keep the edges of the beds clear, use a rope stretched between the pegs, or a piece of hose. A simple and flexible border for beds can be durable plastic border tapes or dug vertically plates. The wooden palisade looks, of course, more beautiful, but it outlines too rigidly.
A good harvest is always several components. All of them are important: the quality of the seeds, their proper preparation for sowing, the choice of variety, conditions and care. But there is one parameter whose influence is most important. it qualitative composition soil in which seedlings are grown. The yield of all seedling crops (and in our climate most vegetables are grown through seedlings) depends to a large extent on properly composed seedling soil.
There is no one universal soil that meets the needs of all plants. Each garden culture requires an individual approach. Any plant makes its own demands on the soil mixture. But there is general rules, which allow you to create a base soil, in order to then optimize it for a particular crop with minimal effort.

Initial requirements for seedling soil
Depending on the type of plants that are grown by seedlings, the soil mixture can be composed of different components mixed in various proportions. But in all cases, it is necessary to comply with the initial requirements for seedling substrates.

Soil constituents
In the land intended for sowing seeds, components of organic and inorganic origin must be present.

Organic Ingredients:
- soil - soddy, leafy, garden;
- vegetable compost;
- decayed cattle manure;
- peat - lowland and highland;
- sphagnum, coconut fiber, seed husks, bark, sawdust;
- wood ash.

Peat is one of the most popular components of seedling soil mixtures.
It is not necessary that absolutely all the components from the list be present in the soil, but most - yes. It is better to mix the soil from three different soils: garden, which can be taken directly from the ridge (unless, of course, diseased or insect-affected plants did not grow there); leafy (from leaves that have rotted with the ground); turf (which is obtained by cutting turf). The soil is the basic element of the seedling substrate.

Compost - rotted plants - is necessarily mixed with rotted manure, which is called humus. This is the supplier of the necessary substances.
Advice! Do not sow vegetable seeds in manure, compost or lowland peat. Too much organic matter will cause the seedlings to overgrow leaf mass at the expense of rooting. As a result, seedlings will not take root well when planted on a garden bed or in greenhouse soil.

Peat is required, it is he who makes the soil fertile. Lowland contains about 70% organic matter, riding, consisting of sphagnum, makes the soil structure loose.
Peat is found in most potting mixes for seedlings. It is mined from swamps. This is not to say that it is a non-renewable resource. From decaying organic components under the influence of natural processes, it is formed in swamps, but very slowly - over thousands of years. In addition, peat is part of the natural ecosystem - if you completely remove it from the swamps, or at least create a serious deficit, the ecological balance will be disturbed.

That is why scientists over the past decades have been trying to find a replacement for peat. And finally found. More and more producers of seedling soil mixtures are switching to use today.

Benefits of Coconut Fiber.
- It is 100% organic with no chemical additives.
- They are able to absorb and retain water, working like a sponge, retaining moisture for plants and not removing nutrients from the soil.
- A layer of earth in a pot or container with a substrate that includes coconut fiber remains dry, which prevents soil fungi.
- Coconut fiber has a pH level of about 6, so it normalizes the overall acidity of the entire substrate.
- The fiber contains phosphorus, potassium, and other needed by plants substances in significant quantities.
Also, sunflower seed husks, tree bark, rotted sawdust, dry moss and other rippers are used to loosen the soil. wood ash added to normalize soil acidity.

Advice! Do not add nutrients to the soil more than the norm - an abundance of top dressing is appropriate during the growing season, the seeds, inside which the plant embryo, have a sufficient supply of substances to form and release a full-fledged sprout. Enhanced nutrition of the seed is not required.
Inorganic components:
- river (in extreme cases, quarry) sand;
- perlite;
- vermiculite;
- expanded clay;
- mineral supplements.
Advice! Do not grind the components of the soil mixture too much and do not sift the mixture through a sieve with small cells - the fine-grained substrate will turn sour and “float” after each watering.

It is an excellent component of seedling soil mixture. This substance has a number of significant advantages.
- Sterility - spores of fungal diseases and pathogens of infectious diseases do not settle in perlite.
- The absence of insects - they simply do not start in the substance.
- The absence of weed seeds - they do not take root in the soil mixture with perlite and do not germinate.
- Preservation in its original state for a long time - perlite does not rot.
- Light weight – perlite is very light.
Vermiculite- porous eco-friendly material, which contains a record amount of magnesium, potassium and calcium necessary for sprouts already at the initial stages of life.

Drains the soil, acting as an organic leavening agent and helping to improve the structure and moisture capacity of the soil.

- a polymer compound, which, due to its properties, also serves to maintain a high moisture capacity in the soil.
Advice! To simplify the irrigation procedure and maintain the required moisture, add a hydrogel to the prepared soil before sowing.

In addition to the required components, the following elements are also included in the soil mixture:
- ash;
- urea;
- potassium sulfate;
- chloride and potassium sulfate;
- ammonium nitrate;
- superphosphate.

What should not be in the soil
This small but important point is often overlooked. Amateur gardeners neglect him, as a result of all efforts to compile correct soil go to waste.
The following components should not enter the soil mixture:
- clay;
- fresh manure;
- not rotted plant residues;
- tea brew, coffee grounds and other similar waste;
- salty sea sand.

Clay will make the soil heavy, impermeable to moisture and air, dense. Unrotted organics and coffee / tea will cause decay processes - they can begin to decompose, raising the temperature of the substrate, which will be detrimental to many seeds and seedlings. Also, the decomposition of organic matter will entail the release of nitrogen, which will evaporate, depleting the substrate.

Soil for various crops
The table below shows the composition of the soil for each of the most commonly grown vegetable crops.
Table. The composition of the soil mixture for common vegetable crops.
| culture | Soil components and their proportions |
|---|---|
| About 2 kg of garden soil, 1 - humus, ½ kg of sawdust (rotted), fine-grained wood bark or coconut fiber. For 6 kg of finished substrate - 40 g of ash, 20 g of superphosphate, 10 g of urea. |
| 5 kg of soddy soil, 5 kg of high-moor peat, 2.5 kg of sand, 2 kg of humus, 1/4 kg of lime, 1/2 kg of ash or dolomite flour. |
| 6 kg of peat or 3 kg of leaf earth and coconut fiber, 2 kg of soddy soil, 1 kg of humus, 1 kg of sand, ¼ kg of lime. |
| 4 kg of peat, 2 kg of soddy soil, 1 kg of rotted sawdust or coconut fiber, 1 kg of humus. |
| 2 kg of peat, 2 kg of soddy soil, 2 kg of humus, 1 kg of coconut fiber or rotted sawdust, 1 kg of sand. For 6 liters of the mixture - 40 g of ash and 15 g of potassium sulfate and superphosphate. |
| 8 kg of peat, 2 kg of sod land, 1 kg each river sand, mullein or humus, or 2 kg of vegetable compost, 1 kg of sawdust or coconut substrate. For 6 kg of the mixture - 10 g each ammonium nitrate and potassium chloride, 20 g of superphosphate and 45 g of ash. |
| 2 kg of sheet soil, 2 kg of humus, 2 kg of peat or coconut substrate, 1 kg of sand. For 6 kg of the mixture - 50 g of ash, 15 g of potassium sulfate, 20 g of superphosphate. |


How to prepare the soil mixture
In the process of preparing the soil for sowing seedlings, it is recommended to follow the instructions and follow step by step recommendations. It is necessary to start harvesting components in the fall. Also in the fall they are mixed. Then the finished soil is sent for freezing, which will serve as additional sterilization.

Important! At the stage of mixing the soil components, do not add nutritious mineral additives. Nutrient additives are introduced into the soil in the spring, after the main sterilization, before planting seeds, in the form of solutions.
Soil preparation step by step instructions
Step 1. Prepare all the necessary components that you plan to add to the substrate. They must be dry and in different containers.

Step 2 Spread an oilcloth or other suitable bedding on the floor in the utility room, or take a large container (basin, trough, bath, tray) in which you will mix the soil components.
Step 3 Take a measuring container (glass, mug, etc.) or prepare the scales. Prepare tools - a spatula, small rakes - and put on gloves.
Step 4 Measure the required amount of the necessary components, place in a container or pour on oilcloth, mix thoroughly.

Step 5 Pour the finished substrate into small bags (ideally - no more than 20 liters). If the bags are plastic, make a few small holes at the top so that the soil “breathes”.
Step 6 Put bags of soil in the barn, utility room where the winter will hold subzero temperature.
If speak about middle lane, then watermelons here (as well as some other crops - for example, melon) are preferable to grow through seedlings. In fact, there is nothing complicated in this process, the main thing is to know how to do it.
Decontamination procedure
Harmful microorganisms contained in garden, leafy, soddy soil, peat, sand, humus and other essential components of the seedling substrate can harm the seeds, introducing an infection and reducing their germination. To prevent this from happening, the substrate must be disinfected. This is a very important procedure, which should not be neglected if you want to get a strong healthy seedlings and productive plants.

There are four ways to disinfect a substrate:
- freezing;
- steaming;
- calcination;
- pickling.
You can limit yourself to one method, but it is better to combine any of the first three with subsequent etching.
Important! Freezing is carried out during the winter. All other methods begin to be applied in January - February, when it is time to prepare the soil for sowing.
freezing
The method of disinfection by freezing consists in the fact that a bag of soil is left in a room where sub-zero temperatures are maintained in winter. If there is no such room, closer to spring, the soil is taken out to frost and left for a week at a temperature of about -10 ° C ... 15 ° C. Then the frozen soil is returned to heat and allowed to thaw for a week. During this time, all the germs of weeds and pests that were not destroyed by the first freezing will “wake up” in it. After that, the soil is again sent to frost. And so two or three times.
Steaming
by the most effective method freezing is considered disinfection. The most favorable for the soil is steaming. During this procedure, not only disinfection is carried out, but also the soil mixture is saturated with moisture. For steaming, the soil is poured into a sieve with a fine mesh (so that it does not spill out) and, while stirring, is kept over a container of boiling water for 8 minutes.

