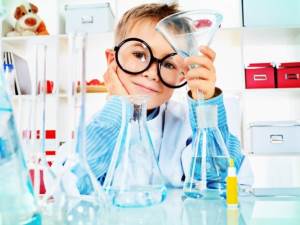
Scientific experiments for adults. For everyone and about everything
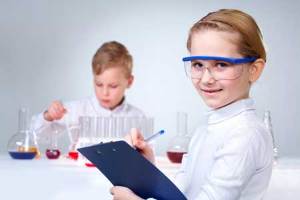
More than 160 experiments that clearly demonstrate the laws of physics and chemistry were filmed, edited and posted online on the scientific and educational video channel “Simple Science”. Many of the experiments are so simple that they can be easily repeated at home - they do not require special reagents or equipment. Denis Mokhov, author and editor-in-chief of the scientific and educational video channel, told Letidor how to make simple chemical and physical experiments at home not only interesting, but also safe, what experiments will captivate kids and what will be of interest to schoolchildren. Simple science."
– How did your project begin?
– Since childhood, I have loved various experiences. For as long as I can remember, I have been collecting different ideas for experiments, in books, TV shows, so that later you can repeat them yourself. When I became a father myself (my son Mark is now 10 years old), it was always important for me to maintain my son’s curiosity and, of course, to be able to answer his questions. After all, like any child, he looks at the world completely differently than adults. And at a certain point, his favorite word became the word “why?” It is from these “why?” home experiments began. After all, telling is one thing, but showing is something completely different. We can say that my child’s curiosity was the impetus for creating the “Simple Science” project.
– How old was your son when you started practicing experiments at home?
– We have been doing experiments at home since the moment our son entered kindergarten, after about two years. At first these were completely simple experiments with water and balance. For example, jet pack , paper flowers on the water , two forks on a match head. My son immediately liked these funny “tricks.” Moreover, like me, it is always interesting for him not so much to observe as to repeat them himself.
–
You can conduct interesting experiments in the bathroom with young children: with a boat and liquid soap, paper boat and hot air balloon,
tennis ball and water jet. From birth, a child strives to learn everything new; he will definitely enjoy these spectacular and colorful experiences.
When we are dealing with schoolchildren, even first-graders, then we can go all out. At this age, children are interested in relationships, they will observe the experiment more carefully, and then look for an explanation of why it happens this way and not otherwise. Here it is possible to explain the essence of the phenomenon, the reasons for the interactions, even if not entirely scientific terms. And when on school lessons the child will encounter similar phenomena (including in high school), the teacher’s explanations will be clear to him, because he already knows this from childhood, he has personal experience in this area.
Interesting experiments for younger students
**Package pierced with pencils**
**Egg in a Bottle**
Rubber egg
**- Denis, what do you advise parents in terms of the safety of home experiments?** - I would roughly divide the experiments into three groups: harmless, experiments that require care and experiments, and the last **-** experiments that require compliance with safety precautions. If you are demonstrating how two forks rest on the end of a toothpick, then this is the first case. If you are doing an experiment with atmospheric pressure, when a glass of water is covered with a paper sheet and then turned over, then you need to be careful not to spill water on electrical appliances **–** do the experiment over the sink. When experiments involve fire, keep a container of water just in case. And if you use any reagents or chemicals (even ordinary vinegar), then it’s better to go to fresh air or in a well-ventilated room (for example, a balcony) and be sure to put on protective goggles on the child (you can use ski, construction or sunglasses).
**– Where can I get reagents and equipment?** **– ** At home, when conducting experiments with children under 10 years of age, it is best to use publicly available reagents and equipment. This is what each of us has in the kitchen: soda, salt, chicken egg, forks, glasses, liquid soap. Safety is paramount in our business. Especially if your “young chemist,” after successful experiments with you, tries to repeat the experiments on his own. Just don’t need to prohibit anything, all children are inquisitive, and the prohibition will act as an additional incentive! It is better to explain to the child why some experiments cannot be done without adults, that there are certain rules, somewhere you need open area To conduct the experiment, rubber gloves or goggles are required. **– Have there been any cases in your practice when an experiment turned into an emergency?** **– ** Well, nothing like that happened at home. But in the editorial office of “Simple Science”, incidents often happen. Once, while doing an experiment with acetone and chromium oxide, we slightly miscalculated the proportions, and the experiment almost got out of control.
And recently, when filming for the Science 2.0 channel, we had to do a spectacular experiment when 2000 balls for table tennis fly out of the barrel and fall beautifully to the floor. So, the barrel turned out to be quite fragile and instead of a beautiful flight of balls, there was an explosion with a deafening roar. **– Where do you get ideas for experiments?** **–** We find ideas on the Internet, in popular science books, in the news about some interesting discoveries or unusual phenomena. The main criteria are **–** entertainment and simplicity. We try to choose experiments that are easy to repeat at home. True, sometimes we produce “delicacies” **–** experiments that require unusual devices and special ingredients, but this does not happen too often. Sometimes we consult with professionals from certain fields, for example, when we do experiments on superconductivity at low temperatures or in chemical experiments when rare reagents are required. Our viewers (whose number this month has exceeded 3 million) also help us in finding ideas, for which we, of course, thank them.
There are ways to have fun and clearly benefit free time with the whole family, so that neither parents nor children get bored. One of these ways is home experiments, experiments using those objects available in every home that surround us every day.
For young, inquisitive family members, such experiments will allow them to join the world of science and create true miracles with their own hands. Parents will be able to recall school knowledge and unobtrusively convey some of it to their children.
The laws of both physics and chemistry apply, regardless of whether it is a laboratory or own kitchen. It may happen that these experiences will prompt your child to seriously seek an explanation for what he saw, and perhaps become the beginning of a long journey into science for him. Experiments for children at home will be very exciting and will help your baby learn a lot of new and interesting things.
With us you will easily and safely experiment with such familiar things: water, fire, magnet and mirror.
Experiments with liquids will help you become a real wizard
Homemade rainbow using water and mirror
Want to see a rainbow at home? All you need is a basin half filled with water and a mirror. small size, a flashlight and a sheet of paper (white).
- You need to place the mirror in a basin of water. The mirror should fit entirely in it.
- Turn on the flashlight and shine it directly on the mirror.
- All you have to do is catch the reflection on a piece of paper and admire the real rainbow.
Many of us, as children, repeated more than once: “Every hunter wants to know where the pheasant sits.” Today's children know that the first letters of words mean the colors of the rainbow.
And if they don’t know, you have a reason to help your child learn the colors of the rainbow in this way. In addition, after such an experiment, it is much easier to talk about light as a source of color, and about more serious things, for example, about the color spectrum.
Colored milk with bright pictures and patterns
Do you believe that on suddenly revived milk, colorful pictures can appear as if by themselves, as if someone was painting them? You can create it yourself.
For the experience you need to take:
- milk (half a glass);
- flat plate;
- 3-4 food colorings;
- quite a bit liquid soap;
- a couple of cotton swabs.
- The milk needs to be poured into a container.
- Then take the dyes and add them to the milk one by one, different colors one after another.
- You will see that their movement creates patterns on the surface.
- Cotton swabs, which you first dip into the soap and then into the plate, will only speed up this movement and cause the dyes to mix.
- By moving the sticks around the plate, you will draw extraordinary, fantastic, colorful pictures. All that remains is to admire them.
Be sure to explain to your baby that the movement occurs because fat molecules are broken down from the soap.
Movement of a boat without wind or motor
And now you can see that the boat can move without wind or a motor. Don't believe me? Let's prepare:
- a bath (or smaller vessel) with water;
- a little liquid soap;
- plastic corner or film;
- scissors.
- All children love and know how to cut. Instruct your child to cut out a boat in the shape of a triangle, with a slit and a hole in the middle.
- Lower the boat into the water, and round hole gently drip the soap. Your boat literally took off!
- You're still dripping. She's swimming again.
Are you sure? And the child will be delighted.
Floating iceberg using ice and oil
An excellent reason to talk about the fact that different substances have different densities, some things sink to the bottom, and some don’t.
For the experience you need:
- one glass of water;
- ice cube;
- 50 ml vegetable oil.
If you throw ice into a glass of water, it will remain on the surface.
Add butter and the cube will be at the bottom. The oil will prevent it from rising to the surface.
Carry out a similar experiment with lemon. Let your child see that the lemon will float like an ice cube in the peel. But once you clear it, it will sink.
Optical experiments at home for young children
Experiment using black sheet and figures
 The study should be carried out in sunny, clear weather. Prepare:
- one sheet of thick black paper;
- several flat objects (cutters, rulers, etc.) or simply cut out figures from another sheet.
- Place items on a piece of paper, leaving free space between them.
- Let the leaf remain in the sun.
- Towards evening, you can carefully examine the results of the experiment and make sure that the paper under the figures is still bright black, and the open space of the sheet has burned out and become lighter.
The magic mirror will show distorted figures
Usually we see our reflection in the mirror. It turns out that distorted things and objects can be reflected in it. Don't believe me? You will need:
- small mirror;
- cup;
- scotch.
- First you need to tape a glass to the mirror and pour water into it.
- As your face approaches the glass, the reflection will decrease. And when you lean, for example, to the right, a tilt in the opposite direction is reflected.
It's time to explain to your baby that this effect is achieved due to the refraction of light, and a distorted image appears in the mirror.
See the invisible on a hidden sheet
Can we see what no one else sees? We can try. Prepare for the experiment:
- 2 sheets;
- envelope;
- pen or felt-tip pen.
- We write any word on a piece of paper. You can draw something small.
- After this, we hide the sheet in an envelope.
The size of the sheet should be smaller than the envelope so that the entire envelope can fit. You can make sure that you won’t be able to see the inscription through the envelope.
- Roll the second sheet into a tube.
- Now try to read the inscription by placing the “spyglass” you made with your own hands tightly to the envelope. If your room is well lit, you will succeed.
Panic room for young children and adults
All little children love scary stories. Some of the adults too. You can create a panic room in your home. To do this you need to take:
- wall mirror;
- a sheet of paper approximately the same size as the mirror;
- scissors.
You can use a table lamp as a light source.
- First, you need to cut out a scary face on a sheet of paper.
- Attach this sheet to the mirror (you can use transparent tape).
- It is necessary to turn on the lamp behind the back of the experiment participant. Shadow from him heads will fall on the wall.
- Invite him to close his eyes.
- We place the mirror so that the reflections from the terrible face fall on its shadow.
- You can open your eyes! Scary?
What else you should definitely read:
Complex experiments with fire, electricity and magnets
Do not leave children alone during such experiments.
The fireproof ball will amaze with its strength
 Everyone knows about the enormous destructive power of fire. It burns and melts, destroying everything in its path. Everyone knows this.
Entertaining experiments for preschoolers, experiments for children at home, magic tricks for children, fun science... How to curb the ebullient energy and irrepressible curiosity of a baby? How to make the most of the inquisitiveness of a child’s mind and push the child to understand the world? How to promote the development of a child’s creativity? These and other questions certainly arise before parents and educators. This work contains large number various experiences and experiments that can be carried out with children to expand their understanding of the world, for intellectual and creative development child. The experiments described do not require any special preparation and almost no material costs.
How to pierce balloon ik without harm to him?
The child knows that if you puncture the balloon, it will burst. Place a piece of tape on both sides of the ball. And now you can easily push the ball through the tape without any harm to it.
"Submarine" No. 1. Grape submarine
Take a glass of fresh sparkling water or lemonade and drop a grape into it. It is slightly heavier than water and will sink to the bottom. But gas bubbles, like small balloons, will immediately begin to land on it. Soon there will be so many of them that the grape will float up.
But the bubbles on the surface will burst and the gas will fly away. The heavy grape will sink to the bottom again. Here it will again become covered with gas bubbles and float up again. This will continue several times until the water runs out. This principle is how a real boat floats up and rises. And fish have a swim bladder. When she needs to submerge, the muscles contract, squeezing the bubble. Its volume decreases, the fish goes down. But you need to get up - the muscles relax, the bubble dissolves. It increases and the fish floats up.
"Submarine" No. 2. Egg submarine
Take 3 cans: two half-liter and one liter. Fill one jar clean water and put it in it raw egg. It will drown.
Pour a strong solution into the second jar table salt(2 tablespoons per 0.5 liters of water). Place the second egg there and it will float. This is explained by the fact that salt water is heavier, which is why it is easier to swim in the sea than in a river.
Now place an egg at the bottom of a liter jar. By gradually adding water from both small jars in turn, you can get a solution in which the egg will neither float nor sink. It will remain suspended in the middle of the solution.
When the experiment is completed, you can show the trick. By adding salt water, you will ensure that the egg floats. Adding fresh water will cause the egg to sink. Externally, salt and fresh water are no different from each other, and it will look amazing.
How to get a coin out of water without getting your hands wet? How to get away with it?
Place a coin in the bottom of a plate and fill it with water. How to take it out without getting your hands wet? The plate must not be tilted. Fold a small piece of newspaper into a ball, set it on fire, throw it into a half-liter jar and immediately place it with the hole down in the water next to the coin. The fire will go out. The heated air will come out of the can, and due to the difference in atmospheric pressure inside the can, water will be drawn into the can. Now you can take the coin without getting your hands wet.
Lotus flowers
Cut out flowers with long petals from colored paper. Using a pencil, curl the petals towards the center. Now lower the multi-colored lotuses into the water poured into the basin. Literally before your eyes, flower petals will begin to bloom. This happens because the paper gets wet, becomes gradually heavier and the petals open.
Natural magnifying glass
If you need to see a small creature, such as a spider, mosquito or fly, it is very easy to do.
Place the insect in three liter jar. Cover the top of the neck with cling film, but do not pull it, but, on the contrary, push it through so that a small container is formed. Now tie the film with a rope or elastic band, and pour water into the recess. You will get a wonderful magnifying glass through which you can perfectly see the smallest details.
The same effect can be achieved if you look at an object through a jar of water, securing it to the back wall of the jar with transparent tape.
Water candlestick
Take a short stearin candle and a glass of water. Weight the lower end of the candle with a heated nail (if the nail is cold, the candle will crumble) so that only the wick and the very edge of the candle remain above the surface.
The glass of water in which this candle floats will act as a candlestick. Light the wick and the candle will burn for quite a long time. It seems that it is about to burn down to the water and go out. But this won't happen. The candle will burn out almost to the very end. And besides, a candle in such a candlestick will never cause a fire. The wick will be extinguished with water.
How to get water for drinking?
Dig a hole in the ground approximately 25 cm deep and 50 cm in diameter. Place an empty plastic container or a wide bowl, place fresh green herbs and leaves around it. Cover the hole with a clean plastic film and fill its edges with earth so that air does not escape from the hole. Place a pebble in the center of the film and lightly press the film over the empty container. The water collecting device is ready.
Leave your design until the evening. Now carefully shake off the soil from the film so that it does not fall into the container (bowl), and look: there is clean water in the bowl.
Where did she come from? Explain to your child that under the influence of the sun's heat, the grass and leaves began to decompose, releasing heat. Warm air always rises. It settles in the form of evaporation on the cold film and condenses on it in the form of water droplets. This water flowed into your container; remember, you slightly pressed the film and put the stone there.
Now you just have to figure it out interesting story about travelers who went to distant countries and forgot to take water with them, and begin an exciting journey.
Wonderful matches
You will need 5 matches.
Break them in the middle, bend them at a right angle and place them on a saucer.
Place a few drops of water on the folds of the matches. Watch. Gradually the matches will begin to straighten out and form a star.
The reason for this phenomenon, called capillarity, is that wood fibers absorb moisture. It creeps further and further through the capillaries. The tree swells, and its surviving fibers “get fat”, and they can no longer bend much and begin to straighten out.
The head of the wash basins. Making a washbasin is easy
Babies have one peculiarity: they always get dirty when there is even the slightest opportunity. And taking a child home to wash all day is quite troublesome, and besides, children don’t always want to leave the street. Solving this issue is very simple. Make a simple washbasin with your child.
To do this you need to take plastic bottle, on its side surface about 5 cm from the bottom, make a hole with an awl or nail. The work is finished, the washbasin is ready. Plug the hole with your finger, fill it to the top with water and close the lid. By unscrewing it slightly, you get a trickle of water by screwing it on - you will “close the tap” of your washbasin.
Where did the ink go? Transformations
Add ink or ink to a bottle of water until the solution is pale blue. Place a crushed tablet there. activated carbon. Close the neck with your finger and shake the mixture.
It will brighten before our eyes. The fact is that coal absorbs dye molecules on its surface and it is no longer visible.
Making a cloud
Pour hot water into a three-liter jar (about 2.5 cm). Place a few ice cubes on a baking sheet and place it on top of the jar. The air inside the jar will begin to cool as it rises. The water vapor it contains will condense to form a cloud.
This experiment simulates the process of cloud formation as warm air cools. Where does rain come from? It turns out that the drops, having heated up on the ground, rise upward. There they get cold, and they huddle together, forming clouds. When they meet together, they increase in size, become heavy and fall to the ground as rain.
I don't believe my hands
Prepare three bowls of water: one with cold water, one with room temperature, and the third with hot water. Ask your child to place one hand in a bowl of cold water, the second - with hot water. After a few minutes, have him put both hands in the water room temperature. Ask if she seems hot or cold to him. Why is there a difference in how your hands feel? Can you always trust your hands?
Water suction
Place the flower in water tinted with any paint. Observe how the color of the flower changes. Explain that the stem has conducting tubes through which water rises to the flower and colors it. This phenomenon of water absorption is called osmosis.
Vaults and tunnels
Glue a tube out of thin paper, slightly larger in diameter than a pencil. Insert a pencil into it. Then carefully fill the pencil tube with sand so that the ends of the tube protrude out. Pull out the pencil and you will see that the tube remains uncrumpled. Grains of sand form protective arches. Insects trapped in sand emerge from under the thick layer unharmed.
Equal share for everyone
Take a regular coat hanger, two identical containers (these can also be large or medium-sized disposable cups and even aluminum drink cans, although the cans need to be trimmed top part). In the upper part of the container on the side, opposite each other, make two holes, insert any rope into them and attach to a hanger, which you hang, for example, on the back of a chair. Balance containers. Now pour berries, candies, or cookies into these improvised scales, and then the children won’t argue about who got the most goodies.
"Good boy and Vanya-Vstanka." Obedient and naughty egg
First, try placing a whole raw egg on the blunt or sharp end. Then start the experiment.
Poke two holes the size of a match head in the ends of the egg and blow out the contents. Rinse the inside thoroughly. Let the shell dry thoroughly from the inside for one to two days. After this, cover the hole with plaster, glue with chalk or whitewash so that it becomes invisible.
Fill the shell about one-quarter full of clean, dry sand. Seal the second hole in the same way as the first. The obedient egg is ready. Now, in order to put it in any position, just shake the egg slightly, holding it in the position that it should take. The grains of sand will move, and the placed egg will maintain balance.
To make a “vanka-vstanka” (tumbler), instead of sand, you need to throw 30-40 pieces of the smallest pellets and pieces of stearin from a candle into the egg. Then put the egg on one end and heat it up. The stearin will melt, and when it hardens, the pellets will stick together and stick them to the shell. Mask the holes in the shell.
It will be impossible to lay the tumbler down. An obedient egg will stand on the table, on the edge of a glass, and on the handle of a knife.
If your child wants, let him paint both eggs or glue funny faces on them.
Boiled or raw?
If there are two eggs on the table, one of which is raw and the other boiled, how can you determine this? Of course, every housewife will do this with ease, but show this experience to a child - he will be interested.
Of course, he is unlikely to connect this phenomenon with the center of gravity. Explain to him that a boiled egg has a constant center of gravity, so it rotates. And in a raw egg, the internal liquid mass acts as a kind of brake, so the raw egg cannot spin.
“Stop, hands up!”
Take a small plastic jar for medicine, vitamins, etc. Pour some water into it, put any effervescent tablet and close it with a lid (non-screw).
Place it on the table, turning it upside down, and wait. Gas released during chemical reaction tablets and water, will push out the bottle, there will be a “rumble” and the bottle will be thrown up.
"Magic Mirrors" or 1? 3? 5?
Place two mirrors at an angle greater than 90°. Place one apple in the corner.
This is where the real miracle begins, but only just begins. There are three apples. And if you gradually decrease the angle between the mirrors, the number of apples begins to increase.
In other words, the smaller the angle of approach of the mirrors, the more objects will be reflected.
Ask your child if it is possible to make 3, 5, 7 from one apple without using cutting objects. What will he answer you? Now perform the experiment described above.
How to scrub green grass off your knee?
Take fresh leaves of any green plant, put them in a thin-walled glass and pour in a small amount of vodka. Place the glass in a pan of hot water (in a water bath), but not directly on the bottom, but on some kind of wooden circle. When the water in the saucepan has cooled, use tweezers to remove the leaves from the glass. They will become discolored, and the vodka will turn emerald green, as chlorophyll has been released from the leaves, green dye plants. It helps plants “feed” on solar energy.
This experience will be useful in life. For example, if a child accidentally stains his knees or hands with grass, you can wipe them off with alcohol or cologne.
Where did the smell go?
Take the corn sticks, put them in a jar that has previously had a drop of cologne in it, and close it with a tight lid. After 10 minutes, opening the lid, you will not feel the smell: it was absorbed by the porous substance of the corn sticks. This absorption of color or odor is called adsorption.
What is elasticity?
Take a small rubber ball in one hand and a plasticine ball of the same size in the other. Throw them onto the floor from the same height.
How did the ball and ball behave, what changes happened to them after the fall? Why doesn't the plasticine bounce, but the ball does - maybe because it's round, or because it's red, or because it's rubber?
Invite your child to be the ball. Touch the baby's head with your hand, and let him sit down a little, bending his knees, and when you remove your hand, let the child straighten his legs and jump. Let the baby bounce like a ball. Then explain to the child that the same thing happens to the ball as to him: he bends his knees, and the ball is pressed in a little, when it falls to the floor, he straightens his knees and jumps, and what was pressed into the ball straightens out. The ball is elastic.
But a plasticine or wooden ball is not elastic. Tell your child: “I will touch your head with my hand, but you don’t bend your knees, you won’t be elastic.”
Touch the child’s head, but don’t let him bounce like a wooden ball. If you don't bend your knees, then it's impossible to jump. You can’t straighten knees that aren’t bent. A wooden ball, when it falls on the floor, is not pressed in, which means it does not straighten out, which is why it does not bounce. It's not elastic.
The concept of electric charges
Inflate a small balloon. Rub the ball on wool or fur, or even better, on your hair, and you will see how the ball begins to stick to literally all objects in the room: to the closet, to the wall, and most importantly, to the child.
This is explained by the fact that all objects have a certain electrical charge. As a result of contact between two various materials electrical discharges are separated.
Dancing foil
Slice aluminum foil(shiny chocolate or candy wrapper) in very narrow and long strips. Run the comb through your hair and then bring it close to the sections.
The stripes will begin to “dance”. This attracts positive and negative electrical charges to each other.
Hanging on your head, or Is it possible to hang on your head?
Make a light top out of cardboard by placing it on a thin stick. Sharpen the lower end of the stick, and insert a tailor's pin (with a metal, not a plastic head) deeper into the upper end so that only the head is visible.

Descendants of Sherlock Holmes, or In the Footsteps of Sherlock Holmes
Mix stove soot with talcum powder. Have the child breathe on a finger and press it to a piece of white paper. Sprinkle this area with the prepared black mixture. Shake the sheet of paper until the mixture well covers the area where your finger was applied. Pour the remaining powder back into the jar. There will be a clear fingerprint on the sheet.
This is explained by the fact that we always have some fat from the subcutaneous glands on our skin. Everything we touch leaves an imperceptible mark. And the mixture we made sticks well to fat. Thanks to black soot, it makes the print visible.
It's more fun together
Cut a circle out of thick cardboard around the rim of the tea cup. On one side, in the left half of the circle, draw a figure of a boy, and on the other side, a figure of a girl, which should be located upside down in relation to the boy. Make a small hole on the left and right of the cardboard, insert the elastic bands in loops.
Now stretch the elastic bands in different directions. The cardboard circle will spin quickly, the pictures from different sides will align, and you will see two figures standing next to each other.
The secret jam thief. Or maybe it's Carlson?
Chop the pencil lead with a knife. Let the child rub the prepared powder on his finger. Now you need to press your finger to a piece of tape, and stick the tape to white sheet paper - your baby's fingerprint will be visible on it. Now we will find out whose fingerprints were left on the jam jar. Or maybe it was Carlosson who flew in?
Unusual drawing
Give your child a piece of clean, light-colored fabric (white, blue, pink, light green).
Pick some petals from different colors: yellow, orange, red, blue, blue, and green leaves different shades. Just remember that some plants are poisonous, such as aconite.
Sprinkle this mixture onto a cloth placed on cutting board. You can either spontaneously sprinkle petals and leaves or build a planned composition. Cover it with plastic wrap, secure it on the sides with buttons and roll it all out with a rolling pin or tap the fabric with a hammer. Shake off the used “paints”, stretch the fabric over thin plywood and insert it into the frame. The masterpiece of the young talent is ready!
It turned out wonderful gift mother and grandmother.
In order to conduct chemical and physical experiments and try to study the laws of nature, you don’t have to wait until it’s time to go to school. You can conduct entertaining experiments in the form of a game at home with your children. to school age. Of course they will simple experiments, which do not require special knowledge or training. They must still be carried out exclusively in the presence of adults in order to avoid unforeseen situations that are dangerous to the lives of children. You can watch some of the experiments listed below and other experiments on video on our website.
Examples
So, let's see how interesting scientific experiments Can it be made as a game at home?
First of all, let’s decide which substances are fun and safe to conduct experiments at home for preschool children.
- Firstly, with water. You can dissolve various substances in it and observe the manifestation of their properties.
- Secondly, with air.
- And finally, with all available means: soap, soda, salt, rubber, etc.
Water (1 option)
First, let's do a simple experiment with water. To do this experiment you will need:
- a quarter glass of colored water,
- a quarter cup of sunflower oil
- and a quarter glass of syrup.
As a result, children develop a concept of various densities liquids.
As a result of the experiments, the following picture should be obtained: the syrup, as the densest liquid, will settle to the bottom, water will be in the middle, and the oil will float to the top.
Home experiments with water are the easiest. They usually consist of mixing various substances with water. With children of preschool and primary school age, you can do another shocking experiment, which, however, is no different from an ordinary boy’s game.
Option 2
Fill the container with water, add a quarter of an Alka-Seltzer tablet, cover with a lid and step aside. It is very interesting to watch how the lid flies off to the side under the pressure of carbon dioxide. You can view similar experiments in the photo.

Interesting science experiments can be done at home using a variety of chemicals. Of course, for preschool children, we will not use life-threatening acids or alkalis for play. Interesting experiments are obtained even if you use things familiar from birth: soap, vinegar, salt, etc.
Inflating the balloons
For the following experiments you will need:
- plastic bottle,
- vinegar,
- baking soda,
- balloon,
- funnel.
We begin the experiment by pouring one and a quarter cups of vinegar into a plastic bottle. Fill a balloon with three-quarters of a cup of soda and attach the balloon to the top of the bottle. Carefully let the soda fall into the bottle and watch how the ball inflates, but it will not fly. Take a video of a similar experiment and show it to your friends: they will probably want to repeat it.

Video
Oil
Interesting experiments can be done with butter. As a result of such experiments, any child will feel like a real wizard. Take a packet of milk cream and pour it into a container with a tight-fitting lid. Close the lid and start whisking. The experiment lasts quite a long time - about 20 minutes. The cream is first turned into a thick cream and then into homemade butter. The child is truly surprised by such a transformation. When the cream thickens, drain off the remaining water by straining through cheesecloth.
This is what you should get:

Video on the topic
Entertaining home experiments can provide a lot for the development of preschool children. Scientific experiments carried out in the form of games teach children to be inquisitive, attentive to natural phenomena, and develop erudition. As a result, the child, through a clear example, learns the laws of physics and chemistry that he will subsequently study at school. Fun experiments for preschool children, they help to reveal their talents and abilities, and prepare future scientists.
Plants
Through experiments with plants, children can become familiar with the physical phenomenon of absorption. This is the ability of a material or living being to absorb the constituents of another substance. To conduct the experiment, you will need several stalks of celery and colored water, for example red. Pour water into a glass and drop the celery stalks into it. Of course, this experience takes time. After a few days, the stems will begin to absorb water and turn red in color. If the stems then sprout leaves, they will also be red. Thus, the rather complex theoretical concept of absorption becomes simple and clear thanks to fascinating experiments.

Making jelly
Fun experiments for children can bring not only educational benefits, but also quite material satisfaction. For example, the result of experiments may be the creation delicious dish, which will also serve as a teaching aid. Such an experiment is convenient to conduct not only for preschool children, but also for school-age children. We invite you to study with your children the structure of plant and animal cells using... jelly, which can then be eaten by the whole family. For these experiments you will need kitchen sets for making jelly and sets of various small sweets:
- jelly,
- marshmallows,
- caramel.
We open the jelly preparation kits and do everything according to the instructions on the packages. Pour the jelly into molds, preferably square. This will be the basis for our cells. Plant cells can be made green, and animal cells orange. Accordingly, in stores we choose sets of jelly of these colors. When the jelly has hardened, open the sets of candies and lay out the component cells from them. Material about this is easy to find on the Internet or in a school textbook. From such sweet crafts you can make a whole training manual, filming them on video.


How to make milk jelly?
Milk
Fun science experiments for kids can be done at home using regular milk, creating a real color symphony. For experiments of this kind you will need:
- a little milk
- food colors of different colors,
- a piece of soap
- ear sticks
- and a dinner plate.
Pour some milk into a plate. Add a drop of food coloring of various colors to the center of the plate. Dyes can be purchased in liquid form or purchased in powder form, which must then be diluted with water. Next, dip the ear stick into the middle of the milk. Don't mix colors! Place a drop of liquid soap on the other end of the ear stick. Place the soapy end of the stick in the center of the plate and hold for 10-15 seconds. Look at the explosion of colors and colors!
The experience works very simply. Milk has a consistency similar to water, but contains fats, minerals, vitamins and other substances. The secret of a symphony of colors lies in a drop of soap. The fact is that the main property of soap is to eliminate fats. When soap is placed in milk, the soap molecules try to attack the fat molecules, and in turn, the fat molecules try to avoid the “attack.” It is this process that reflects the rapid movement of flowers.
For the development of a child, it is necessary to use all possible means, including experiments for children, which trained parents can conduct at home. This type of activity is very interesting for preschoolers, it helps them learn a lot about the world around them and take direct part in the research process. The main rule that mothers and fathers should adhere to is the absence of coercion: classes should be conducted only when the child himself is ready for experiments.
Physical
Such scientific experiments will interest an inquisitive little one and help him gain new knowledge:
- about the properties of liquid;
- about atmospheric pressure;
- about the interaction of molecules.
In addition, under clear parental guidance, he will be able to repeat everything without difficulty.
Bottle filling
You should prepare your inventory in advance. Need hot water glass bottle and a bowl of cold water (for clarity, the liquid should be pre-tinted).
The procedure is as follows:
- Needs to be bottled hot water several times to ensure the container is properly warmed up.
- Pour out the hot liquid completely.
- Turn the bottle upside down and place it in a bowl of cold water.
- You will see that water from the bowl will begin to flow into the bottle.
Why is this happening? The hot liquid filled the bottle warm air. As the gas cools, it contracts, causing the volume it occupies to decrease, forming a low-pressure environment in the bottle. As water flows in, it restores balance. This experiment with water can be done at home without any problems.
With a glass
Every child, even at 3-4 years old, knows that if you turn over a glass filled with water, the liquid will spill out. However, there is an interesting experience that can prove the opposite.
Procedure:
- Pour water into a glass.
- Cover it with a piece of cardboard.
- Holding the sheet with your hand, carefully turn the structure over.
- You can remove your hand.
Surprisingly, the water will not spill out - the molecules of the cardboard and the liquid will mix at the moment of contact. Therefore, the sheet will hold on, becoming a kind of lid. You can also tell the child about atmospheric pressure, that it exists both inside the glass and outside, while in the container it is lower, outside it is higher. Due to this difference, water does not spill out.
A similar experiment is best carried out over a basin, since gradually the paper material will get wet and the liquid will drip.
How to develop the most significant areas for a child in 20-30 minutes a day
- Three ready-made scenarios for comprehensive developmental classes in pdf format;
- Video recommendations on how to conduct complex games and how to create them yourself;
- A plan for creating such activities at home
Subscribe and get for free:
Developmental experiments
There are a large number of truly interesting experiments for kids.

Volcanic eruption
This experience is rightfully considered one of the most exciting and therefore loved by children. To carry it out you will need:
- soda;
- red paint;
- citric acid or lemon juice;
- water;
- a little detergent.
First, you should build the “volcano” itself by making a cone out of thick paper, fastening it along the edges with tape and cutting a hole on top. Then the resulting blank is put on any bottle. To resemble a volcano, it should be covered with brown plasticine and placed on a large baking sheet so that the “lava” does not spoil the surface of the table.
Procedure:
- Pour soda into the bottle.
- Add paint.
- Add a drop of detergent (1 drop).
- Pour water and mix well.
For the “eruption” to begin, you need to ask the child to add a little citric acid(or lemon juice). This simplest example chemical reaction.

Dancing worms
This simple, fun experiment can be done with both preschoolers and elementary school students. Required equipment:
- corn starch;
- water;
- baking tray;
- paints (food coloring);
- music column.
First you need to mix 2 cups of starch and a glass of water. Pour the resulting substance onto a baking sheet, add paint or dye.
All that remains is to turn on loud music and place the baking sheet on the speaker. The colors on the workpiece will be mixed in a chaotic manner, creating a beautiful, unusual spectacle.
We use food
To make an experiment that is unusual, interesting for your child and educational, it is not at all necessary to purchase complex equipment and expensive materials. We invite you to get to know the very simple options, available for execution at home.

With egg
Required equipment:
- glass of water (tall);
- egg;
- salt;
- water.
The idea is simple - an egg immersed in water will sink to the bottom. If you add table salt (about 6 tablespoons) to the liquid, it will rise to the surface. Such physical experience with salt helps illustrate the concept of density to your baby. So, salted water has more water, so the egg can float on the surface.
You can also show reverse action(this is why it was recommended to take a tall glass) - when you add plain tap water to the salted liquid, the density will decrease and the egg will sink to the bottom.

Invisible ink
A very interesting and simple trick, which at first will seem like real magic to the baby, and after the parents explain it, it will help to learn about oxidation.
Required equipment:
- ½ lemon;
- water;
- spoon and plate;
- sheet of paper;
- lamp;
- cotton swab.
If lemon is not available, you can use analogues, such as milk, onion juice or wine.
Procedure:
- Squeeze the citrus juice, add it to a plate, mix with an equal amount of water.
- Dip the tampon into the resulting liquid.
- Use it to write something the child can understand (or draw).
- Wait until the juice dries, becoming completely invisible.
- Heat the sheet (using a lamp or holding it over a fire).
Text or a simple drawing will become visible due to the fact that the juice has oxidized and turned brown when the temperature rises.
Color explosion
You can make the little ones happy fun experience with milk and paints, which can be done in the kitchen without any problems.
Required products and equipment:
- milk (preferably high fat content);
- food coloring (several colors - the more, the more interesting and brighter it will be);
- dishwashing detergent;
- plate;
- cotton swabs;
- pipette.
If dishwashing liquid is not available, liquid soap can be used.
Procedure:
- Pour milk into a plate. It should completely hide the bottom.
- Let the liquid sit for a while until it reaches room temperature.
- Using a pipette, carefully drop several different food colors into the bowl of milk.
- By lightly touching the liquid with a cotton swab, you need to show the baby what is happening.
- Next, take a second stick and dip it in detergent. It touches the surface of the milk and holds for 10 seconds. There is no need to mix colorful stains, a gentle touch is enough.
Next, the baby will be able to observe the most beautiful thing - the colors begin to “dance”, as if trying to escape from the soap stick. Even if you remove it now, the “explosion” will continue. At this stage, you can invite the child to participate himself - add dye, immerse a soapy stick in the liquid.
The secret of the experience is simple - detergent destroys the fat contained in milk, which causes the “dance”.
With sugar
For children 3-4 years old, various experiments with food will be very interesting. The child will be happy to learn about new qualities of his usual food.
For this entertaining activity you will need:
- 10 tbsp. l. Sahara;
- water;
- food colors of several colors;
- two spoons (teaspoon, tablespoon);
- syringe;
- 5 glasses.
First you need to add sugar to the glasses according to this scheme:
- in the first glass - 1 tbsp. l.;
- in the second - 2 tbsp. l.;
- in the third - 3 tbsp. l.;
- in the fourth - 4 tbsp. l.
Add 3 tsp to each of them. water. Mix. Then you need to add a dye of your own color to each of the glasses and mix again. The next step is to carefully take the colored liquid from the fourth glass using a syringe or a teaspoon and pour it into the fifth, which was empty. Then colored water is added in the same order from the third, second and finally from the first glasses.
If you act carefully, the colored liquids will not mix, but, when layered on top of each other, they will help create a bright, unusual pyramid. The secret of the trick is that the density of water changes depending on the amount of sugar added to it.

With flour
Let's consider another interesting experience for children, simple and safe. It can be carried out either in kindergarten, and at home.
Required equipment:
- flour;
- salt;
- paints (gouache);
- brush;
- sheet of cardboard.
Procedure:
- In a small glass you need to mix 1 tbsp. l. flour and salt. This is a blank from which we will later make paint of the same color. Accordingly, the number of such blanks is equal to the number of flowers.
- Add 3 tbsp to each glass. l. water and gouache.
- Using paint, ask your child to draw a picture on cardboard using a brush or cotton swab, one for each color.
- Place the finished creation in the microwave (power 600 W) for 5 minutes.
The paints, which are dough, will rise and harden, making the drawing three-dimensional.
Lava lamp
Another unusual one children's experiment allows you to create the most real lava lamp. After watching just once, even a novice researcher will be able to repeat the experiment with his own hands, without the help of adults.
Required equipment and materials:
- vegetable oil(cup);
- salt (1 tsp);
- water;
- food coloring (several shades);
- glass jar.
Procedure:
- Fill the jar 2/3 full with water.
- Add vegetable oil, which at this stage forms a thick film on the surface.
- Add food coloring.
- Slowly add salt.
Under the weight of the salt, the oil will begin to sink to the bottom, and the dye will make the spectacle more colorful and impressive.

With soda
An experiment with soda is perfect for demonstrating to a preschool child:
- Pour the drink into a glass.
- Drop a few peas or cherry pits into it.
- Watch how they gradually rise from the bottom and fall again.
An amazing sight for a child who does not yet know that the peas are surrounded by bubbles of carbon dioxide, which brings them to the surface. They work on a similar principle. submarines.
With water
There are several educational optical experiments that, despite their simplicity, are very interesting.
- The missing ruble
Water is poured into a jar and an iron ruble is dropped into it. Now you need to ask the baby to find the coin by looking through the glass. Due to the optical phenomenon of refraction, the eye will not be able to see the ruble if it is directed from the side. If you look into the jar from above, the coin will be in place.
- curved spoon
Let's continue exploring optics with a preschooler. This easy but visual experiment is carried out like this: you need to pour water into a glass and dip a spoon into it. Ask your baby to look from the side. He will see that at the boundary of the media - water and air - the spoon appears curved. By taking out the spoon, you can make sure that everything is okay with it.
The child should be explained that a ray of light bends when passing through water, which is why we see a modified image. You can continue the water theme and lower the same spoon into a small jar. Curvature will not occur since the walls of this container are smooth.

This biological experiment will help the child get acquainted with the world of living nature and observe how a sprout is formed. Beans or peas are required for this.
Parents can invite the young botanist to independently moisten a piece of gauze folded several times with water, place it on a saucer, place peas or beans on the cloth and cover with damp gauze. The baby’s task is to carefully ensure that the seeds are moistened at all times and check them regularly. In a couple of days the first shoots will appear.

Photosynthesis process
This plant and candle experience is best for junior schoolchildren who know that trees and grass absorb carbon dioxide and release oxygen.
The gist is this:
- Carefully place burning candles into two jars.
- Place a living plant in one of them.
- Cover both containers with a lid.
Observe that the candle in the jar with the plant continues to burn because oxygen is present in it. In the second bank it goes out almost immediately.

Entertaining
We catch electricity. This one is small and safe experience It can easily be done with kids.
- One inflated balloon is placed on the wall, several others lie on the floor.
- The mother invites the child to place all the balls on the wall. However, they will not hold on and will fall.
- The mother asks the baby to rub the ball on his hair and try again. Now the ball has been attached.
After this, you need to tell that the “miracle” happened thanks to the electricity that was generated when the ball was rubbed on the hair.
Another option for the curious is an experiment with foil. It goes like this:
- A small piece of foil needs to be cut into strips.
- Ask your little one to comb her hair.
- Now you need to lean the comb against the strip and observe. The foil will stick to the comb.
You can also demonstrate “The Lost Chalk” to children. To do this, a piece of ordinary chalk is placed in vinegar. The limestone will begin to hiss and decrease in size. After some time it will completely dissolve. This is due to the fact that chalk, when in contact with vinegar, turns into other substances.
Experiments with preschool children are an excellent opportunity to develop their curiosity and answer many questions in a visual and understandable form. In addition, by offering children a variety of experiments, attentive parents will help them in early age outline your own circle of interests. And doing the research itself will be a great and fun pastime.
