DIY coffee table. (120 photos). How to make a coffee table with your own hands: description of the process and decoration options How to make a coffee table from wood with your own hands
Essential attribute every home is coffee table ik. At first glance, it may not seem like the most necessary furniture, the purchase of which is postponed for a long time.
But it is precisely such interior items that make it truly cozy and comfortable. On the coffee table you can place all the things you need that should be at hand: books, remote controls, keys and other small items.
DIY wooden coffee table
If you still haven’t been able to choose the option that suits you or have difficulties with the design, we will share with you ideas that will tell you how to make a coffee table with your own hands.
A wooden coffee table will fit perfectly into almost any interior style.
Wooden coffee table
The tree is especially popular among many various materials, from which furniture is made. If you care for it correctly wooden furniture, it will serve you for a very long time. In addition, by working independently, you can create a unique piece of furniture.
To make a wooden coffee table yourself, you will need to prepare everything necessary materials and tools. Ready design you can place it directly on the floor or additionally make four legs on which your table will be located.
An example of how you can make a coffee table with your own hands from wooden pallets
Using multiple drawers, you can also create great coffee tables for your living room. Four large drawers fastened together form a stylish table. There is usually a gap in the middle of the drawers, which can be decorated with various items.
Living room table made of wooden boxes
Photo: DIY coffee table
A coffee table made of wooden drawers is a great place to store all the necessary things.
DIY rectangular coffee table
Modern look
You can also make a table that will look modern and stylish. But before choosing a specific design for the table, determine the overall composition of the objects in the room. It is important to maintain a consistent style in every item that is used in the room.
Stylish wooden table with metal legs
Pay attention to retro style, which is also particularly popular today.
A real work of art - an elegant low coffee table made of wood
An effective design move - a furniture duo in the living room
Decorating a coffee table
You can turn your coffee table into a stylish and topical subject interior using decor. Thanks to this, the most inconspicuous table will become a real work of art. You can decorate it with anything: old wallpaper, shells, mirrors, fabric or mosaics.
Use textiles to decorate your coffee table to give it originality
Think about your mood. After a long day of work, you want to return to an atmosphere of calm, comfort and coziness. Therefore, for table decor, it is better to select elements that will fit perfectly into the overall interior of the apartment and will not disturb the harmony.
Mobile coffee tables on wheels are a beautiful piece of furniture that will transform any living room.
Materials and items that can be used more than once
A wooden pallet is a universal item from which you can make anything with your own hands. Perhaps the easiest way to build a coffee table, since the pallet is, in fact, a ready-made tabletop. It can be painted in any color, applied with a pattern, symbol or ornament. Wheels or wheels can act as legs. wooden blocks.
Transform a wooden pallet into practical designer furniture
Table design options depend only on your skills, preferences and, of course, the interior of the room
A glass tabletop can set the tone for the entire interior
Suitcases and old radiators
Your old suitcase can become an integral part of your apartment's interior. To make a table out of it, just attach four legs. A coffee table made from a battery will also look unusual and original.
DIY coffee table from an old suitcase
Wooden coffee table on wheels in the interior
Making furniture with your own hands is not only great way save money, but also the opportunity to put your creative potential into practice!
We will talk about making coffee tables with your own hands. There is no such thing as too many side tables. They can be placed next to the sofa to place a vase of flowers or a mug of tea, used as a bedside table or as a stand for potted indoor plants. However, monotonous wooden tables are unlikely to liven up a dull interior. I want something stylish and unexpected...
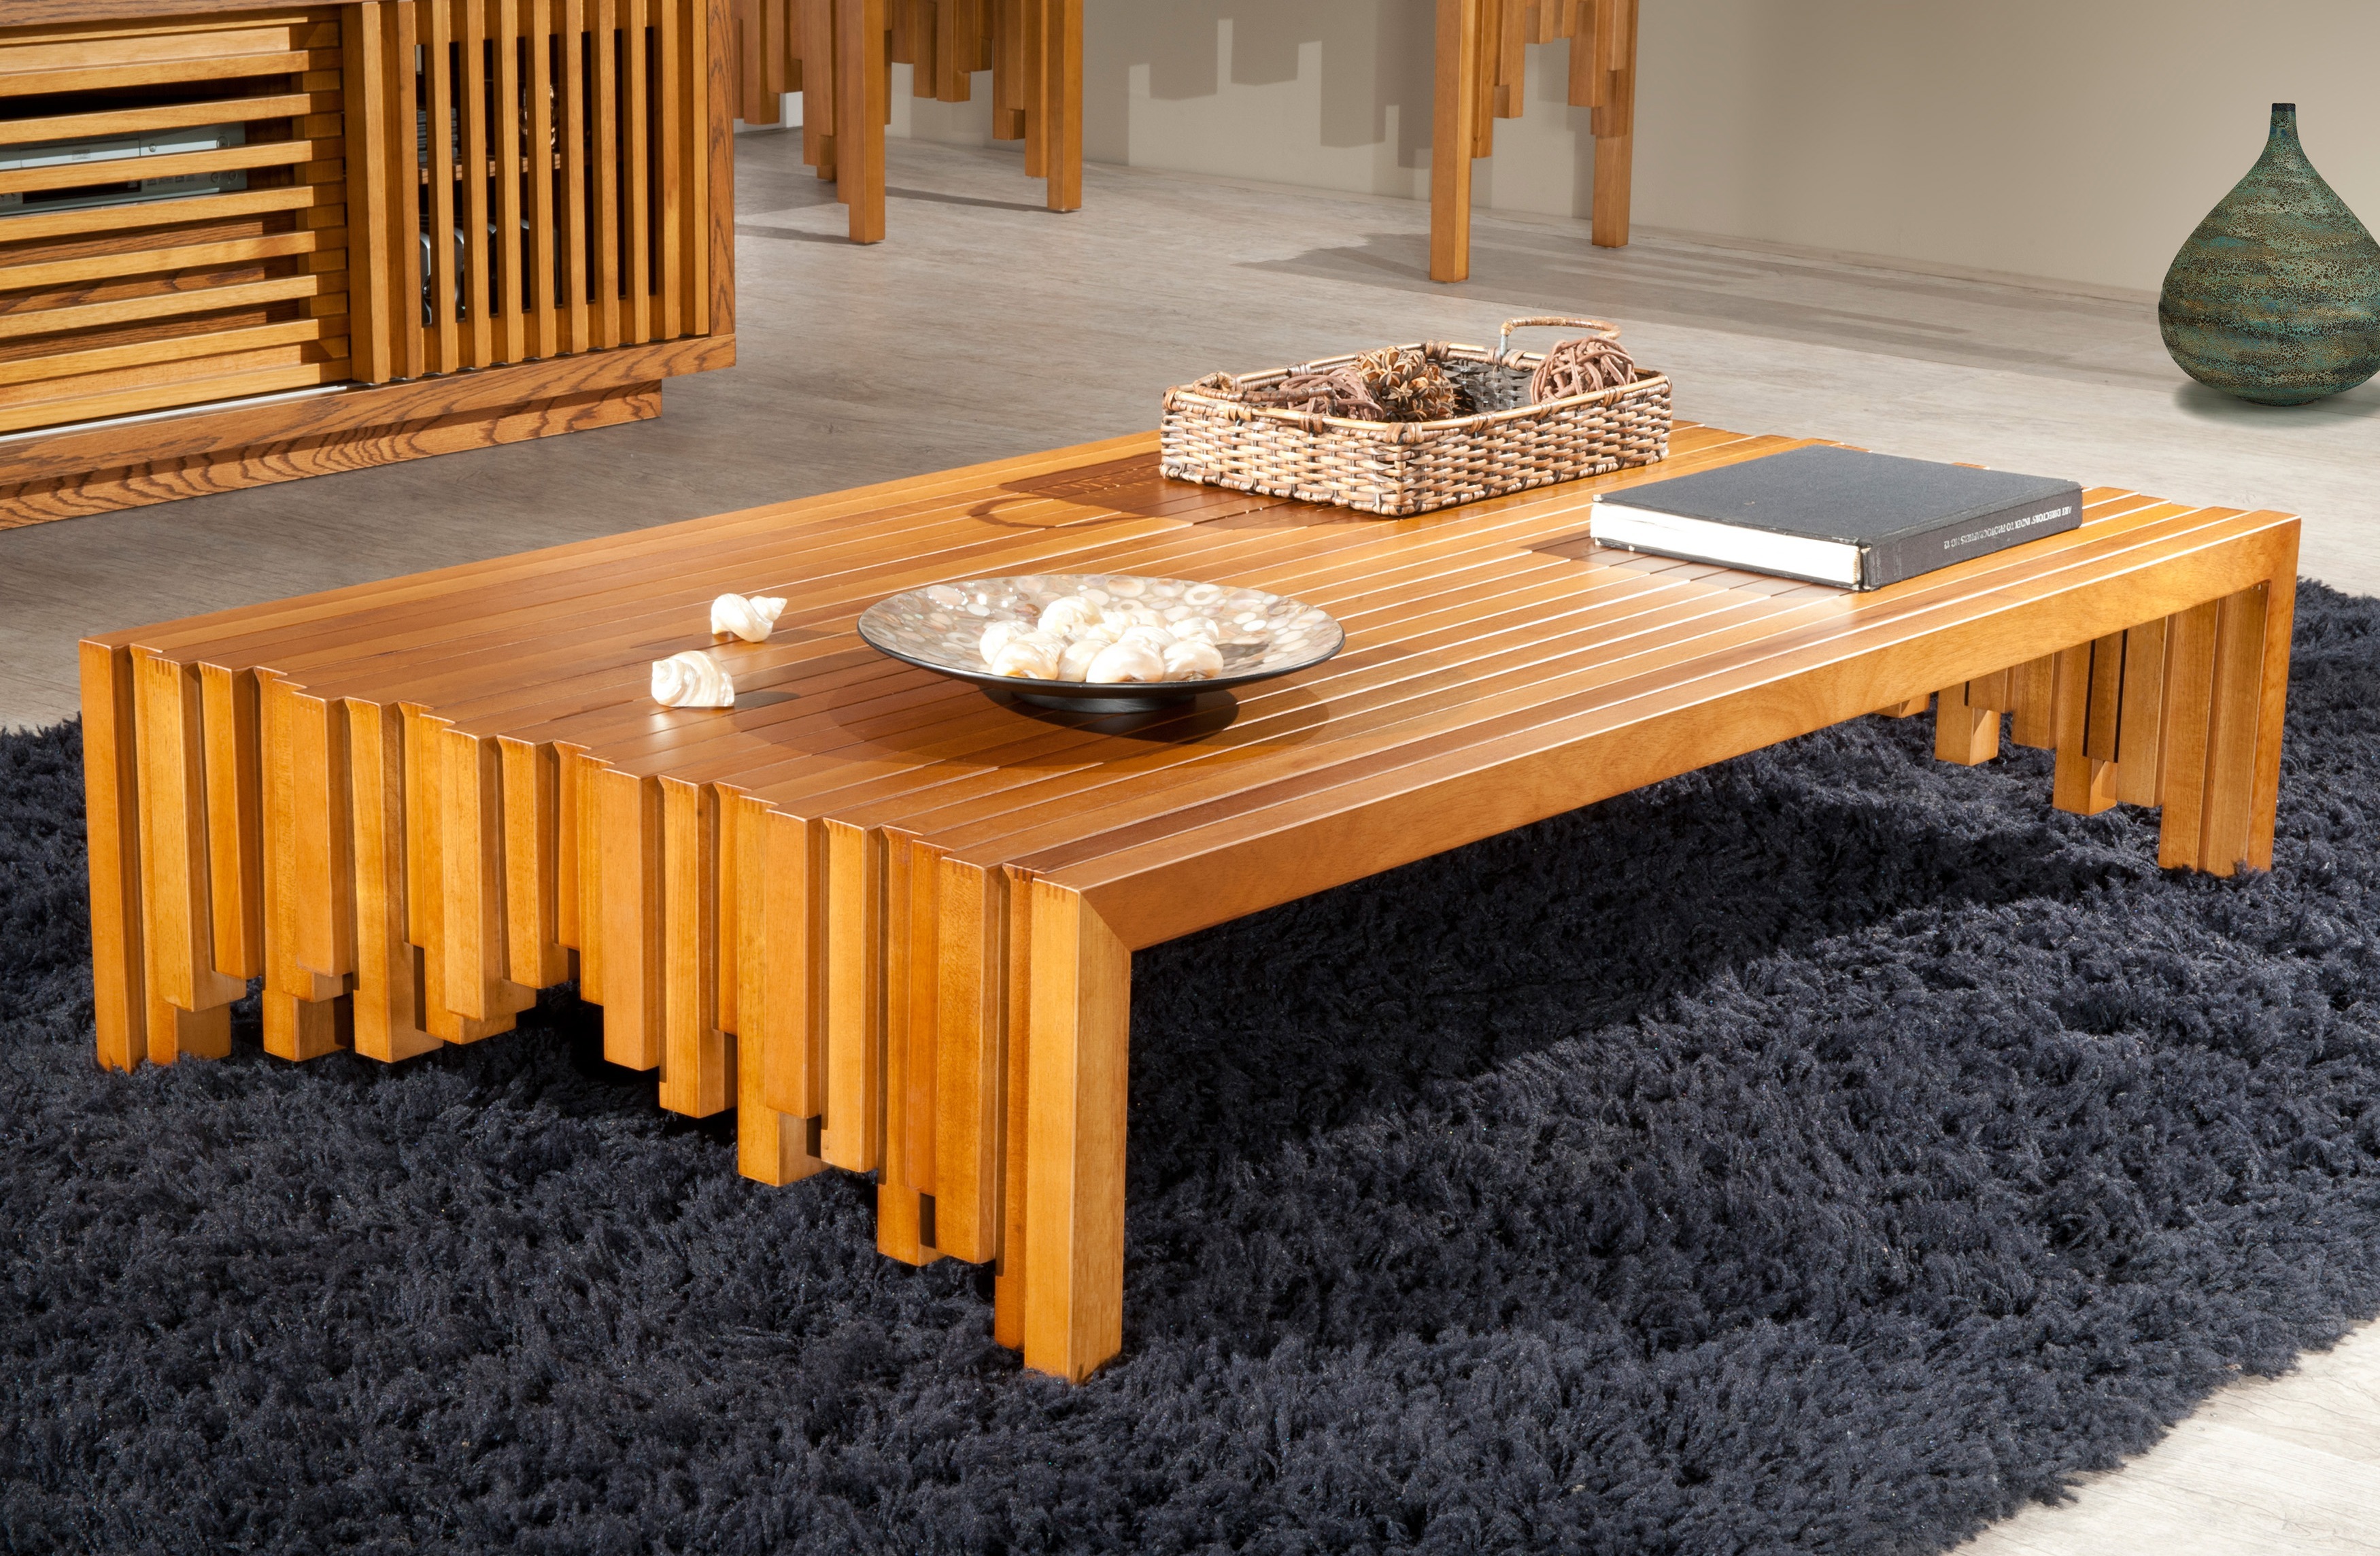
Stylish table made of wooden slats with your own hands
This bench can serve as a coffee table, extra seating or storage space indoor plants. This piece of furniture will “fit” well into almost any interior!

DIY coffee table photo
Materials:

Tools:

Step one: Using a hacksaw, cut the ends of two 2.5 x 7.5 cm boards at a 45 degree angle. Cut out fragments from 2.5x5 cm bars, the length of which will correspond to the internal length of 2.5x7.5 cm blanks.

how to make a coffee table with your own hands. Photo
Step two: Place 2.5x5 cm of the workpiece in the middle, and 2.5x7.5 cm on the edges. Make sure the ends of the inner slats are aligned.

Step three: Measure the distance between the outermost 2.5x7.5 cm bars and cut two pieces of this length from 2.5x10 cm boards. They will serve as lower supports for the bench. Secure them by screwing self-tapping screws into each longitudinal rail.
Step four: Using a Kreg Jig, drill two pocket holes at each end of the support crossbars. These holes will be used to connect to the 2.5 x 7.5 cm edge bars.
Tip: It is difficult to give specific recommendations regarding how far from the edge to attach a Kreg Jig. This depends on the length of the screws used, the exact thickness of the board, etc. We advise you to first practice on unnecessary scraps of boards.

unusual coffee table with your own hands. Photo
Step five: Place 2.5x7.5 cm blanks along the edges of the structure. After making sure that their ends are at the same level, secure them with clamps.
Tip: If you use to make a table soft wood(for example, pine), place unnecessary cuttings of boards under the clamp supports. Otherwise, marks from the clamps will remain on the wood.
Step six: Securely attach the outer 2.5x7.5 cm bars to the base of the bench by screwing 3.5 cm screws into the countersunk holes that you made a little earlier at the ends of the support crossbars.

coffee table made of wood. Master class
Step seven: Measure the width of the fabricated base to determine how long you need to cut the 2.5 x 7.5 cm blank for the ends of the bench. We recommend that you make a cut with a small margin in length, and then slowly grind off the excess until you achieve the perfect fit.

Step eight: Wet the ends of all slats with water and apply large number Gorilla Glue.
Step nine: Install end boards to their intended place and tighten the entire structure with a belt so that it does not fall apart until the glue has dried. For reliability, you can additionally secure the ends with several finishing nails.
Step ten: Sand the surface of the bench with 120-grit sandpaper to remove any rough edges at the joints. All gaps in seams and indentations from nail heads (the latter in mandatory must be recessed into the wood) fill with putty. Once the putty is dry, sand the surface again, this time with 220 grit sandpaper.
Step eleven: Paint the bench. We recommend that you sand the surface again using 400 grit sandpaper and water before painting.

Step twelve: Install special mounting plates for attaching legs. When attaching them, make sure that you drill holes in places where there are no screws already screwed in. The distance from the fastening to the edge of the base of the bench should be about 2.5 cm. Screw the legs themselves into the fastenings.


Coffee table made of copper pipes. Master class
The material for making the next table can perhaps be called the most unexpected. This time we decided to tell you how to make a table with your own hands from... copper tubes.

Materials and tools:

The figure below shows all the parts (pipes (A-E) and various connecting elements (F-H)) with their sizes and quantities. All that remains for you is to take it in your hands pipe cutter and sit in front of the TV, which will brighten up the tedious cutting process a little. It's not difficult, just a little boring. 😉


When all the pieces are ready, you can begin assembling the lower part of the table. How to do this is shown in the figure.

Having assembled the lower tier, you can proceed to the upper one. The only parts not listed are the four 2.5cm pieces of pipe that fit into the tees at the top of the corner posts. Without these inserts you will not be able to put on decorative caps, because... the latter have the same diameter as the tees.

Reliable connection of the tubes with each other will ensure glue, but we recommend applying it only after preliminary assembly of the structure, i.e. after you are sure that all the cut tubes are the correct length and fit together well.

Wooden shelves, which you can pre-paint if you wish, are secured using special clamps that are placed on the underside of each board. Now you are ready to decorate your home with a new, handmade table!


DIY lightweight cement table

Concrete countertops and other interior elements in lately are becoming more and more popular. However, for all their attractiveness, they are not without a number of disadvantages. Firstly, pouring large quantities of concrete can sometimes be quite an expensive undertaking. Secondly, when it comes to small side tables, another serious problem emerges - such furniture turns out to be too heavy. On the one hand, there is a desire to get a good, solid thing, on the other hand, you want to be able to move a table you made yourself without the help of professional movers. The solution found can be considered an insight.

Materials and tools:

Step one: Mark and cut out the foam sheet. From a 120x240 cm piece you can cut 18 squares of 40x40 cm. By stacking them on top of each other, you will get a parallelepiped 40x40x45 cm.

DIY foam table. Photo
Step two: Glue the cut pieces together. 3M Super 77 aerosol adhesive is ideal for this. It is better to perform this stage of work outdoors. Don't forget to wear gloves and a long sleeve shirt. Apply an even layer of glue to one side of the first square, then do the same with the second. Wait ~15 seconds, then connect the squares, making sure their edges meet. Repeat this until all the square pieces are joined into one piece. Wait about 30 minutes before moving on to step 3.

Step three: Now the most interesting thing... giving the resulting parallelepiped the outline of the future table. We decided to make a table in the shape of a cylinder. You can come up with something more original or, on the contrary, keep the original block with right angles. Cutting foam is easy and fun. Your design will have a rough, angular appearance at first, but don't worry! Once the table has been given the desired shape, it is time for sanding. Using 36 grit sandpaper will quickly smooth out any rough edges. As you get closer to the ideal, gradually move on to sandpaper with a finer grain size. Do not strive to achieve a super smooth surface; at this stage it is important for you to achieve only the required shape.

Step four: The surface of the future table has been sanded, it’s time to cement it. The first layer, applied over the entire foam mold, will fill in the voids and texture of the foam. You only have ~20 minutes, so work quickly so you have time to smooth out any rough edges. Once the applied cement mortar has dried, you can apply the next layer. The number of coats depends on how smooth and even the final surface you want (usually four to five coats are required). It should be remembered that the smoother the surface of the final layer before it dries, the less sanding it will have to do!
Tip: When cooking cement mortar follow the manufacturer's instructions. You should not prepare more mortar than you need to apply one layer (for example, we used 220 ml of water and 450 g of cement). Make sure you don't forget to cover the surface of your workbench or workshop floor, because this job is quite dirty.

Step five: After the last cement layer has dried, you can sand the surface if desired. We wanted to achieve a glossy finish on at least the top of the table, so we sanded it using sandpaper various grain sizes - from 100 to 2000.
Advice: If you are planning this operation, purchase a protective mask that will help you protect your lungs from cement dust
(The table made in this project turned out to be very durable and strong, but at the same time it weighed no more than a kilogram.)

DIY stump table
The material for the next table is sometimes literally lying under your feet. Even residents of megacities will be able to find a suitable stump if they wish.

log table. Photo
Materials and tools:
- wooden block;
- white acrylic paint;
- hand grinder;
- chisel;
- hammer;
- decorative upholstery nails;
- molar tape.
Step one: Find a table base! This should not be an old rotten stump, but a freshly cut log. Allow it to dry for at least 6 months (nothing is worse than waiting, but it must be done) until the bark begins to separate from the trunk.
Step two: Using a chisel, use a downward motion to carefully scrape away the bark from the log. If the stump is dry enough, you won't have to use too much force to do this.
Step three: By using grinder With medium-grit sandpaper, sand the surface, removing any remaining bark and smoothing out any sharp corners. Don't forget to sand the surfaces of the lower and upper cuts. Wipe the wood with a damp cloth.

Step four: It's time for painting. We used white semi-gloss paint that included a primer (we needed three coats for full coverage). You can choose a different type and color of paint, focusing solely on your taste. Don't forget to prime the surface of the wood first. Make sure you don't forget to trim the bottom cut.
Step five: Prepare decorative nails. Place a strip of masking tape along the top edge of the side surface of the block, thereby marking the place where the first row of nails will be located.

Step six: Use a hammer to hammer in the first row of decorative nails. To ensure that the distance from them to the top edge is the same throughout the entire “line” of nails, use the strip of masking tape you previously glued as a guide. Once the first row is completed, repeat with the second and third row of nails (we needed almost 150 nails for three rows).
Tip: Cover the bottom surface of the stump with furniture felt so that you can move the table around the room without damaging the flooring.
The work is finished. You can enjoy your new piece of furniture and be proud that you made this charming coffee table yourself.


Coffee tables: do it yourself
Wooden table: how to make?
Many people are interested in how to make a wooden table with their own hands to get a model with an original appearance. Let's consider one of the options.

To make an original coffee table with your own hands, you should take timber with a section of 5x10cm. It is cut into pieces of the following lengths: 130cm - 9 pieces, 21cm - 12 pieces, 34cm - 2 pieces.
The prepared timber is placed in three rows, leaving space for attaching the legs.

The top two rows are removed. The timber in the third row is moved slightly to create an interesting appearance. Next, mark the places for attaching the transverse parts.
Lay the outer bars of the second row and mark the places of cuts. Then the cuts are made circular saw or a hacksaw with a chisel.

The bars of the second row are secured with screws.

Lay the third row, move the parts and secure them.
An empty space is formed under the tabletop, in which they fix legs.
The wood is processed protective composition , preserving the wood texture.


Original model of a wooden coffee table with your own hands

First, to make a table with your own hands, prepare planks: 6pcs - 22.5x45cm, 2pcs - 22.5x41cm, 8pcs - 20x4cm, 8pcs - 40x4cm.

Planks 20x4 and 40x4 are glued in pairs. To ensure they stick together securely, they are clampedclamps.

While the leg blanks are drying, assemble box from the remaining parts. They are connected with wood glue and nailer.

Legs They are attached to the box with countersunk screws. Crossbars are placed between the legs at the bottom.

cover for a wooden table they are also made using 22.5x45cm planks. They are glued together, and then the resulting square is sawn into two triangles.

One triangle is secured with screws, and the second triangle is secured with slats so that it is removable.

All parts are sanded and painted.


Stylish coffee table. Master class

Start making a stylish table with your own hands by marking the sheet Chipboard 16mm thick. The center is found on the sheet at the intersection of two diagonals.

A nail is driven into the center, to which a thin rope or harsh thread is tied.

A pencil is tied to the free end. This allows you to draw a circle.

If you want to make a table with your own hands that is not round, but of a more interesting shape, then the shape of the circle is changed by drawing curves.

The table top is cut out jigsaw or a reciprocating saw.

Edges are processed sandpaper.
Legs secured with screws. If they are located obliquely, then the slope should be outward.

Table surface paint in the desired color.

Simple coffee table

To make a coffee table with your own hands, take boards 40x15cm - 2 pieces and 50x19cm - 2 pieces. In addition, you will need legs and mounting plates.

A larger one is fixed on one of the boards plates for attaching legs. You should step back a little from the edges.

Lateral and top part The table is secured with wood glue.

It dries in about half an hour.


DIY log table

A self-made coffee table with this appearance will decorate your dacha or country house. Work begins by assembling the frame. To do this, take sheets plywood two centimeters thick. A base with dimensions of 60x80cm is cut out of them. A box 68cm long, 45cm wide and 40cm high is attached to the base.

DIY log table. Photo
After this, thirty round pieces are cut logs 45 cm long and twenty-four round cuts, the thickness of which is 3 cm.
The prepared logs are secured around the perimeter of the box. Fixed from below to the base rollers. They are installed at a distance of three centimeters from the edge.

In addition to glue, it would be useful to secure the logs with screws from below.

Installed on the box plywood cover. Round circles are glued onto it. The space between them is filled with wood putty, which does not shrink when dried. Apply it in stages so that the previous layer has time to dry.

After the putty has dried, the surface polished. For this, a surface grinder is used. After this, the log table can be used.
Country style table

If you are interested in how to make a table from wood cuts with your own hands, then you should read the instructions.

They begin making such a coffee table with their own hands by choosing the appropriate material.


Selected slept We inspect for any interesting parts or parts that need to be removed.


Excessively rough, protruding parts are cut off. On the side where the tabletop will be, the surface level.


Used for work cleaver, which moves at an angle of forty-five degrees.

The sides also need to be leveled.

All surfaces polished, using ever-decreasing grain sizes.


Glossy varnish mixed with resin in equal parts.

The resulting composition is applied to the wood in a thick layer. It will take a long time to dry. If cracks appear during the drying process, they must be filled.


Bottom side clearing out. If there are voids in the tree, they are filled with resin gradually until the hole is filled.


If there are air bubbles in the dried resin, the surface is heated with a heat gun or burner.

A second layer of resin is applied and again left to dry for two days. The entire surface of the tabletop should be glossy.

The part of the ax handles is cut off at an angle of 22 degrees. The surface is sanded and painted in the desired color.


Mark places for legs and make holes.


Glue is poured into the holes and the legs are installed. Special pads are attached to each.


White coffee table

Make such a coffee table with your own hands from plywood And glass First, prepare a drawing and determine the dimensions. Then they proceed directly to production.


DIY coffee table. Drawings
Plywood acts as a tabletop box with partitions, covered with glass on top. Triangular legs are attached to it.


You can make a door at the box to access what's inside, or you can lift the glass.


LegsFor a table with your own hands, it is better to cut it out of fairly thick plywood. It must be remembered that double legs are easier to make than more single.


When all the parts are ready, they are assembled together and fastened. The table is painted or varnished.


DIY table made from pallets
If you know how to make a table from pallets with your own hands, you can get an interesting version of furniture for your home. Pallets must first be sanded, sawn into pieces and primed.


table made from pallets. Instructions
A table is assembled from the prepared material. To do this, attach legs or wheels. A pallet directly or a surface assembled from individual planks can be used as a table cover.


After all the parts are connected, the structure needs to be painted or varnished. After this, the table made from pallets is ready.
Second version of a table made from pallets
To make such a table with your own hands, you will need one or two pallets. You should first draw a sketch of the future product, taking into account all dimensions.


The table will have a shelf for small things under the table top. The structure is assembled from prepared parts.


The surface is painted black, but this is not the only possible option. There are many other decorating possibilities.


Coffee table stand
Option on how to make a table from copper pipes with your own hands, may be of interest to many craftsmen.

The pipes are first marked and cut. Then they are coated epoxy glue and assemble the base for the table.


This base is applied to the board and the fastening points are outlined. In these places you will need to drill holes by pipe diameter.

Four holes are drilled, but not all the way through.

The board is impregnated polyurethane and cover stain.


The remaining one is collected from the pipes frame.


Legs and base cover paint in the color of the tabletop.

Made from a piece of cloth pocket, which is hung on the transverse parts of the legs.


All parts are assembled together, adding epoxy glue for reliability.


DIY marine style table
This table is from an old one window frame looks very romantic. The frame is cleaned of dust. If necessary, replace the glass.

Wooden surface paint white acrylic paint. After drying, the paint layer is sanded so that the wood appears. An option is also available in blue and white.

To make the legs, take stalk and sawed into pieces of 34 cm. After this, it is treated with sandpaper to remove roughness.
The blanks are drilled in four places. Next, each leg is attached to the base, and the base with legs is attached to the frame. All this is done with self-tapping screws.

The legs are covered with coarse rope.
For peeled and low-fat glass glued sea souvenirs and seafood. They must be covered with glass on top, which is cut in the workshop to the size of the frame.

A loop is made at one end of the rope. The rope is glued around the perimeter of the frame, leaving the loop free. When the other end reaches it, an interesting sea knot is tied.

Purchasing furniture is a rather expensive procedure that is not always affordable. This especially applies to non-essential furniture items. However, there is a way out - to create an accessory yourself. For this you need minimal experience working with tools, creativity, patience and imagination. In this article we will tell you how to make a coffee table on wheels with your own hands from simple available materials, and show photos of successful examples finished products. The latter will be a good decoration for any bedroom, living room or children's room. Very often, such furniture is placed in cottages on summer terraces, where it emphasizes the existing style and subtle taste of the owners, and also creates the desired atmosphere of comfort.
DIY coffee table
There are many ways to make such an accessory. For everything to work out, minimal skills in carpentry and limited materials. During the process, the master will not need any drawings or any diagrams. All you need is a small piece of hardboard and a few legs (depending on the design, 3-4 pieces), which can be purchased at any furniture or hardware store.
Take a sheet of paper in a one-to-one size and use a construction tape measure to find the center. To do this, draw two straight lines and mark the point of their intersection. Drive a nail into the center to which the thread is attached. A pencil is fixed on the opposite side of the thread (it should look like a large compass). The handle determines the size and shape of the rounded tabletop. Next, everything is even simpler - cut out the part, process the edge, apply paint and varnish. At the final stage, install the legs.


Wooden table in country style
If you prefer simplicity and understatement, then rustic furniture is exactly what you need. But this is purely a matter of taste and everything can be adjusted. Simple rectangular shape, the natural texture of wood will be a wonderful addition to country style interior design.
Schemes on how to build a table for tea drinking
Below are popular assembly drawings wooden structures countertops You can put them into practice. All instructions are visually clear and shown in the form of step-by-step pictures. The main rule: measure several times and only then cut. To avoid cracking the wood, make preliminary holes with a drill in the fastening areas.
Super simple
The project is suitable even for people who have never been involved in carpentry in any way. You just need to cut a tabletop of the required size from a piece of plywood and 4 legs from rectangular or square shape. Make decorative bevels at the end of each leg. A wood miter saw is used for this. Then combine all the details into one composition. For a clearer understanding, it is advisable to number all elements in pencil.
Square
It is a solid design that will appeal to lovers of the classics. Boards for organizing the tabletop will not be cheap, so when limited budget take plywood. Legs can be selected or ordered separately. Even with purchased parts, this option will cost much less than a ready-made purchased model.
Tall in rustic style
An original thing that not everyone will like. This design looks good in modern interior design, against the backdrop of expensive furniture. The step-by-step photo instructions show that the assembly is simple and is carried out like a stool, although with some nuances. To give the table a noble look, decorative cross sides are used.
Carved
Furniture that looks like a museum exhibit is made with your own hands at home. The pictures below show all the stages of making this masterpiece. The master gave this product a figured relief using an ordinary knife. A little imagination, talent, perseverance and patience, and you can decorate your home with a luxurious item.

On trestles
Typically, in carpentry, this design of legs is not used. However, no one forbids its use. A table can become the highlight of any living room interior, giving the room a Mediterranean flair and flavor.
Rustic style
Quite a popular model, which looks very similar to the previous version. Here, instead of trestles, classic-looking legs are used. The photo selection clearly shows all the manufacturing stages, which, if desired, you can repeat yourself.
Classic with drawers
An interesting multifunctional solution for a living room or bedroom that you can make yourself. To give design stylish look semi-antique, it is necessary to carefully work with decorative coating. You can use various stains and ship varnish. During the manufacturing process, many have difficulties with drawers. There are several recommendations regarding this:
- . Make sure that right angles are maintained everywhere and that there is no deformation of the wood.
- . Make the first box right away, try it on, if everything is good, then create the second one according to its dimensions.
- . Always compare the details with the drawing and know that nothing is perfect. A slight curvature is quite acceptable.
With metal legs
Here the main material is solid birch, walnut bars and connecting elements. When everything is in place, you can start working:
- . Cut the boards into strips of equal size.
- . Pack them tightly cutting edges one way.
- . Carefully apply a layer of glue (make sure all edges are sealed securely).
- . Secure all elements with clamps, wipe off excess adhesive solution.
- . After drying, use a cross-cut saw to trim the edges.
- . Cut a 20 mm recess in the boards, so that there is 1 cm of margin at the top and bottom.
- . Spread the foam into equal strips, 30 cm wide and 20 cm long.
- . With the help table saw Make an even chamfer on the lower edges, at an angle of 45 degrees.
- . Sand all parts of the structure with a grinder.
At the last stage, screw the legs.
With shelves
A beautiful product that is easy to assemble and has affordable materials. A convenient shelf gives the accessory solidity, and thin stiletto legs add lightness and sophistication. If a person has ever worked with a drill, then creating such a structure will be a trifle for him. The pictures show what is done and how.
Large coffee table for living room
An ideal option if you need roomy and at the same time non-bulky furniture. It will be a wonderful addition to the interior of a living room or bedroom.

Rectangular
Making furniture with your own hands is a fun activity, and most importantly, an inexpensive way to furnish your home. When deciding on a model, it is necessary to take into account the location and functional load of the piece of furniture. This option will fit into almost any room.

With round tabletop
The accessory can be assembled from parts from old and antique furniture. The round shape looks noble and is very relevant in rooms where there are small children - there are no corners and a child cannot be injured by such a product. For the countertop, it is better to purchase a high-quality sheet of plywood. The final decoration is individual, depending on the materials used and the taste of the master.
Folding
Tables classified as coffee tables often play a decorative role in rooms - they serve as a stand for flowers, remote controls, the press, and are less often used for morning and evening tea parties. But for work, for example, with a laptop, such accessories are not suitable or require improvement. It will be ideal folding tabletop, which rises to a certain height. A simple mechanism made from wooden blocks and a regular box as a stand will make your table multifunctional. Also, under the lid of such a product you can store a lot of useful things.

With a pop-up top
Here is an excellent modernized model homemade table with a height-adjustable tabletop. The mechanism makes it possible to lift work surface to a computer-friendly level. It also turns out to be a good place for a quick snack in front of the TV. However, to mount such a mechanism you will need patience, a little ingenuity and welding.
Coffee tables made from pallets
A separate group of furniture accessories made from recycled building materials. It is practical and cheap.
DIY table made from pallets
One of the most economical options for a coffee table, which can be made from improvised materials. You will need a sheet of plywood of medium thickness, one pallet that is as smooth and free from defects as possible, and an iron welded metal frame. If you have any difficulties with the last part, it doesn’t matter - it can be made from wood.

DIY metal legs for a coffee table - drawings and dimensions
Original product based on construction pallets fits perfectly into a simple rustic interior in country, Provence or eco style. In addition, the project will allow you to save a lot of money and show your imagination. The model will be exclusive and in one copy. You can place it near the sofa and store remote controls and newspapers in it. For manufacturing you will need a pallet. The latter may differ in the size and pitch of the boards nailed on top. To create a flat surface, pallets are disassembled and fastened tightly. Then everything is sanded and covered with stain and varnish.

Original DIY coffee table
The table can be made mobile by organizing a wheelbase. Everything is very simple here, you don’t even need step-by-step instructions. Take two pallets and connect them inside. In this case, the lower one will have to be disassembled in order to attach the boards tightly and screw the wheels to it. You can put glass or a sheet of plywood on the top tray. The entire structure must be treated with stain or decorative paint and varnish.
Examples in the photo
Below are the most popular and sought-after models of homemade coffee tables.


From wooden boxes
The hard part of the job is finding the materials. But once you have found the boxes, they need to be processed: sanded, fastened with a sheet of plywood, varnished or painted. If desired, you can screw on the wheels.

From a car tire
When we talk about available materials, we cannot fail to mention ordinary tires. A little imagination, patience, and skills in working with tools and you will end up with a unique thing.

Glass accessory in high-tech style
You can make a small simple coffee table from glass with your own hands. This is not an easy task, but it is doable. The main thing is to choose the right glass material - triplex with a sheet thickness of 10-12 mm is best. Next, everything is according to the diagram: we make a drawing, use it to create a pattern, and cut the tabletop to size. We process, grind the edges and install the finished canvas on a pre-fabricated support structure.
Glass coffee tables
There are many product options here that fit well into modern design interior There are both complex designs, and those that you can do yourself.
As shown in numerous photos, exclusive ideas for DIY coffee tables made from scrap materials look especially good.
Unusual solution
A vivid imagination and minimal experience with tools is all that is needed to implement such a project. You definitely can’t take away his extravagance and originality.


From a wooden barrel
Not a bad idea to implement. From a technical point of view, creating such a product is not easy, but all the efforts made will pay off with interest. An accessory with an opening tabletop looks especially elegant and practical.
How to make a coffee table-clock with your own hands from scrap materials - photos of step-by-step work
A very interesting idea to add a clock mechanism.

DIY shelf table
A good option for mobile furniture on wheels. To make such a masterpiece, you will need a minimum set of materials - plexiglass, wooden blocks, plywood and four stainless metal tubes. Assembly is not difficult, and the result will delight generations.
From round wood
A similar product from sawn wood is quite easy to make. However, in this option, simple doesn't mean fast. If the material is freshly cut wood, then it must be allowed to dry. Next, you should carefully treat the surface and open it with varnish.
From birch logs
Birch is a wonderful material that fits into many interior styles. He has nice color, it radiates lightness and warmth.

From willow branches
Simple and at the same time original design- a dream for connoisseurs of eco-style. This is full-fledged furniture created on the basis of branches. The material can be found on almost every street. A room furnished with such attributes looks like something exotic.

Modern
High-tech products are gaining enormous popularity. You can create such an interior item yourself. To do this you will need non-standard imagination, fiberglass, epoxy resin and dyes. The pictures show step-by-step assembly.
From glass bottles
A very unusual approach; below are drawings with the dimensions of such products.

Homemade giraffe table
Using an electric jigsaw and a small sheet of MDF, you can create an original coffee table in the shape of the famous African animal.
In the form of a tetraerd
A conceptual model in a complex geometric image is an interior item that will fit perfectly into any office space. Combine individual elements and you will get a unique item that will become the highlight of the design.
From the lids
In pursuit of extraordinary ideas, visionary craftsmen create truly unique accessories. Check out this tabletop made from regular bottle caps.
On gas keys
Corner table in the hallway
If a corner in your living room is empty, then there is an opportunity to fill it original furniture. Outwardly, it resembles a bookcase, which contains several baskets for storing things.

Photos of original products
A selection of photographs of unique tables will allow you to gain useful ideas.
![]()


![]()


DIY restoration
If your favorite accessory has lost its former attractiveness, there is no need to immediately send it to the landfill. There are many ways to breathe into it new life- modeling, painting, patination, tinting and other methods.
Coffee table made from a Singer sewing machine
If you are the owner of a frame from an antique mechanism, then you can remake it into an expensive piece of furniture.
Schemes and drawings - photos
Below are schematically presented the most popular models of coffee tables and coffee tables.
Tables for magazines - photo
Photo selection of the most original products that anyone can make.
Do you love designer items, but sigh in frustration when you look at the price tags that adorn them in stores? Try becoming a designer yourself. Do you think it's difficult? Nothing of the kind! By following the instructions, you can easily create with your own hands original interior item from scrap materials. And we suggest starting with coffee table- such a simple, but very important subject furniture. Believe me, at such a table you will be happy to serve tea to your guests, who will admire your skills. In addition, by creating a coffee table with your own hands, you will literally fill your house warmth and put a piece of your soul into it. So it's definitely worth a try.
DIY coffee table in a marine style
Idea in the style of "romantic". All year round, while sipping your favorite drink at this table, you will remember the warm sea, gentle surf and moonlit path. " Nautical"The table is tenderness, sophistication and originality in the very heart of your home.
How to do it?
1. Take the old window frame and clean it of dust and dirt. If the previous glass cracked, insert a new one, then get rid of the old layer paints and sand the surface. Next you should delete metal corners, which additionally fix the details frames.
Ready! Enjoy your creation and bring joy to your guests!
Suitcase table for travel lovers
Very original solution for an old favorite suitcase that has seen other lands with you and that you don’t want to throw away because of the memories.
How to do it?
First, go to the store where you will need to purchase furniture legs (wooden or metal). If you want to make a mobile table, then you need to take wheels. You will also need plywood, screws and a screwdriver.
Now we make markings on the bottom of the suitcase for future legs and drill holes. Since it will not be possible to attach the legs to the fabric, we put plywood inside the suitcase, make markings on it through the holes and also drill them. Now we attach the mount to the bottom of the suitcase and attach the legs. Using hot glue, glue the felt inside the suitcase.
To give the table an original look appearance, reminiscent of distant travels, you can decorate it with stickers made in the form of stamps, or decorate it at your discretion.
That's all - the unusual coffee table is ready! By the way, there are a huge number of options for turning suitcases into tables: by choosing the legs to your liking, you can make a table into style retro or classical. You don’t have to attach the legs at all if you have a massive suitcase - it will look truly incredible: such a table will bring into the interior a sense of adventure and adventure, the spirit of travel and unknown distant countries.
Table made of logs for nature lovers
We take wooden beams (in this case birch) of the same height and width, 32 pieces in total. You also need to take a base for the table, legs (4 pieces), putty to match the wood, a screwdriver and glue intended for wooden surfaces.
First you need to assemble the base for the table, then glue wooden beams around the perimeter, and sew up the middle with cardboard. Then we screw the legs to the bottom. Next, we glue thin wooden dies to the inner surface - this will make it seem like the table is completely wooden. Now we take the putty and carefully fill in all the voids, after which we rub it in until we create a completely flat surface. Voila! Now you are the owner of an extraordinary table that will become the highlight of your interior.
If you like the idea, you can create other tables using this scheme, using, for example, branches instead of bars. To create such a table you need to take a plywood box, painted black paint, the size of which is 40x40x60 cm (or any other size at your discretion).
To paste the frame, we take branches from which we first remove the loose bark (we do this with sandpaper). What is the order of gluing: first we glue the branches on the long side of the table, and then we select wooden dies and, as mosaic, lay them out on the ends. The thickness of the dies should be approximately 1 cm; they can be cut with a parquet or circular saw. And finally, install the glass that will serve as the tabletop. If desired, you can make it mobile by screwing the wheel supports to the table.
Using the same technology, you can create many more unusual pieces of furniture. You can lay out the branches horizontally and then you will get such a wonderful table. Such furniture looks not only very original, but also incredibly stylish.
Original table made from pallets
An idea that came to the mind of someone truly brilliant. It would seem that one can come up with pallets, which are probably lying around at every dacha? And you can make them into a very convenient and functional element of the interior.
How to do it?
First, collect all the tools necessary for your idea: the pallet itself, drill, clamps, hammer, screws, nail puller, wood glue, wheels, soap, primer, screwdriver. In addition, take paint brushes, a flap brush with abrasive bristles for a drill, varnish and a clear primer.
First of all, you should take a drill with an attachment designed for wood processing, and clean the surface of the boards from dirt. Now carefully disassemble the sanded pallet into pieces. Lightly tap out the rusty nails with a large hammer and carefully pull them out with a nail puller. Glue the broken pieces of boards with wood glue. At this stage you will need clamps. They need to carefully clamp the boards and wait until they dry.
Now the parts prepared for the tabletop need to be nailed and glued with reverse side, then clamp them with clamps and wait until they dry.
Then coat the table with a colorless primer, and then varnish. Next, on the back of the table, mark places for screws to attach the wheels. Drill holes for the fasteners with a drill. To ensure that the screws fit into the wood easily, lubricate them with soap. Using a ratchet wrench, you can quickly and conveniently tighten hex head screws.
A stylish, compact and quite functional table is ready!
Table made of drawers
One more original idea captivates with its simplicity and unexpectedness - who would even think of building a table from boxes? But it has come, and now you yourself can create such an unusual piece of furniture at home. Surely you yourself will be delighted, and your guests will appreciate the originality of this idea.
How to do it?
Take 4 wooden boxes, sandpaper, varnish c water based, roller and brush, dowels, 10 mm plywood sheet, PVA glue, 4 wheels and screws.
First you need to sand the drawers and coat them with varnish. Then, using a drill with a stop, make holes at the ends of the drawers. Using wood glue, you need to fix the dowels at the fastening points and connect the ends of the boxes to each other. Attach wheels to a sheet of plywood, and then attach the sheet to the boxes with self-tapping screws. The table is ready!
Such extraordinary things can be created from quite ordinary materials. Having imagination and a desire for originality and comfort in your home, you can easily create miracles. Look around: maybe old window frame has every chance of becoming an interesting element of the interior?
Or maybe a huge wooden reel of industrial cable that can become an elegant piece of furniture?
It's hard to be a fan design solutions for home furniture, without having enough available funds to purchase them. The point is not only in the level of your income, but also in the price tags that are typical for such furniture, because they are often several times higher than for traditional options.
You can solve this problem by making a coffee table with your own hands. You will be pleasantly surprised to learn how simple and entertaining activity it could be.

Low table
Most often, this option is found among coffee tables. They are not new, they have just recently begun to receive more attention from the public.

They gained popularity two centuries ago, when tea lovers - the British - began to use them. A hundred years later, this trend has spread to other countries of the world, including ours. Now this is not a very popular option, however, it has the right to life.


Chipboard table
Simple and enough practical option maybe a coffee table made of chipboard, which you can make yourself without any problems. Now on the furniture market, chipboard is one of the most available materials, which can be used to create a traditional table. We'll talk about why traditionally later.

The price tag for this option will be significantly lower than if your choice falls on a wooden coffee table. It is best to take sheets coated with laminate or varnish. Still, you will be placing such a table in your home, and therefore you need to pay attention to the aesthetic component.

Then everything depends more on the design you choose. A simple, yet small table can be made from several parts. This option will be small and with several shelves. Perfect for the living room, and will stand next to the sofa or armchair.

The shelves are well suited for magazines and remote controls for controlling equipment. This reduces the likelihood that they will get lost.

Glass table
Drawings of such coffee tables can be easily found on the Internet. You just need to take into account one feature - in almost any case you will need to buy a glass part of the table. You can solve this issue with the help of old glass, which may be in your barn or garage.

The main part of the table can be made from a material that suits you, and cover it with a sheet of glass on top. To do this, you need to cut it to shape, then process the edges and secure it to the main structure.

Even if you don’t make such a table entirely out of glass, with the exception of the frame, you can get a very attractive and interesting result that will look good both in modern interior, and in the usual apartment design without any special features.


Wooden table
Enough detailed instructions How to make a coffee table from wood can be found on the pages of thematic magazines. This option will be more expensive than with chipboard, but the appearance pays for everything. This material is better suited for tables large sizes, which you can work on if necessary or use them to store documents that you view while sitting in front of the TV in the evening.

The design can be tritely simple: four bars for the legs, which are complemented by a tabletop of the desired shape. Depending on the latter, you can take three legs, which will look even more interesting.

On top of this you can add various decorative and functional details - be it shelves or decorations. Here you can give freedom to your creative nature.

Unusual table options
You may have often come across photos of coffee tables that are made from unusual materials. This can easily include a table made from an old suitcase.


The most interesting thing about this is that you will have to do practically nothing to create such an item. All you have to do is restore a pleasant appearance, if required at all, and install such a table.

The huge advantage of this solution will be reasonable use space in the room. This would work well in front of the sofa, while the space inside the suitcase would also be good to use. You can put some kind of blanket or boxes of shoes there. In general, here it comes down to personal choice; in any case, it is very convenient and practical.


Table made from scrap materials
Separately, I would like to consider a coffee table made with my own hands from scrap materials. There are several options that I really liked, and I want to share them with you.

The first one is a table made of pallets. They can be found in any supermarket or warehouse, and therefore it will not be difficult to get them. They are made of wood, which is very good for the interior. This wood can be varnished, which will greatly change its appearance.

Take two of these pallets, or trays, whichever is more convenient for you, place the first one with its legs up, and place the second one on top so that the legs meet. They can be additionally connected with self-tapping screws, and a sheet of glass can be placed on top of them. The option is very beautiful and easy to implement.


As you already understand, I prefer options when I don’t have to do work furniture companies, and cut out all the parts, and then adjust them. I am more interested in creative and fresh solutions.

For the second option, you will need only four old boxes, which, placed on their sides, need to be connected to each other clockwise. We first coat them with varnish, connect them and that’s it – the table is ready. The empty space inside can be covered with a tree and a flower placed on top. Good luck with your choice.


DIY photo of coffee tables


