Homemade tools and do-it-yourself devices. Homemade tools for the garage, for storing tools in the garage. Homemade gadgets for the home workshop. Homemade tools for woodworking
This article discusses homemade machines and devices for the home workshop. Here we detail the features of the most popular and necessary DIY tools, as well as tools for the workshop or garage, step-by-step technologies their manufacture and other useful recommendations on this topic.
Many home workshop owners create the equipment they need with their own hands.
Each owner of a garage or workshop, depending on his needs, selects the equipment himself. Many of them know how to make homemade machines and devices for garages, so they get by on our own when arranging a room, customizing it to suit yourself technical features designs.
So, when creating a metal workbench with your own hands, the drawings and dimensions of the product on them can be adjusted to the parameters of the room and other conditions. Even for a small home workshop, you will need to allocate enough space to accommodate at least the design of a universal folding workbench and a minimum set of tools. The required area for this is at least 3-5 m².

Useful advice! It is better to set up a workshop in a separate room so that the noise from the operation of a homemade wood grinder and other tools does not disturb the residents. A garage can be allocated for the placement of machines, the area of which is sufficient for comfortable work and installation of equipment.
Manufacturing of tools storage devices: shelves, racks
In fact, it is very difficult to achieve optimal operating conditions. It is desirable that the size of the room be at least 6.5 m. To equip the workshop, you can make an extension to the house or garage. This solution will be the most profitable in any case.
Before designing a drawing of a folding workbench with your own hands, which has the largest design (therefore its dimensions are taken into account first), it is worth deciding on some points:
- indicate what types of work will be performed in the workshop;
- define list necessary tools and equipment.
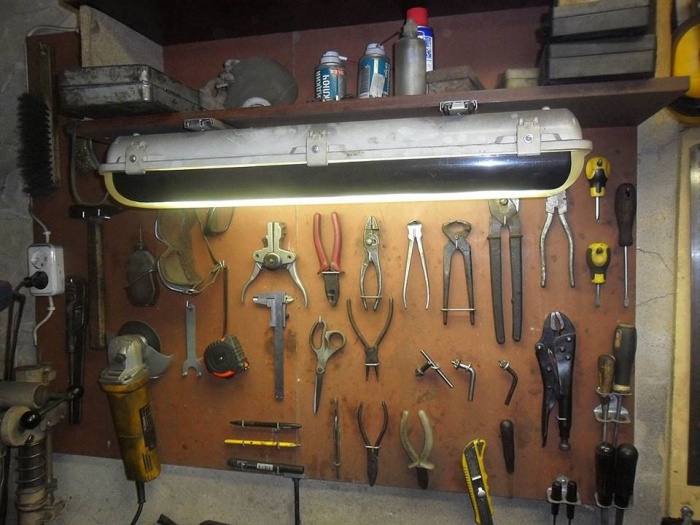
By mounting the tool on the wall, you can significantly save useful space in the workshop. Shelves or racks are perfect for this. You can successfully arrange these structures, achieving the most rational distribution of area.

In order to save space, you can get a special device for a circular saw with your own hands, made on the basis of a conventional drill. Such universal machine can perform several functions at once, combining the following capabilities:
- circular saw;
- grinding machine;
- sharpened;
- cutting machine.
The work table can be combined with a vice for carpentry workbench and equip it with drawers to store small tools.
DIY tool shelves: popular designs
Metal structures are more durable and reliable, while wooden ones are affordable.
There are several options for rational storage of tools:
- wall shelves;
- DIY tool racks;
- suspended ceiling shelves;
- Shelves-boards for hanging small tools.

Useful advice! The shield shelf is very convenient for metalworking and carpentry work. You can install holders or hooks for tools, small shelves or containers for fasteners on it. It is most advisable to hang such a structure over a folding carpentry workbench. You can even let me down additional lighting. It is better to use a small lamp for this.
Technology for making a shelf for tools with your own hands (shield):
- A shield is cut out of a plywood sheet, and the places where the shelves will be installed are marked on it.
- Using a jigsaw, shelves with side walls are cut out. The length of these sides must match the length of the shield.
- Shelves for tools are assembled and fixed to the surface of the shield using long self-tapping screws.
- Hooks are being installed. Holes are made in the shield where dowels are installed. You need to screw special hooks equipped with threads into them. First, you should distribute the entire tool and mark the points where it will hang.
- Brackets or lugs are installed on the rear wall of the structure.
All that remains is to fix the shield shelf on the wall. To prevent the lugs from sliding off the anchors, it is recommended to fix them with special washers.

Making a carpentry workbench with your own hands: drawings, videos, technology
The drawing of a carpentry workbench should include the following details:
- Working surface - for its manufacture it is recommended to take a board 6 cm thick or more. Suitable wood species such as oak, hornbeam or beech. It is allowed to use several narrow boards pre-treated with drying oil.
- A do-it-yourself homemade vice design is attached to the top cover, which should also be included in the drawing. If you intend to install the product large size, for its manufacture it is better to take wood. It is allowed to make and subsequently install small metalworking vices made of steel yourself.
- Workbench supports can be made from linden or pine. Between them it is necessary to install longitudinal connection in the form of planks. This will increase the stability of the table.
- Shelves for storing tools - mounted under the workbench. Designs can be fixed or retractable.
Useful advice! The linear parameter of the workbench can exceed 1 m. The increased size of the structure can be used to install two carpenter's vices with your own hands.
There are several modifications of workbenches:
- mobile;
- stationary;
- folding (universal).
Having familiarized yourself with the structure of a carpentry workbench, you can begin to manufacture it.
Technology and drawings of a do-it-yourself carpentry workbench: how to make a simple design
Step-by-step technology for manufacturing the structure:
- To make a lid for a wooden carpentry workbench, you will need to take thick boards. The size must be selected so that, as a result of their connection, a shield with parameters of 0.7x2 m is obtained (the length can be less than 2 m). Long nails should be used as fasteners, which must be driven in from the front side and bent from the back.
- You can finish the lid by securing a beam with a section of 50x50 mm along its lower perimeter.
- Depending on the size of the carpentry workbench (its cover), vertical supports are located. To make them, a timber (12x12x130 cm) is taken. At this stage, it is necessary to take into account the height of the working surface, because it should be comfortable. The upper limit of the support should be at the level of your lowered arms. Subsequently, due to the installation of the cover, about 8-10 cm will be added to this indicator. Markings for installing beams should be applied to the ground and these elements should be dug to a depth of 0.2-0.35 m.
- Next, we install the frame part and the cover of the wooden workbench with our own hands. The installed support bars must be connected in pairs. For this, wide boards are used, fixed at a height of 0.2-0.4 m with long screws. The cover is secured to the ends of the supports using the same fasteners.
Pay attention! Do not use nails to install the cover. During the process of driving them in, the frame part of the product may move.

Technology for making a universal wooden workbench with your own hands
Despite the fact that the technology for creating this design is in many ways similar to the previous version, for the manufacture of a composite carpentry workbench, drawings with dimensions will be required in mandatory. But in this case, bolts are used instead of screws.
In addition, you can install drawers for storing tools in a folding universal workbench with your own hands.
Technology for making a folding workbench with your own hands:
- Vertical supports are installed in a similar way and are connected to each other using horizontally located jumpers. Before installing the jumpers, grooves should be made on them for nuts and washers. To do this, it is better to use a hammer and chisel.
- When the jumpers are set at the required level, through holes are made in the horizontal bar and the vertically installed support. The long bolt will be inserted here. On the side where there is a groove for fastening, put on a nut and washer, after which the element is tightened well.
- You will need 2 horizontal jumpers for the frame part of a homemade carpentry workbench. on each of 4 sides. You will also need a couple of jumpers for installation under the work surface (in the center). The elements under the table top are designed for drawers. The distance between these jumpers should correspond to the size of the boxes.
- Bolts are also used to fix the working surface. Mounting recesses are prepared at the ends of the supports, and holes for fastening are prepared on the tabletop. The bolts are installed so that their heads are recessed (1-2 mm).

Pay attention! Drawings for a folding workbench are not as complicated as they might seem. The advantage of the design is that any damaged part can be easily replaced with a new one.
DIY carpenter's vice design for a workbench
Usually workbenches are equipped with a vice. Many garage workshop owners know how to make such a device with their own hands. For a homemade design you will need special studs. Such fasteners are sold in hardware stores.
To work, you will need a special screw pin. This threaded part is the main operating component of the structure. The minimum pin diameter is 2 cm, the cutting length is 15 cm. The longer this part is, the wider the vice can be spread. If you take into account exactly these dimensional parameters in the drawings of a vice with your own hands, you can get a design that is set apart by almost 8 cm.

The jaws of the tool are made from a pair of boards. One part of the part will be fixed. To make it you need to take pine. The second part measuring 2x1.8x50 cm will move. In each of these boards you need to make a hole for a screw. Using a drill with a diameter of 1 cm, holes for the studs are formed in all boards at the same time. To prevent the holes from moving relative to each other, you can connect them using nails.
After all the holes are made, the screw and all the studs are inserted into them along with the washer and nut.
Useful advice! To be able to process workpieces different sizes, you need to make the studs repositionable. You will need to make a pair in each of the boards additional holes located close to the screw terminal.
Additionally, you can use the video material posted below to create a vice with your own hands.
Making a metal workbench with your own hands: how to make a metal structure
For plumbing work, it is better to make a metal workbench with your own hands, because a wooden one will not be suitable for this. The fact is that wood is not that durable. In addition, when working with metal workpieces, a tabletop made of this material will be constantly damaged and will quickly become unusable.
On general drawing For a do-it-yourself mechanic's workbench, there are five main design components:
- For longitudinal rigidity of the product, horizontal beams (3 pieces) measuring 6x4 cm are used. Length – slightly exceeds 2 m.
- Rack-mounted small-sized beams (9 pcs.) made of profiled pipes measuring 6x4 cm. They are used to assemble the frame part of the cabinets. In the corner area there are welded spacers made of steel strips. Due to all these elements, the frame is rigid and very durable.
- Rack beams (4 pcs.) 9-10 cm long (section 6x4 cm). To do this, it is better to use metal profile pipes with thick walls (more than 2 mm).
- Corner No. 50 (4 pcs.), which will be used as vertical posts. The height of these elements is 1.7-2 m. Working tools will be attached here.
Dimensions of the bench:
Useful advice! In order to make high-quality seams, it is recommended to use a carbon dioxide semi-automatic machine. Experienced craftsmen can use a pulse-type welding machine. If you lack skills in handling this tool, it is better to entrust the work to professionals.
Do-it-yourself workbench manufacturing technology: how to assemble
Making a universal workbench with your own hands begins with assembling the frame. To do this, you need to take a couple of short and a couple of long beams. During the welding process, these elements may become twisted.
To prevent this, you must:
- Lay out the parts on a perfectly flat surface.
- In the places where the connecting points are located (there are 4 of them), the beams are tacked using the spot welding method.
- After this, all welding seams are fully completed. First on one side of the frame, then on it back side.

Then the rear vertical racks and the rear beam (long, one of three) are attached. You definitely need to check how evenly they are placed in relation to each other. If there are any deviations, the beams can be carefully bent using a hammer. At the end, the remaining vertical rack elements are assembled, as well as elements that provide rigidity.
When the frame is ready, corners can be welded to it to strengthen the structure. The tabletop is formed from wooden planks. They must first be soaked in a fire-resistant liquid. Then a sheet of metal is laid on top.
A plywood tool shield can be mounted on the vertical rack elements. The same material is used to sew up the cabinets. For boxes, you can use metal boxes or make wooden structures.
You can use the video below to understand in more detail the technology of making a workbench with your own hands:
Features of creating a wood lathe for a home workshop
In the technology of making a wood lathe with your own hands, the bed occupies a special place. The operation of other parts, as well as the stability of the entire structure, directly depends on this part. It can be metal or wood.
Useful advice! To make a wood lathe with your own hands according to standard drawings, it is better to use an electric motor that can reach a speed of 1500 rpm. The optimal power indicator is 200-250 W. If you plan to process large workpieces, you can increase the power ratings.
To create a turning - copying machine for woodworking with your own hands, you can use an old one that is no longer needed. This tool is placed on a plywood platform 1.2 cm thick and 20x50 cm in size. You must first make holes in it for fastening elements. Stops made of bars will also be mounted here. They are necessary to ensure that the cutter is in a fixed state. The router itself is secured with two nails between the clamps.
In fact, it is absolutely not difficult to make a copy design of a homemade wood lathe with your own hands - there are enough video materials on the Internet.

An example of a homemade wood lathe with your own hands
For the base, it is better to take a steel profile with thick walls. To make the structure reliable, it is recommended to use two supports. A frame will be installed on top of them. To fasten parts, a groove type of connection is used. First you need to make support platforms intended for the headstocks (rear and front).
List of parts for a wood lathe (it’s easy to understand how to assemble the structure yourself based on this list):
- Power component - you can use an electric motor from an old pump or washing machine.
- Headstock (rear) - a head from a drill with a high power reserve is suitable.
- Headstock (front) - to organize this part, it is better to buy a factory spindle equipped with 3-4 pins. Thanks to this, it becomes possible to shift the workpiece relative to the rotational axis.
- The supporting element - the table for incisors - can be of absolutely any configuration, the main thing is that it provides comfort during work.
- Pulley - is a connecting element between the headstock and the shafts in the electric motor.
Pay attention! To work with this design, you will need to purchase a set of factory cutters. Subject to availability suitable tool You can make them yourself, but you will need tool steel.
As supporting information, you can use a video detailing this process to assemble a wood lathe with your own hands.
The second example of a DIY woodworking lathe
An alternative solution would be to make the design of a simple mini-wood lathe with your own hands based on an electric drill. This example of technology can be used as a test before building a more serious tool.
This type of machine is suitable for processing wooden blanks small size. The material for the frame can be wooden beams. The return headstock can be replaced by a combination of a shaft mounted on a support bearing. To fix the workpiece, you will need to take out the appropriate attachment for the drill.
This design has its drawbacks, they are associated with:
- high probability that errors will occur in milling;
- low level of reliability;
- inability to process large-sized wooden workpieces.

But you shouldn’t give up this option, because it forms the basis for technologies for creating more advanced and complex turning tools. To correctly calculate the design, determine for yourself the necessary operational properties and technical specifications.
The principle of making cutters for a wood lathe
The technology in this case is complicated only the right choice workpieces, which not only must have a level of cutting edge hardness that meets the requirements, but also must be correctly installed in the clamp - the holder.
Pay attention! In the absence of tool steel, you can make do with improvised means. After the preliminary preparation stage is completed, the material is further hardened.
- Reinforcing steel bars - it is better to use options that have factory original dimensions and square shape sections.
- Files or rasps - worn-out workpieces are suitable, but it is not allowed to use material with deep chips or cracks.
- Automotive springs - before using these blanks they will need to be given a square shape, which not everyone can do. For this purpose it will be useful welding machine. Autogen will also do.
 Turning: A - with a semicircular blade for rough turning; B - with a straight blade for finishing turning; B - shaped; G - machine passage
The machine can provide the ability to change cutters. For this purpose, a special modification of the housing is made with the necessary mounting parts. These elements must be strong enough to withstand the loads during operation and at the same time maintain the original location of the edge part.
When the cutter is made, it is sharpened, and cutting edge hardened. After the cutting part is heated, the cutter must be dipped into machine oil. Using slow hardening technology, the surface of the product can be made as hard as possible. In this case, the heated workpiece should cool naturally.
DIY knife sharpening devices: drawings and recommendations
To make a sharpener from a washing machine motor with your own hands, you can limit yourself to a motor from an old Soviet design, for example, SMR-1.5 or Riga-17. A power of 200 W will be enough, although you can increase this figure to 400 W by choosing a different engine option.
The list of parts needed for a DIY sharpening machine includes:
- tube (to grind the flange);
- a nut for fixing the stone on the pulley;
- metal for manufacturing protective casing for a sharpener with your own hands (thickness 2.-2.5 mm);
- whetstone;
- an electrical cable cord having a plug;
- starting device;
- a corner made of metal or a block of wood (for the frame).
The diameter of the flange must match the dimensions of the bushing on the motor. In addition, this part will be fitted with grindstone. On one side, this element is threaded. The indentation should be equal to the thickness of the circle multiplied by 2. The thread is applied with a tap. On the other hand, the flange must be pressed onto the motor shaft using heat. Fixation is carried out by bolting or welding.
Useful advice! The thread should go in the opposite direction relative to the direction in which the rotational movements of the engine are performed. Otherwise, the nut securing the circle will unwind.
The working winding of the motor is connected to the cable. It has a resistance of 12 ohms, which can be calculated using a multimeter. The starting winding for a DIY knife sharpener will have 30 ohms. Then the bed is made. It is recommended to take a metal corner for it.
Some people need sharpening machine for chainsaw chains. You can make such a structure with your own hands from a frame with 3 supports, two spindles, stepper motor(2 kW) and pipes used as holders.
Instructions for creating a stationary circular saw with your own hands
Creating a table for a hand-held circular saw with your own hands is the most important stage in creating the machine, since this structure will house the main parts of the equipment in the form of:
- power unit;
- control block;
- cutting component;
- other components.
Support frame on the table for hand tools acts as a guide for a DIY circular saw. It controls the direction in which the cut is made and fixes the workpiece.

The sawmill is a modification of the circular saw. The only difference is that the disk is located at the bottom. The design of the table for a circular saw with your own hands is assigned the function of a bed. The power unit, block, fixing disk and control system are also installed here.
At the design stage for DIY circular saw drawings, you should take into account some factors:
- The depth to which the material will be cut depends on the geometry of the disk.
- The power level of the electric motor - a specific indicator of 800 W will be sufficient.
- Control system installation area - the control should be located as far as possible from the disk.
- Rotational speed - the minimum acceptable value is 1600 rpm, otherwise color change will occur during the cutting process.
Useful advice! If the table is made under manual option tool, it is recommended to make the tabletop metal. The metal sheet should be equipped with stiffening ribs at the base.

How to make a circular saw from a grinder with your own hands
First, the tabletop is made from sheet material. Markings are applied to it in accordance with the dimensions of the instrument. Using these markings, cutouts are made to install the saw.
- Installing a DIY rip fence for a circular saw made from wooden slats. The element is fixed to the tabletop.
- Groove for stop – these elements are formed on the tabletop using the milling method.
- Installation of a ruler for measurements - the installation area is located at the leading edge of the cutting element. The ruler will be used to control the dimensional parameters of the workpieces.
- Installation of clamps is an additional component for fixing the workpiece.
For a DIY circular saw machine you will need legs. They are mounted taking into account the dimensions of the countertop made of wooden beams with a section of 4x4 cm. Use is allowed. To provide additional stability, stiffeners should be installed between the supports. A control unit is placed next to the workplace. You should not refuse to install RCDs and devices that protect the engine from overloads.

Technology for creating a wood cutting machine
Manufacturing technology of a homemade cutting machine:
- Cutting parts from a corner for assembling a frame ( overall size– 120x40x60 cm).
- Frame assembly by welding.
- Fixing the channel (guide) by welding.
- Installation of vertical posts (2 pcs.) on the channel (bolt connection).
- Assembling a frame from pipes for installing an electric motor and shaft at the required angle (45x60 cm).
- Installing a plate with a motor at the rear of the frame.
- Manufacturing of a shaft equipped with flanges, supports and a pulley (flange protrusion height - 3.2 cm).
- Installation of supports, bearings and pulleys on the shaft. The bearings are fixed to the upper frame in recesses made in the plate.
- Installation of a box with electrical diagram to the lower part of the frame.
- Installing the shaft in the area between the posts. Diameter – 1.2 cm. A bushing should be placed on top of the shaft with the minimum possible gap so that these elements slide.
- Welding a rocker arm made from a channel (80 cm) onto a bushing. The size of the rocker arms must be within the following ratio: 1:3. The springs must be secured on the outside.

Useful advice! Experts advise using an asynchronous motor. This motor is not particularly demanding. For networks with 3 phases, a motor with a power of 1.5-3 kW is required, for single-phase networks this figure needs to be increased by a third. A connection via a capacitor will be required.
All that remains is to mount the motor on the short arm of the rocker arm. The cutting element is placed on the long arm. The shaft and motor are connected using a belt drive. For the tabletop you can use a sheet of metal or a planed board.
Assembling a drilling machine with your own hands: video on how to make a structure, recommendations
A good drawing of a drilling machine from a drill with your own hands is the main condition for acquiring the necessary tools. To create such a machine, you do not need to use special materials or buy additional components.
Components for the construction of a homemade drilling machine with your own hands:
- bed (base);
- rotation mechanism (drill);
- device for supplying;
- vertically located rack for fixing the drill.

In mastering the technology of making a drilling machine from a drill with your own hands, video material can provide invaluable assistance.
Guide to creating a drilling machine with your own hands (how to make a simple design):
- For the rack it is better to use DPS so that the part turns out to be massive or a furniture board with a thickness of more than 20 mm. This will eliminate the vibration effect of the tool. You can use the base from an old microscope or photo enlarger.
- The accuracy of the drilling machine from a drill with your own hands depends on the guides (2 pcs.). They serve as the basis for moving the block on which the drill is located. To make guides, it is best to take steel strips. Subsequently, they will be securely screwed to the rack.
- For the block you need to take steel clamps, thanks to which the rotation mechanism will be securely fastened to this part.
A self-made mini drilling machine requires a rotary tool feeding mechanism. Classic scheme The design involves the use of a spring and a lever. The spring is fixed between the block and the stand.
There are many DIY devices; video material will help you understand this topic.
Features of DIY CNC milling machines
Software is considered an important component in a DIY wood CNC router. Drawings of conventional construction subject to this condition should include additional elements under it:
- LPT port;
- CNC block.
Useful advice! To make your own copy-milling machine for wood or metal, you can use carriages belonging to an old printer. Based on these parts, you can create a mechanism that allows the cutter to move in two planes.
Assembling a wood milling machine for a home workshop
At the first stage, drawings are drawn up for a wood milling machine with your own hands, which include information about the placement of all structural components, their dimensions, as well as methods of fixation.

Next, a support frame is assembled from pipes pre-cut into parts of the required size. For fastening you need to use a welding machine. Then the dimensional parameters are checked in order to begin manufacturing the working surface.
You need to act within the following scheme:
- Markings are applied to the slab and a tabletop is cut out of it.
- If the cutter will be placed vertically, you need to make a cutout for it in the slab.
- The spindle and electric motor are being installed. In this case, the spindle should not extend beyond the plane of the working surface.
- A limit bar is installed.
Be sure to test the machine before work. When the router is turned on, it should not vibrate too much. To compensate for this drawback, it is recommended to additionally install stiffeners.

Assembling a metal milling machine with your own hands
Step-by-step instructions for making a homemade metal milling machine:
- The column and frame are made of metal channel. The result should be a U-shaped structure, where the base of the tool acts as the lower cross member.
- Guides are made from the corner. The material must be sanded and connected to the column with bolts.
- From profile pipe Guides for the console are made with a square cross-section. Here you need to insert pins with screwed threads. The console will be moved using a diamond-shaped car jack to a height of 10 cm. In this case, the amplitude to the side is 13 cm, and the tabletop can move within 9 cm.
- The working surface is cut out of a plywood sheet and fastened with a screw. The fastener heads need to be recessed.
- A vice made of a pipe with a square cross-section and metal corner, welded together. It is better to use a threaded pin as a fixing element for the workpiece.
Pay attention! It is better to fix the rotating element in the frame so that the spindle is directed downward. To fix it, you need to weld the jumpers in advance; you will need screws and nuts.

After this, you need to attach a cone (Morse 2) to the spindle and install a collet or drill chuck on it.
Features of making a thicknessing machine with your own hands
Do-it-yourself thickness planer drawings with complex design involve the use of expensive components:
- bearings with increased wear resistance;
- rolled steel sheets;
- cog;
- pulleys;
- powerful electric engine.
As a result, the cost of producing a homemade surface planer increases significantly. For this reason, many try to limit themselves to the simplest design.
Instructions for a homemade thickness planer for wood:
| Design element | Data |
| bed | Frames (2 pcs.), made using welding based on a corner (4-5 cm). The frames are connected using studs (ground hexagons - 3.2 cm). |
| Broach | Squeeze-type rubber rollers from washing machine. They are machined to the size of the bearings and put on an axle with a diameter of 2 cm. It operates through rotational manual movements. |
| Table | The sanded board is attached to the frame using a bolted connection; the heads must be countersunk. The boards need to be treated with oil (already used). |
| Engine | for 3 phases, power – 5.5 kW, rotational speed – 5000 rpm. |
| Protective cover | Made of tin (6 mm) placed over a frame corner (20 mm). |
Assembling a surface planer from an electric planer with your own hands
To create a homemade thickness planer, you need to place the plane on the block, secure it with a device such as clamps, not forgetting to leave a gap.
Pay attention! The gap size is set taking into account the thickness of the workpiece that will be processed on the machine.
The scheme for making a surface planer from a plane with your own hands is very simple:
- the support beam is fixed on a convenient surface;
- the required gap size is selected by adding layers of plywood;
- The surface planer structure made from an electric planer is attached to the resulting base with clamps.
Two clamps hold the base on the table, the other two hold the plane. After making sure that this fastening is secure, you can start using the tool.

Scheme for creating a wood grinding machine with your own hands
- The optimal width of the sanding belt is 20 cm.
- The sanding cloth of the tape is cut into strips.
- The abrasive tape is applied end-to-end.
- To strengthen the seam, you need to place dense material underneath.
- It is not recommended to use low-quality glue, as it will cause the material to tear along the seam.
- The diameter of the tape shaft in the center should be 2-3 mm wider than at the edges.
- To prevent the tape from slipping, it is recommended to wind it with thin rubber (a bicycle wheel).
Calibrating and grinding machines for wood belong to the group of drum structures. This category is broad and includes many varieties of equipment.
To make a drum sanding machine for wood with your own hands, you can choose the following designs:
- surface grinding – the workpiece is processed within one plane;
- planetary - with its help a flat plane is formed on the workpiece;
- cylindrical grinding – it is used to process cylindrical workpieces.
From the video below you can learn how to make a machine with your own hands grinding type.
Rules for operating a wood jointing machine with your own hands
In handmade designs jointer It is very important to set the equipment settings correctly so that errors do not exceed the permitted values:
- perpendicular – maximum 0.1 mm/cm;
- plane – 0.15mm/m.
You can familiarize yourself with the technology of making a jointer with your own hands using a video.
If during operation a mossy or scorched effect appears on the surface being treated, it means the cutting elements have become dull. To make processing parts with dimensions less than 3x40 cm more comfortable, they need to be held using pushers.
The curved surface of the workpiece after processing indicates that the correct placement knives and work surface. These elements need to be set again.
All of these machines can be useful for home renovations or basic repairs. Therefore, their presence in the home workshop will be useful. Regardless of how the garage is equipped, all machines require careful and attentive handling. You should never forget about safety while working.
For household repairs and work on summer cottage Various power tools are used. Specialized additional instruments and devices are produced for them, many of which can be made with your own hands. It is better to get complex industrial devices ready-made, but workbenches, tables, attachments and almost everything else can be made without the help of others. Handmade devices for power tools can be adjusted to the required technical conditions.
Classification of devices for power tools
Do-it-yourself power tool accessories are usually systematized into the following categories:
- Tools and attachments for processing. These are hand-held devices, which include grinding attachments and bars for grinders and drills.
- Devices for modifying the position, mounting a certain cutting angle, drilling and the rest. These are the main surfaces, standards, guides. They can have different external types, often made of metal or wood.
- Dust removal devices. Similar devices are used to remove sawdust, dust, and shavings from the working plane. It is not so difficult to make such devices with your own hands; as a rule, pre-existing fan holes in the equipment are used for mounting.
- You assemble grinding attachments, structures or bars designed for surface treatment with your own hands. For example, for grinding wooden surface or to clean the alloy, you can use a wooden plate with a handle on top. In its working side it is strengthened sandpaper required grain size. The platform model can be anything, it is only important to choose the right abrasive material.
Diagram of the milling table device
Attachments for power tools vary, but sometimes they are large scale, as is the case with milling machines and saws.
It is recommended to choose an improved table that will contain everything you need without exception for comfortable and non-hazardous work. The most normal look counts milling table, produced in the form of a large board with an opening for a router and a guide board. The scale of the worktop can be different, everything without exception depends on what kind of work will be carried out. The most ideal type is a table with legs of the required height. And the working and guide boards are made from chipboard sheet. In this case, vices and clamps can be taken into account on the surface. It is generally better to make table legs replaceable and provide a backup set.
Workbenches for power tools

To work with numerous devices, it will be necessary to improve workplace. For a home workshop or a car garage, a small, small-sized and universal workbench. It is not so difficult to make it without the help of others; you just need to specifically improve your choice of what functions it is needed for. In general, it is more correct to make a workbench that can be used at any height, including on a table.
Then it will be possible to position the power tool comfortably and change its position if necessary. For work, it is recommended to use various hard woods; a common material is maple, which is easy to process and yet has the required hardness and strength.
To register on the table, it is possible to attach comfortable legs or clamps to the installation. A workbench requires a vice; they are often used in work, which guarantees an improvement in its quality.
Drill attachments
During operation, the drill may need various attachments. They make it possible to simplify work, make it simpler, more comfortable, and faster. A huge number of homemade products are used for the drill, which numerous manufacturers today have taken as the basis for the study of specialized kits. The list of devices that you can make with your own hands is huge.
Accessories for power tools:

Various accessories for power tools are needed in order to make the work more convenient and simpler.
It is not always possible to buy such devices, of course, and they are often only needed for a couple of times. For this reason, it is much easier to make them without the help of others, spending not so much large number time.
Order in the house depends not only on whether every thing is in its place. Every home needs periodic maintenance. If every mechanism in the house works like a clock, then we can say that the owner is fully fulfilling his duties. To maintain order, you cannot do without a workshop and tools. Some of them you can make yourself. The article will talk about the process of assembling tools that will allow you to equip your workshop.
What you can collect with your own hands
With proper skill, you can assemble almost any machine that is needed for processing wood or metal. They will differ from the factory ones in the assembly method, as well as in dimensions. Most often for home use no large units required. There is no problem in building your own milling machine, with which you can beautifully design various slats. To others the right machine, which can be assembled at home is a drilling machine. You can’t do without it if there is a need to drill precise holes in small workpieces. In some cases, assembling a machine involves making a holder for a hand tool, in others it can be assembled from scratch using motors from other devices.

Before you begin assembling any products for your home workshop, you need to clearly define what tasks are assigned to the workshop and what scope of work will be performed. On the one hand, this will allow you to decide what machines will be needed, and on the other hand, it will make it possible to find out whether the available space is enough or whether the workshop needs to be located in another room. It’s good if it’s a separate room, because the noise from working machines can irritate the residents. The easiest way to build a workshop is in a private house, where you can use a basement or garage. A good craftsman has everything organized and in its place, so it is important to take care of practical shelving.
Storage items

Almost any surface in a home workshop can be used to store tools. Based on the location of organizers, the following types can be distinguished:
- wall shelves;
- racks;
- shields;
- floor organizers;
- ceiling shelves.
They can all be located in one workshop, which will make it possible to significantly expand the total area of the room.
Wall shelves

This home workshop design is the most common and frequently used. Building wall shelves is not difficult. The first step is to determine the wall where their placement will be most practical. For example, it could be a wall near which it would be impossible to place a shelving unit. You should not place a wall-mounted shelf in the workshop where you plan to build a shield for hanging hand tools. In some cases, a wall shelf can be placed right under the ceiling. Since shelves in a home workshop are designed to store heavy objects, not soft toys, then the strength of the structure should be higher than that of those used at home. For assembly you will need:
- corner 40×20 mm;
- board or chipboard;
- Bulgarian;
- welding machine;
- roulette;
- marking tool.

The first step is to draw up a sketch-drawing indicating the exact dimensions of the structure for the workshop, which are determined based on the free space on the wall. The sketch also indicates the number of tiers that one shelf will have. The next step is to prepare the corner pieces for assembling the frame. A shelf for a home workshop in which the ends of the racks will be cut at 45 degrees will look neater. This can be achieved by using a square or a special holder for an angle grinder. The first step is to assemble the side faces of the workshop shelf, which can be represented by rectangles or squares. It all depends on the chosen shape of the shelf.

The elements must be absolutely identical so that the design of the shelf for the home workshop is without distortion. After this, the sidewalls are connected to each other by four horizontal crossbars. In this case, the corner must be placed in such a way that the part with a length of 20 mm is at the bottom. It will serve as a support for the board. There is no need to rush to the workshop when welding the shelf frame. It’s worth starting with tacks so that the structure doesn’t move, and then weld it with a solid seam. An excellent assistant when assembling the frame will be corner clamps, which will keep the angle straight.

When the frame is ready, you need to determine how it will be attached to the wall in your home workshop. This can be done by drilling holes in the corner or welding special ears. The first option is more reliable. Next, the seams of the structure are cleaned in the workshop and the metal base is painted to prevent corrosion damage. The last step wooden stands are cut out and placed inside. The shelf is fixed in place in the workshop and is ready for use.
Shelving

Workshop shelving can be assembled in several ways. It all depends on the material used, and this could be:
- metal;
- wood.

Each of these materials is practical in its own way. With the right approach, wood can withstand significant pressure and weight, but the dimensions of such a rack in the workshop will be larger than that of a similar one made of metal. Assembling the entire structure into a home workshop begins with a drawing. In this case, it is necessary to correctly determine the depth of the rack. A comfortable depth is considered to be such that it is possible to reach the edge of the shelf in the workshop by simply extending your arm. Typically, this size does not exceed 50 cm. If the shelving in the workshop will have a ceiling height, then it would be appropriate to have a small stepladder that will allow you to safely remove the necessary tools from the upper shelves.
Pay attention! On sale you can find ready-made shelving for the workshop that has a modular design.
This means that the number of shelves can be varied depending on needs. Often their purchase is cheaper if you take into account not only the cost of materials for self-assembly, but also the time that will be spent on this.

The number and height of shelves in a home workshop are determined by what will be stored on them. Each shelf can have its own purpose. For example, on the lower ones you can place devices or workpieces with a large weight. If it is a power tool, then it makes sense to make the height higher than the highest element that will be stored on the shelf. The assembly principle is similar to that used for wall shelves to the workshop. In this case, it is better to use a corner with large sizes for greater strength. At the same time, it is important to correctly calculate the width of the shelving for a home workshop, so that when using corners with smaller dimensions for shelves, they do not sag.
Shields

Shields are one of the most convenient items you can use in your home workshop. The advantage over other storage methods is that each element has its own place and is in plain sight. The only disadvantage of such a system is the inefficient use of space. Compared to shelves, more of it is required, and fewer tools fit. This is why shields are best suited for storing the tools that are used most often. The advantage of shields for the workshop can be considered their certain versatility. On the shield you can place not only hooks for hanging, but also various small drawers for storage.

There are ready-made shields for sale for the workshop, based on which you can assemble own version. To do this you can use:
- sheet metal;
- plywood.

The assembly principle in each of these cases is similar, only the way of working with the material is different. If plywood was chosen as the base, then there are several ways to proceed. The first step is to mark the sheets that will be used in the home workshop. After that, they are laid out on the surface and the tool is laid out, which will hang on the shield. A fastening in the form of a self-tapping screw is screwed under each tool or it is outlined along the contour to make it easier to navigate later. Next, the sheet is fixed to the wall using self-tapping screws. For fastening, it is better to use bolts with hexagon heads and clamp the sheets through washers.

There is another version of the shield for the home workshop, which uses hooks instead of screws. This design can be considered more universal, since its configuration can be changed depending on needs. The best solution will purchase in advance the metal hooks that are used for shields in workshops. Depending on the distance at which the fixing tendrils are located on the hooks, the sheet is marked. Holes are drilled at the marked points. The shield is fixed on the wall in the home workshop at a short distance from the wall so that you can freely remove and put the hooks in their place.
The metal shield is assembled according to the model of the second wooden version. In this case, the work also comes down to drilling holes at the indicated points. In this case, it is better to use metal with a wall thickness of 0.8 mm. The weight of the tool can cause the metal to bend. There are several ways to solve the problem. One of them is to install additional spacers in the form of corners on the back side of the rack. You can also assemble several separate smaller panels and install them side by side.
Ceiling shelves

Certain areas in home workshops are practically not used, or the ceiling height exceeds 2.5 meters, which will allow free placement of storage items on the ceiling. The easiest and most convenient way is to secure containers in which you can put small things. This is quite easy to do. To implement the entire project in the workshop you will need to make wooden boxes any size. The easiest way would be to purchase plastic containers that are perfect for these purposes. Except plastic containers, you will need metal ones I-beams. If these are not available, then for the workshop you can use U-shaped profile. As a last resort, you can remove one wall from square pipe to achieve the required result.

Plastic containers for the home workshop have special edges along the edges, for which they can be secured. Therefore, it is enough to simply attach the prepared profile to the ceiling in the workshop at such a distance that the containers fit between them. This design is not suitable for storing heavy objects, but a lot of material or tools that are rarely used can be placed there, freeing up space on shelves and racks.
Pay attention! Floor organizers for the workshop can be represented by ordinary boxes, which will have inserts divided into a certain amount cells. It is convenient to store fasteners in such inserts. But if there are enough shelves and racks in the workshop, floor organizers will not be needed.
Workbench

This design is essential for any home workshop. It is on the workbench that all the magic of repairing and constructing any products happens. It is better to make a workbench for a workshop universal, since it will require processing not only wood, but also metal, but if the workshop area allows, then you can make two separate workbenches, which will be more convenient, since wood requires the most careful handling, and metal often requires force. The process of making a wooden workbench for a home workshop will be described in detail in several videos below. It is worth noting right away that to assemble such a structure for a home workshop, you will need some skill in working with power tools. A ready-made workshop workbench will support work with various systems fastenings
A simpler, but no less functional design for a home workshop can be assembled from metal. At the same time, it is easier to build additional holders for shelves and drawers on it. Above is a drawing that can be taken as a basis. Dimensions are adjusted depending on how much space is available in the workshop. The height of a workbench for a home workshop is selected individually, but most often 80 cm is enough, which allows you to work with objects at waist level. It is better if the workbench is securely fixed to the floor. It is also worth setting it according to level. If wood processing is planned on a metal workbench in the workshop, then a special carpentry vice is additionally mounted where it will be convenient. You can use a portable version of the vice, which is fixed with clamping clamps.

Advice! An excellent option would be to make wooden table top to the home workshop, but metal can damage it.
To protect the wooden surface of the workbench, you can lay a metal sheet on top through a gasket made of OSB boards. The thickness of the metal that will be used as an overlay should not be less than 1 mm.
Workshop machines
It will be described below general principle assembling machines for the workshop, which can be taken as a basis, and assembly can be done from available materials.
Wood and metal lathe

It is worth saying right away that on such a lathe in a home workshop it will be possible to process only small metal workpieces. An important part of the machine for the workshop, which will ensure stability of processing, is the bed. You can make it yourself or use a factory one. For self-made you can use a profiled pipe or a strong corner. The two elements are placed at a suitable distance and securely secured to each other by transverse elements. Examples of machine designs for a home workshop are visible in the photos above and below.

As a motor that will rotate the part, you can use a unit from an old washing machine, pump or some kind of machine. A powerful drill chuck can be used as a tailstock. In this case, it will be possible to insert a cone or drill into it, if required during processing. The headstock can be purchased factory-made or made according to the model in the photo.

In this case, a metal axle will be required, it is better if it is made of hardened steel. You need two holders with bearings for the axle. On one side, a pulley is fixed, and on the other, a chuck into which the workpiece will be clamped. The engine on such a workshop machine is installed next to the headstock, and the force is transmitted through a belt. The speed can be varied by using a frequency module or by moving the belt over a pulley. You will also need a support element, which is made according to the schematic drawing below.

Video about self-assembly wood lathe is below.
Milling machine
A milling machine for a home workshop is also quite easy to assemble. One option is to use a ready-made hand router, which is indispensable for an owner who likes to make something out of wood in his workshop.

For manual machine You can make a special workbench for your home workshop. The photo shows an example of such a table. At its core, it is a small table in which there is a hole for a cutter and a mount for the router itself. If you wish, you can do this in the workshop and on a ready-made workbench. It is important to choose the most convenient place for fixing the router. During fastening, it is necessary to correctly calculate the maximum overhang of the cutter. When working this way, you will need to lift the factory support completely on a hand router. Switching on and off can be done via an extension cord with a switch. The disadvantage of this method is the need to manually adjust the speed directly on the router itself. A video about a homemade milling machine is below.
Advice! If there is an engine of the required power and frequency converter you can build a stationary milling machine in the workshop.
To do this, the motor is attached to the bottom of the table. A cutter chuck is mounted on the motor shaft. The connection is made through a frequency converter, which will vary the speed.
Drilling machine

A drill can be used as a drilling machine in the workshop. But for this it needs to be fixed correctly. This can be done using a holder, which can be stationary for the workshop or portable. There are many various options assembly of such a drill holder for the workshop. One of them is shown in the video below. Assembly will require materials that are within walking distance in every hardware store.
Circular saw

Stationary circular saw for a workshop can be made in a similar way as a holder for a hand router. It is enough to make a slot in the countertop for the slab sheet and mount it when required. The only drawback of this solution is the reduction in cutting depth. This can be corrected by installing it on a metal tabletop that is smaller in thickness. A video of the assembly of this design is below.
Resume
An electric drill is a compact, lightweight, easy-to-use and transport machine. It is indispensable in the home workshop, garage and construction site. In addition to drilling operations, it can be adapted to perform turning, milling, grinding and other work. Many craftsmen use drills to create homemade machines and devices for the home workshop. They are used in the garage for simple wood and metal turning work.
Workshop equipment
Not always with help hand drill can be drilled precise hole. If such a need arises, use a stationary drilling machine. It is certainly accurate and safe, which is what is needed when processing solid elements with a large-diameter drill.
You rarely see such a machine in a garage or workshop, mainly because of the price, it is expensive, in addition, it is bulky, takes up a lot of space, and is rarely used. The drill on a tripod is a lightweight, easy-to-transport design that will fulfill all the requirements for a desktop drilling machine.
Stationary drilling device
 A homemade machine based on a drill will ensure high drilling accuracy in any conditions - it can be installed on a workbench tabletop or on the floor. It consists of several elements. The main ones, of course, are the base and the column. The first part is responsible for the stability of the machine installed on a flat surface. The second, in turn, allows you to smoothly and very accurately move the drill up and down when drilling.
The steel column does not deform even under the greatest pressure to ensure perpendicular drilling. In addition to high accuracy, it is worth mentioning operational safety. If the workpiece is securely secured in a vice on the workbench, then there is no risk of injury during drilling.
Bench-top drill-based machine provides precise drilling of holes in parts complex shapes, for example, round, oval, and also at an angle of 90 degrees. A home craftsman cannot do without it, where the tool is not used intensively. To make a desktop vertical drilling machine based on a drill, you can use ready-made stands or tripods. They are quite suitable for use.
As the manufacturer guarantees, the stand for vertical drilling will be useful wherever there is a need to perform drilling operations during repairs metal structures, wooden parts. The product is made from quality materials, provides stability and reliability of fastening, due to which the quality of work is good. This type of product is great for reducing work time.
In private garages you can find homemade machines, where tripods from photo enlargers and overhead projectors, jacks and car steering racks of a suitable design are used as a stand for the drill. There are machines made entirely of wood. A drill is a universal mechanism with which you can construct homemade woodworking machines.
Woodworking machine
Using a drill as electric drive, you can assemble homemade machines and accessories for the garage. For example, lathe on wood in a few days from a board and a handful of screws. Nobody makes drawings for making machines, everything is created according to an invented project.

In addition to homemade drilling and turning equipment for a home workshop, you can make a wood milling machine with your own hands. For the drive, you can choose an electric drill or hand router.
Bed for grinder
 The grinder, like the electric drill, quickly entered our lives and took its place universal tool. It can be used to cut pipes, sheet metal and rods, stone and tiles, grind and polish. Wide Application she found it in a car service when repairing car bodies. For ease of use, you can make a cutting machine.
To make it cheaper and easier, they make it from wood. As in every machine, the base is made, the material can be chipboard measuring 400 x 400 x 20 millimeters. From below, attach the legs in the form of two slats 40 x 40 millimeters to the slab with screws. Attach a block 100 millimeters high and 50 millimeters thick to the top of the slab. A door hinge with a long plate is attached to the block with screws. The grinder is attached to the plate using a clamp. Everything, a homemade device for a home workshop that acts as a cutting machine is ready. For safe work A machine vise is installed on the base.
Garage sharpener
 Emery, electric sharpener, sharpening machine - this is what the tool is called, without which a workshop, a private garage, and a car service center cannot do. The sharpener is the most necessary tool for car repairs, making plumbing products, sharpening tools, and polishing metal surfaces of crafts. It is not necessary to buy this useful mechanism; you can get by with a homemade one based on an electric drill. First you need to choose a place on the table and use two wooden brackets 40 millimeters thick and two screws to secure the drill.
To support your hand or tool, you need to make a rest. To do this, you can use thick-layer plywood 20 millimeters thick. The tool rest is attached to the table and placed under the emery wheel. In order for the chips to fall freely on the floor and be able to use sanding wheels of different diameters, a rectangular hole is cut out in the tool rest with a width slightly larger than the thickness of the abrasive tool. To adjust the hand rest different heights it is necessary to install a set of plywood plates and secure them with screws. Cover the upper plane of the tool rest with a steel plate. That's it, the useful power tool for the home is ready for use.
Milling machines
There is an opinion among woodworking experts that the router is the most necessary tool for a carpentry workshop. It can even replace some power tools, such as a circular saw, drill, and even a jointer. There are two main types of routers:
- submersible;
- edge
The plunge cutter works as follows: the cutter is immersed in the material and moves along a given contour. The edge cutter does not allow the cutter to be immersed; its milling depth is set in advance and fixed. Based on power, milling cutters are divided into three categories:
- small from 500 to 1200 watts;
- average from 1100 to 1900 watts;
- powerful from 1900 to 2400 watts.
 Low-power milling cutters are lightweight, compact, maneuverable, easy to use and allow you to perform all the tasks of a home workshop - this is best choice for home. Is it true, low power imposes its own limitations. The device has a diameter of up to 32 millimeters, there are restrictions on length. If you need to make boxes and frames, this machine is quite enough.
Using an electric drill or milling cutter you can make useful device for do-it-yourself power tools - a milling table. This device will come in handy if you need to make profile products made of wood. For these purposes, you can adapt an ordinary table by strengthening the tabletop sheet metal two millimeters thick.
 A router is attached to the tabletop under the table. A thrust board is installed on the table, which moves under set size and is fixed with clamping bolts. The cutter feed mechanism is a lift, made from a regular car jack, which is installed on metal brackets under the table. The finished homemade product is pleasing to the eye.
By changing cutters you can perform various milling jobs. Overall, the device is a professional wood milling machine for the home workshop. It is convenient to select grooves, mill quarters on frames, and process the configuration of skirting boards.
An electric drill, an angle grinder, and a hand router are tools on the basis of which you can create devices and multifunctional machines that greatly facilitate the work of a home craftsman.
Today for home renovation and work on a suburban area, a variety of power tools are used. Special auxiliary devices and accessories are produced for them, many of them can be made with your own hands. It is better to purchase complex technical devices ready-made, but you can make workbenches, router tables, attachments and much more yourself. Homemade devices for power tools can be adjusted to the required conditions.
Classification of accessories for power tools
They are usually classified into the following groups:
- Tools and attachments for processing. These are hand-held devices, which include grinding attachments and bars for grinders and drills.
- Devices that are designed to change position, set a specific cutting angle, drill, etc. These are supporting surfaces, templates, guides, etc. They can take on a variety of appearances and are often made of metal or wood.
- Dust removal devices. Such devices are used to remove sawdust, dust, and shavings from the working surface. It is not so difficult to make such devices with your own hands; usually existing ones are used for fastening. ventilation holes on the equipment.
- You assemble grinding attachments, blocks or bars intended for surface treatment with your own hands. For example, to polish a wooden surface or clean metal, you can use wooden plate with a handle on top. Sandpaper of the required grain size is attached to its working side. The platform can have any shape, it is only important to choose the right grinding material.
Return to contents
Milling tables

There are various accessories for power tools, but sometimes they have overall dimensions, as is the case with milling machines and saws. It is recommended to assemble a good-quality table that will have everything you need for comfortable and safe work. The most simple option is a milling table made in the form of a large board with a hole for a router and a guide board. The dimensions of the worktop can be different, it all depends on what kind of work will be performed. A more advanced option is a table with legs of the required height. The working and guide boards are made from a sheet of chipboard. A vice, clamps, etc. may be provided on the surface. It is best to make the table legs removable and provide a spare set.
Return to contents
Workbenches for power tools
To work with many tools, you need to organize your workspace. A small, compact and multifunctional workbench can be indispensable for a home workshop or garage. Making it yourself is not so difficult; you just need to clearly define for what functions it is needed. It is best to make a workbench that can be used at any height, including on a table.

Figure 1. Basic elements of a workbench.
Then the power tool can be conveniently positioned and its position can be changed if necessary. For work, it is recommended to use any hard wood; a popular material is maple, which is easy to process and yet has the necessary hardness and strength.
To fix it on the table, you can attach comfortable legs or clamps to the device.
A workbench requires a vice; they are often used in work. An example of the main elements of a workbench is shown in Fig. 1.
Return to contents
Drill attachments
A drill may require a variety of attachments during operation. They make your work easier, simpler, more convenient and faster. A large number of homemade products are used for drills, which many manufacturers today have taken as the basis for developing special kits. The list of devices that you can make with your own hands is large.
Accessories for power tools:
- Limit attachments. During repairs and construction work it is necessary to prepare holes of the required diameter to a strictly specified depth. This is why a fairly simple nozzle is used, which consists of 3 parts. You can do it yourself, and the hole parameters can be easily and quickly changed if necessary. The first part of the device is a holding clamp; it is placed directly on the tool body. This clamp has 2 holes; guide stops in the form of 6 mm metal rods are inserted into them. The rods are bent if necessary. During operation, the required drill angle is set to prepare holes with the specified parameters.
- Circle cutters are a special device that looks like a large compass. Nozzles are assembled from metal rods. The vertical part acts as a stop; a special thickening is made at its end. A horizontal part is attached to the vertical part, on one side of which a comfortable handle is made, and on the other side a ring is welded. For the device, it is necessary to provide the diameter of the fastening ring so that the drill does not slip out and is held tightly in it during operation. It is best to glue a rubber ring inside, which will help make the fixation more reliable.
Various DIY accessories for power tools are necessary to make work more comfortable and simpler.
It is not always possible to buy such devices, and often they are only needed a couple of times. Therefore, it is much easier to make them yourself, spending not so much time.
