Putty for models. We make our own and Tamiya branded ones. How to putty prefabricated scale models? Homemade putty for plastic models
Hello. Preparations for the holidays are successfully completed, so I decided to break the silence. Moreover, there are at least 11 more articles in the drafts.Not long ago we looked at some methods for assembling a model, which allow, if not avoiding, then at least minimizing putty work.
I probably won’t be wrong if I call this work the most tedious stage.
To many (but not all) something will seem too simple and has been known for a long time.
Let's try to cut corners a little.
Let's get started
The rules as old as time apply here:
1. Take your time
2. The better (more often and more expensive) the materials used, the faster and better the result.
I met many people who expressed some special opinion regarding this or that model putty in the form of a paste in a tube. At one time I tested Humbrol, Revell and Tamiya, as well as several cheaper and little-known analogues. I was not satisfied with the quality of any of them.IN at the moment completely switched to:
First, we will try to get rid of unnecessary work and then restore the jointing. I protected the jointing lines with the first quality tape I could find.

Next, apply a layer of liquid putty with a thin and flat brush. The layer is applied with a small slide, taking into account the shrinkage of the material.

It is necessary to wait until the putty begins to dry out a little - a matte crust will be the signal. Then, using a cotton swab dipped in solvent, we remove excess chemically. It does not damage the plastic, washing away excess putty.


Consistently, without strong pressure, we “smooth” the joint.

At this stage, a thorough drying of 10 hours and an audit of the work done is required. In most cases, re-puttying is not required, but if necessary, everything can be repeated.
The seam is first sanded with 1000-1200 grit sandpaper, then 1500-2000 grit, depending on the circumstances. Please note that the skin MUST be damp and washed regularly. Otherwise, instead of sanding, you'll just create more scratches.
As you can see, you can get creative even with such tedious work as putty.
Hello. Preparations for the holidays are successfully completed, so I decided to break the silence. Moreover, there are at least 11 more articles in the drafts.Not long ago we looked at some methods for assembling a model, which allow, if not avoiding, then at least minimizing putty work.
I probably won’t be wrong if I call this work the most tedious stage.
To many (but not all) something will seem too simple and has been known for a long time.
Let's try to cut corners a little.
Let's get started
The rules as old as time apply here:
1. Take your time
2. The better (more often and more expensive) the materials used, the faster and better the result.
I met many people who expressed some special opinion regarding this or that model putty in the form of a paste in a tube. At one time I tested Humbrol, Revell and Tamiya, as well as several cheaper and little-known analogues. I was not satisfied with the quality of any of them.At the moment I have completely switched to:
First, we will try to get rid of unnecessary work and then restore the jointing. I protected the jointing lines with the first quality tape I could find.
Next, apply a layer of liquid putty with a thin and flat brush. The layer is applied with a small slide, taking into account the shrinkage of the material.
It is necessary to wait until the putty begins to dry out a little - a matte crust will be the signal. Then, using a cotton swab dipped in solvent, we remove the excess chemically. It does not damage the plastic, washing away excess putty.
Consistently, without strong pressure, we “smooth” the joint.
At this stage, a thorough drying of 10 hours and an audit of the work done is required. In most cases, re-puttying is not required, but if necessary, everything can be repeated.
The seam is first sanded with 1000-1200 grit sandpaper, then 1500-2000 grit, depending on the circumstances. Please note that the skin MUST be damp and washed regularly. Otherwise, instead of sanding, you'll just create more scratches.
As you can see, you can get creative even with such tedious work as putty.
In previous articles, since we talked about using putty for a very narrow and specific purpose, it’s probably worth telling you about using it for its intended purpose - for sealing seams.
In general, this very puttying of seams is a tedious, long and dusty task and the post is quite long, so make yourself comfortable, pour yourself some tea and delve into it.
At a certain moment of creativity, any modeler asks the question: what putty to choose, how to putty cracks correctly, what sandpaper is better to use?
Despite all the obviousness and apparent simplicity of the answers, not everything is so simple. Often, when you look closely at the work of experienced modelers online, or even live, at exhibitions, you notice unfilled seams, shriveled or under-sanded putty, and other delights. And just by picking up your old models, which previously seemed normally assembled, you understand that there are many pitfalls here.
Firstly, the more large gaps and seams a model has, the worse it is assembled. A fair portion of them can be eliminated at the gluing stage by adjusting and sharpening the parts. Yes, and high-quality gluing will help here. So collect models wisely without haste. Then you will have to fuss with putty and sandpaper much less.
Let's start with the most important thing - the necessary consumables. In addition to the victim itself in the form of a model, we will need putty and abrasive. You should not use construction consumables as putty for models. Water-soluble putty for wood seems to be a very attractive option, but in fact it does not stick well to plastic, does not tolerate cutting jointing and is afraid of moisture. And it can ruin an already finished model.
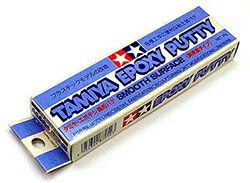
- Basic nitro putty, better fine-grained, best option- finishing (white) putty from Tamiya or Hansa. This putty is suitable for filling most small cracks, smoothing out ledges, sink marks and other small surface irregularities. It dries quite quickly (2-3 hours before processing), does not crumble, and is easy to process. But! You should not apply it in a thick layer or try to seal large holes and ledges with it. The putty shrinks a lot, and a thick layer can eat the plastic and not harden inside.
- Among the shortcomings ordinary putty and the need for the second follows. Large gaps, of course, can and even need to be sealed with strips of plastic (we select a strip of plastic according to the size of the gap, glue it there, putty on top), but this is not always possible. Where the joint is too intricately shaped, where there is simply a ledge along a curved surface, etc. This is where two-component putty comes to the rescue. Good choice- two-component epoxylin from Tamiya. This putty does not shrink and can be used to fill any holes. To make it convenient to work with epoxylin, read the instructions. It needs to be moistened with water. And in order for it to stick well to the plastic, you can simply apply model glue to the place where we will glue the putty. Then she will not strive to move away from plastic. In addition, it is worth noting that after drying, this putty is harder than plastic and you should start processing it with large sandpaper numbers (400). After filling the gap with this putty, the surface should be finished off with regular putty. In addition, from two-component material you can sculpt various under-molded sections of parts, wing edges, etc.
- It often happens that after filling cracks or cutting jointing on the surface of the model, after priming, small scratches, shrinkage and other very small, not deep, but noticeable appear problem areas. Especially for this finishing work It’s worth buying either liquid putty or liquid primer.
In addition, ordinary nail polish remover, without acetone, or primer solvent from Tamiya will be useful.
For what? You can use it to wash off regular nitro putty simply by soaking a cotton swab in it. This comes in very handy if you have used putty on some relief parts of the model, or are working with cabin lights and other delicate places. If there is simply a gap at the junction of parts in such places, without a ledge it is enough to apply putty, wait about an hour and wipe off all excess with a cotton swab dipped in nail polish remover/solvent. As a result, the surface of the model will not be touched by sandpaper, and the gap will be sealed (this will be especially useful for fans of armored vehicles on models with a lot of rivets - you can seal the gap and save the rivet).

It is better to take a waterproof sandpaper with which you will sand the seams. It is worth starting processing with coarse numbers (how coarse depends on the situation) 400-600 and ending with smaller numbers 1000-1500. It is worth sanding with water, so that the skin does not clog, in a circular motion. At the same time, being careful not to wave the sandpaper too much and not to damage the surface of the model around the place of puttying.
Now a few words about the process itself.
There is a gap/seam/ledge. And we must overcome it. Degrease the surface. We take putty. Spatula/match/toothpick. And we apply it to the right place. Try to press the putty into the seam. At the end, you can make out the putty along the seam with your finger, if you are not too lazy to wash your hands. If the seam/ledge is large, apply putty in several layers, with intermediate drying, or use a two-component solution.
If there is a lot of relief surface of the model around the seam and you need to preserve it, glue tape along the edges of the seam, with a border of a couple of mm, as in the photo.


If the joining of the model is very lame, then after applying the putty the model will look rather untidy. But don't be afraid of a bunch of putty. It's better to tinker with sanding it than to end up with a clumsy seam. We wait until the putty dries and sand it. Don't forget about water. Notice how little putty is left on the model in the end and how the putty looks when sanded to zero. It should remain only in the seam/ledge itself, but not on the surface of the model.


Remember, applying/processing putty alone is not enough. This is a common mistake. On a seemingly perfect seam there will be small shrinkages and other imperfections that will come out at the priming stage.

The sanded seam should be examined from different angles, in different light. Then problem areas will become noticeable. It is better to do this after priming and be prepared for the fact that the seam will have to be puttied over again. Moreover, it is better to let the seams dry for at least a week so that the putty settles and does not bring any “surprises”. You won't have to do much puttying, and you might be able to get by with liquid putty. For example, the joint on the center section of the Su-2 was puttied in two approaches, with drying for about five days between them.


After priming, the joint is not visible despite the fact that the light falls exactly on it. You can guess where the seam was only by the white putty showing through slightly from under the ground.
Primer is a mandatory step. It not only improves paint adhesion, but also reveals putty jambs and evens out the color of the surface. After all, not every paint will cover white putty well on black plastic. And you need to be prepared for the fact that you will have to prime the model a couple of times. First, all of it, and then the places where the putty was sanded.
We remind you that you should approach the process of sealing seams carefully and without hackwork. A shrinking or unsealed seam kills a beautifully painted model. It’s better to sit an extra day with the skin in your hands than to kill an otherwise excellent model with carelessness.
And of course - watch what you putty! Often there should be a seam at the junction, and sometimes under hot hand beginners find the right cracks and joints. So be careful not to turn the model into a solid blank without seams. And don’t forget to cut the damaged jointing lines again.
Good luck and stay tuned!
Next time we will finish the story about putty by talking about using superglue for these purposes.
So, if you are a novice modeler, then most likely you have already asked the question - how and how to deal with cracks and scratches that occur on the model body during assembly. It's very simple - you just need to use putty.
putty- This is most often a paste-like or powdery substance intended for leveling the surface between model parts.
Currently, a huge number of types of putty are produced and they all differ in their properties.
The right choice putty depends on large quantity factors such as
model material
seam width, or scratches
seam location
Types of putty:
- Putty
- Epoxy resin
- Automotive putties
- Super glues
In most cases, a special nitro-based modeling putty - Putty - is suitable for bench modeling. The putty comes in a metal tube, in gray or white, is applied tightly and dries quickly. It is possible to liquefy it to the desired consistency using a native (or domestic 600th) solvent. There is a drawback after completely dry- the putty is fragile and shrinks a lot. For this reason, Putty is not suitable for sculpting figures. If putty diluted quite thinly, it must be applied in layers, allowing time for each layer to dry completely. You need to remember - the more the putty is diluted, the stronger the shrinkage will be and the longer it will take to dry.
Model putty almost all well-known brands produce: Tamiya, Revell, Humbrol, Model Master, Italeri
 The use of this type of putty clearly goes beyond simply filling cracks and seams. For example, it is very convenient to use when making dioramas. - represents two fine-grained materials that harden only from thorough mutual mixing of the components. Well-mixed putty is applied to the model using a spatula or pressing with your fingers with little force.
Ideal for sculpting figures, making and copying parts for aircraft, tanks and other equipment. After thoroughly mixing the two components during hardening, a moment comes when the putty does not stick to the model or to the fingers. This is very convenient when sculpting and giving the desired shape.
It takes 24 hours for complete hardening. You can reduce this time by placing it on the battery.
 - two-component polyester putty. - does not shrink and dries quite quickly and is suitable for those that require puttying in large volumes.
To prepare putties To use, you need to squeeze the putty and hardener in a ratio of 50:1 onto a hard surface and mix thoroughly in a circular motion. For better stitching, it is best to use a miniature flat spatula.
The main disadvantage of this type of putty is its strong and bad smell, for this reason it is best to work with it in a ventilated area.
Keep in mind that if remains sticky even the next day, then most likely it was mixed with a small amount of hardener or it has simply expired.
(green)
 Two-component epoxy putty. Consists of two ribbons - blue and yellow, when mixed it turns out green. After obtaining a uniform green color, the putty is ready for use. For this reason, its name is common among modellers - brilliant green. The blue tape is the hardener, the yellow tape is the base material. The more blue, the stronger the putty. By the shade of green you can control the properties of the mass. To ensure that the putty does not stick while working, it is necessary to wet the tool and hands. Working putty can be stored in a container and refrigerator.
Other puttying methods
There are other types of materials for the same tasks, but which are not model putties.
Epoxy resins
Conventional two-component epoxy resins can also be used as a placeholder. There are different varieties, from hardening in 5 minutes to 24 hours. The main advantage of this type is that they practically do not shrink and do not destroy the plastic. Disadvantage - they do not stick well, unlike those made on the basis of solvents.
Automotive putties
This is probably the most popular type of aggregate developed for non-modeling purposes. There are a lot of them. Automotive putties are usually solvent-based and adhere well to plastic. And for this reason, they become very strong when completely dry.
Super glue
Superglues are good to use if you need to fill small cracks or scratches, as they fill the space without bubbles. Super glue practically does not shrink. The speed at which the glue dries completely depends on air humidity.
How did you understand that it doesn't exist? ideal material for all tasks. Each of them has its pros and cons. By understanding all the differences and putting them into practice, you will get best experience, which will take your models to the next level.
>> >> Putty in bench modeling
Now, during the assembly of a custom-made An-12 from Roden, the model has to be puttied a lot, with different types of putty. Therefore, I decided to write a short review on putties for models.
In the mid-80s - early 90s, when I was involved in a ship modeling circle, the most popular putty for models was nitro putty of the NTs brand, gray. She puttyed everything: fiberglass hulls, soldered superstructures and wooden blanks, because nothing else was widely available. Then I started working on plastic models and again, during the assembly process, it was necessary to putty them somehow. If anyone knows about NOVO-FROG products and vacuums, he will understand what I’m talking about. In the early 90s, our modelers, with rare exceptions, had neither seen nor even heard of overseas chemistry for modeling. All available means were used for the work. For plastic we tried the same “NTs”, but it was not possible to cut seams on it, it crumbled and did not adhere very well to plastic surface. The most acceptable results were obtained when the sprue was dissolved in . Now, with the advent of all kinds of chemistry for models, you need to clearly understand what is what and how to use it. Putties, roughly speaking, can be divided into two types.
1) one-component nitro-based
2) two-component epoxy
The first type includes compositions from various model manufacturers: Tamiya, Revell, Humbrol, Italeri. In my opinion, the most best results gives a product from Tamiya.


It dries quite quickly and after processing gives good surface. It cuts jointing well. At one time, I tried putty from Humbrol, but when cutting the seams there were chips. When working with one-component compositions, I encountered one unpleasant issue: after priming and then painting the surface with nitro enamels, shrinkage appears. Thus, when filling a gap with Tamiya one-component putty on the Me-262 model, after painting, a gap appeared as a result of shrinkage. It is possible that this type is designed for paints based on white spirit or water based. By the way, when communicating with colleagues who also use nitro paints, it was not possible to collect clear statistics. Some experienced shrinkage effects, others did not. It is quite possible that this depends on the area being puttied, the thickness of the layer and the type of solvent used to thin the paint. So, when working, you need to be careful so that there are no unpleasant surprises after painting. It is worth adding that car putties can be used as putties for models. Fortunately, they are now large selection, there are also some pretty good one-component ones. To be honest, I haven’t used these myself, but judging by the reviews of my colleagues, some very successfully use automotive chemistry of this type for modeling.
The second type includes two-component putties, consisting of the mass itself and a hardener. The preparation of the working composition occurs by mixing the components in the required proportions. This must be done very carefully, having first read the instructions. For example, let's take a two-component putty for Tamiya models.

It consists of two identical plates and is mixed in a 1:1 ratio.

You can mix its components by mashing it with your fingers. After this, you get this sand-colored mass.

The working mass is quite hard and cannot be applied with spatulas by spreading it. She's good at closing up large gaps, you can also sculpt something from it. This is what the putty parts of An-12 engines look like. It is better to stuff the working compound into the cracks with a spatula dipped in water.

And here, on the F-86F Saber model from Academy, I built up the tail section by sculpting.


And this is what the installed and fixed stern tubes look like on the S-100 radio-controlled torpedo boat.

As in the case of one-component putties for models, automotive chemicals can also be used here. Good results obtained by using Body Soft automotive putty.

It also consists of two components and is mixed in a ratio of 1:100 (100 parts of putty are taken for one part of hardener). Increasing the amount of hardener reduces the curing time. This putty has a pungent odor, and it is better to work with it in a well-ventilated area. It is easily applied with a spatula by spreading. Using Body Soft, I sealed the sink marks on the An-12 model.


Separately, it is worth noting the homemade putty, based on glue for models and sprue. Today, even with a huge selection of specialized chemistry, I personally have not refused it. I use it to repair small scratches, chips, and sink marks. Over many years of using it, I came up with my own recipe. To prepare homemade putty for models, I use: dichloroethane, white polystyrene (trimmings polystyrene sheet or sprues from Revell ship models), and as a filler I use a little talcum powder to prevent bubbles.

To do this, you can use regular glue for models, for example, from the Zvezda company, instead of dichloroethane, but I liked working with it more, although this substance is more toxic. Depending on the thickness of the layer, the part can be processed in about a day.
In conclusion, I want to say, like everything in modeling, the putty process is creative and requires experimentation. What and how to use is determined empirically; there are only basic recommendations. There is no one universal putty for models, it is better to use several different types, most suitable for their tasks and operations.
