How to make a round lamp. DIY lamp (58 photos): options for desktop, pendant and wall lighting design. Rope Sun
Handmade items fill the house with special warmth and comfort. Plus, they are exclusive. We offer an overview of lamps that will completely change the atmosphere in the room, turning into an object of envy from the groans of friends and relatives. Moreover, they are made from everyday items that are usually thrown away.


A cardboard bag for juices or other drinks is a common thing in most homes. Most of the time it gets thrown away. But the Malay designer Edward Chu spent a lot of time to cut them into hundreds of strips and build amazing lamps from them without a drop of glue, a simple origami principle.

Yaroslav Olenev proposed to make lamps from disposable plastic spoons and became the winner in the nomination "Ecology and Design" from the magazine "Future Now".

Not less than original application I also found Natalie Simpson for ordinary wooden hangers. But they look amazing in the form of a chandelier.


Kevin Chempeny must be given credit, not everyone has the strength and patience to string 14 thousand bears to get a chandelier.

Tira Hilden and Pio Diaz have their own vision on the problem of housing lighting. Thanks to their lamps, the room becomes like a forest. All walls come to life and turn into trees.

Talented welder Matt Ludwig was also an excellent designer. For the JJ's Red Hots restaurant, he made an incredible original chandelier from the old drum set.

Texan artists Joe O'Connell and Blessing Hancock made stunning lamps from old bike parts and hung them in a tunnel under the highway.

It will probably be difficult to find a more original chandelier than a pumpkin from a Polish artist. It carves stunning patterns on the peel that do not repeat.

Felt hat lampshades from Jeeves & Wooster look original and stylish.

Once Heather Jennings saw an amazing Rhododendron chandelier in the store, only it cost more than $ 800. Then the designer decided that she could do just as well with her own hands. To do this, she needed paper molds for cupcakes.
11. Chandelier in the kitchen

A chandelier made of ordinary metal tetrahedral graters will look incredibly beautiful.

Still fresh in my memory are vases and candy bowls made from openwork napkins. Now it's time to knit chandeliers.

Fansois Lego offers a strange option, he believes that the best way to store cutlery is a chandelier.

A large cloud is cut out of wood, but the rest and the switch are made of cardboard.

Several globes can make a wonderful cascading chandelier, great way illuminate the staircase.
Original lamps and lampshades with their own hands. Ideas, master classesDIY lamps and lampshades. Ideas, master classes
Hi all!
Creating or decorating lamps and lampshades is not only incredibly interesting, but also quite useful: it allows you not only to create a unique item, and in full accordance with the interior of your home, but also to save a lot of money. It is enough to purchase the simplest lamp for little money and beat it to your liking. And there are a lot of options for what and how to do, in a variety of techniques, using a variety of materials.
I picked up ideas for creating and decorating lamps for you and me, I hope you can choose for yourself suitable option:) Happy viewing!


The lampshade is decorated using decoupage technique, the base of the lamp is made of books

Decor metal frame lampshade with feathers - very stylish :)

Quite often, fabric or paper flowers are used to decorate lampshades, the result is very romantic :)
Fabric flowers with candle processing

Chintz convolutions are used as flowers here.

Twisted fabric flowers


Flowers used here


The flower is made of a cotton strip of fabric, strung on one side and gathered into a bud.

Spiral newspaper roses

The bottom of the lampshade is decorated with spiral paper roses.

Decor of an IKEA lampshade with paper flowers

Lampshades made of lace and knitted napkins look very beautiful.

Shaped with glue


A balloon is inflated and lace napkins are applied to it with glue. After drying, the ball is pierced, deflated and removed.


Highly beautiful option: used as the base of the lamp bird's cage, the lampshade is decorated using decoupage technique with obsolescence.

Even an umbrella can be used for a chandelier :)

Even shreds-trimmings of fabrics will go into action: wound, tied in a knot. This option will fit perfectly into the design country house or children's room.

Buttons


For the manufacture of lamps, various glass containers are often and successfully used - jars, bottles. A little lower I gave a master class on the manufacture of such a lamp.

A bottle as the base of a lamp - below is also a similar master class

It is a little more complicated here - a hole is drilled at the bottom on the back of the bottle through which the cord is inserted.

The lamp is made of figured metal sheet


The origami technique has been successfully used to create lampshades


Fabric strips glued to the base of the lampshade

Lampshade from various retro leaves

Lampshade from a basket - why not? :)

The second life of a metal colander

Unnecessary forks-spoons created a very interesting version of the chandelier :)

Very nice solution: stretched over the frame metal grid and the poultry house was beaten. I think for a child's room.

And here's another bird theme :)


Painting a lampshade with acrylic paints


Thin veneer lampshade

The base of the lamp is glued with seashells

Knitted lampshades - look very cozy :)


Lampshade decor with commemorative photos and slides


The flowers on this lamp are the bottom of plastic bottles :)

Lampshades covered with paper circles

Vegetable lampshade :) I think it’s still hot for the flower there :)

Lace lampshade

Decoupage technique is also applied here.

Highly interesting solution- wire as an art object :)

The lampshade is decorated with strips of fabric

branch lamp 
The lampshade is decorated with crumpled-compressed coffee filters (cupcake molds)

Glass vase lampshade

Lampshade base - unnecessary toy soldiers, glued and painted with spray paint

Creative lampshade made of strips of felt

Lampshade made of ping-pong balls :)

Floral decor

And many, many more ideas...


Master class on making a lamp from a jar with a metal lid from Tom & Brit (bestofinteriors.com)

Punch holes with a nail to create a hole

We insert the cartridge

Paint in one color

We screw the light bulb and insert it into the jar

The lamp is ready :)
Paper lamps from varrell.com


We need a picture of a castle


Cut out, cut through the windows, glue


We put inside spotlight battery powered

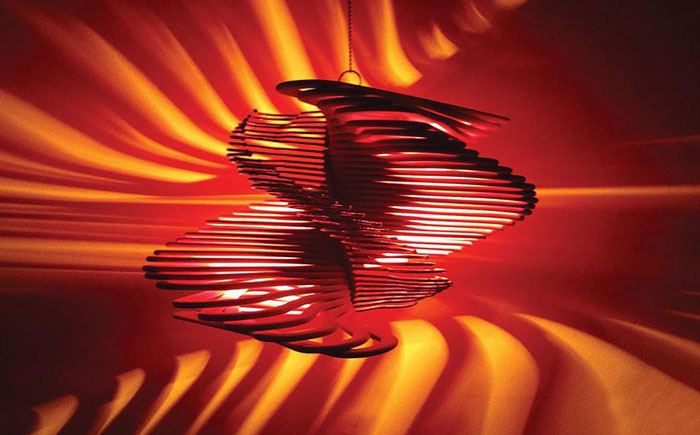
Rope chandelier by Sarah M. Dorsey (sarahmdorseydesigns.blogspot.com)

We will need a rope, Mod Podge glue (can be replaced with diluted PVA), a ball

To create the wavy shape, Sarah used wooden slats. We lay out the form, coat with glue for fixing.

After drying, lay out on a ball and coat with plenty of glue


After drying, remove the lampshade from the ball and paint it with white spray paint - Sarah has four layers


Highly beautiful lampshade from grandmother's squares from the author of the resource Aboutgoodness.com 


We cover the lampshade with fabric

Bend the strip of fabric in half lengthwise and twist it into a roll


Straighten slightly

Apply glue to the fold and glue to the base


Kiri's lampshade base tutorial (ilikethatlamp.com)

Required accessories

Thoroughly wash the bottle, disinfect and dry

Cover with spray paint


Mounting process


,


This is how a gin bottle turned into a base for a lampshade :)
As you can see, creating lamps and lampshades with your own hands is quite simple and very interesting. Give free rein to your imagination, create and let your home be beautiful and cozy!
Well, for those who still prefer to buy ready-made lighting, I recommend to look into a specialized online store lampa.ua- www.lampa.kiev.ua/katalog/nastolnye_lampy/, where in huge assortment quality and stylish table lamps, chandeliers, sconces, accessories, etc. are presented. from the best manufacturers and at very flexible pleasant prices :) By the way, this online store is Google statistics is the most popular among Ukrainian buyers :) Use with pleasure!
I wish everyone good luck and good mood!!
![]()
What could be more beautiful than the satisfaction of a self-created original crafts, which will become bright accent in gray everyday life? We offer several simple models, the manufacture of which does not require professional skills and financial costs. Go ahead, get to work!
Every day we have to throw away empty tetra packs, but meanwhile this is an excellent basis for an openwork chandelier. We cut strips 5 cm wide, fold them into the desired shape and begin to carefully glue. So that the structure does not fall apart prematurely, it is possible to assemble it on a round piece of suitable sizes.


From disposable spoons it turns out quite a decent lampshade. We take a 5 liter plastic container and cut off the bottom. We break off the cuttings and the remaining parts with the help of glue gun mount on the base, imitating pineapple peel. It is better to use a low-temperature light bulb for safety reasons.


Ordinary wooden hangers are transformed with a creative approach. By simply cutting them in half and placing them in a circle, we get a modernist chic lamp from the 30s era. A completely surreal option is also possible - skip strong thread through the attachment point of the suspension and simply string the shoulders, turning slightly.


Funny Gummi Bears are the perfect solution for a nursery. The difficulty lies in the accuracy of placing individual figures, so we recommend making a template with radial holes through which we lower the white threads. Do not try to use lollipops - these are acrylic figures!


The effect of a dense forest in the bedroom is achieved by bizarre chiaroscuro. A few stylistic roots, wire, skillful hands - and the original ball under the ceiling will plunge the room into the world of the unknown. Or gather the rhizomes, peel, dry and weave as you like. Ready product better varnished.


Has the drum set lost its former attractiveness and is gathering dust in the garage? From the bored musical instrument an extravagant chandelier is mounted without problems - fortunately, all fasteners are initially included in the kit. Original and beautiful, and most importantly - quiet!


If you are the owner of a bicycle workshop, then you probably have a container with unusable spare parts in the corner. some creativity and welding machine- you will get a unique product, similar to the ancient inventions of the crazy Mechanicus. Of course, you can’t hang it in the living room, but just right for a nightclub.


Leaky galabash (a bottle of African gourd) lends itself well to engraving. Intricate patterns, contrasting transitions of textures from shiny to matte, elegant perforations scatter ethnic ornaments of the Black Continent on the walls.


It's in the hat - a funny tandem of top hat and bowler hat creates a solid entourage of a cigar club for gentlemen. If you are not an English dandy, do not despair - an old Stetson, a bright sombrero or a straw bryl will also work. It is important not to be a hostage to sanctimonious dogmas.

Paper cups for cakes will become an elegant accent of your interior. It’s not difficult at all - we glue them two by two, straightening the bottom one, and we connect the resulting “flowers” with a thread in a spiral. We cover the original night light with glue or varnish for strength.


Banal iron graters look very original above the bar counter. You need 4 tubes with electric cartridges and a meter length of 2-core wire. Do not forget about fire safety - metal shades are seriously heated.

Have your lace doilies done their job? Do not rush to part with them! We inflate Balloon ik white color, we find a brush and PVA, straighten the matter on the surface and coat it abundantly. An hour later, the elegant lampshade is ready for use.


Cutlery can decorate a meal not only with serving. The spoons collected in a bundle resemble a silver tulip. And connoisseurs of Kandinsky or Dali will appreciate the avant-garde cube, constructed from knives and forks. Enjoy your meal!

An interesting effect in the children's room is created by small light screens in the form of a cartoon cloud. A light bulb located behind it dimly illuminates the walls without blinding the eyes. Adding some more funny clouds, we get a romantic sunset.


Several brightly glowing globes will dynamically enliven the space above the stairs. Oceans and continents will light your way - an original and charismatic solution with deep connotations. Correctly select the proportions of the unique installation and charge yourself with positive.

Don't know where to put the miscellaneous remnants of services? Drill holes in the cup and saucer, place the cartridge in the middle and connect with a hollow tie - as in a conventional lamp. White porcelain scatters light wonderfully - hang the composition over a coffee table and enjoy a fragrant drink.

A ball of yarn can be successfully used as a chandelier. Several skeins of thread, white balloon, electrical fittings and glue - we randomly wrap the base and generously spread it with a binder. wait until complete drying- and a unique masterpiece is ready. They cannot play football, but the product is quite reliable.
Can you make a table lamp out of beer cans? It turns out yes! Only a lot of them will be needed - after all, we use only valves for opening. We connect the frame of the desired shape from a rigid wire and begin to braid the base. It turns out something like a shiny chain mail. Unfortunately, exact amount raw material is unknown.


Charming lamp in the shape of a cute alien animal is very easy to make. The most time-consuming process is cutting narrow paper wedges. We connect several wire rings together to get a semblance of a sphere, and with the help of adhesive tape we fasten the prepared parts in layers. Everything!


The option with pronounced charisma will appeal to hardened bachelors and lovers of noisy parties. Having seen an impressive installation above the table, guests will immediately understand what awaits them in the next couple of hours. Cheap and cheerful, but with soul...

Where to put endless plastic bottles? If you are tired of fighting them, we suggest you turn their myriad to your advantage, at least partially. Cut off the bottoms and you have mass in your hands small parts. Arbitrarily connect them with threads - there are no restrictions on the form.


Lighting is the most important component of the interior. The coziness and comfort level of our home depends on the lighting. The play of light and shadow allows you to beat the winning moments of the interior and divert attention from bad moments. And also - lamps, floor lamps, chandeliers and lamps create the atmosphere that we call "home". Unique lamps will help to make a dwelling only “your own”, personal, individual, and the best way is to make a lampshade with your own hands. Homemade plafonds and lampshades are the thing that will make your home stand out from the rest.
A few words about security
In the manufacture of lamps, floor lamps and chandeliers in industrial conditions, the minimum distance from the "body" of the lamp to the materials is preliminarily calculated. This distance depends on the power and thermal radiation of the lamp and on the type (combustibility) of the material from which the ceiling / lampshade is made. At home, hardly anyone will bother with such calculations. And not to create dangerous situation, it is necessary to adhere to certain rules.
And in general, having made a lampshade and installing it, in the first few days, pay attention to whether the ceiling heats up. Heating is any increase in temperature above environment. If the lampshade feels “warm”, change the light bulb to a less powerful one. Check again. So until the homemade lampshade warms up.
Where to get a frame
If you want to remake an old lamp, floor lamp, sconces old lampshade has fallen into disrepair, you can simply use the existing base by peeling old stuff. Before starting work, inspect the frame well, if there is rust or a damaged coating somewhere, maybe it’s worth stripping everything off and painting it again? At the same time, the color can be changed. If there are no old frames, you can buy an inexpensive lamp (in a store or at a flea market) and do the same operations with it. Good lampshades can, by the way, be made from waste baskets. They are wire, there are plastic. The main thing is to find a suitable shape and size. Then make a hole in the bottom for the cartridge. Further - it's up to decoration / plating, and here there are a lot of options.

If this method is also not available, you can make a lampshade without a frame (there are some) or make a frame yourself. The material for making a frame for a lampshade with your own hands is: wire, wood (wooden or bamboo sticks, specially cut elements), plastic bottles.
How to make a frame for a homemade wire lampshade
The wire for the lamp frame needs aluminum or steel. Aluminum is easy to work with, but wrinkle easily. This is not very important when the lampshade is already in use, but this fact must be taken into account during operation: you can ruin the shape. On the other hand, such plasticity allows easy and simple changes in the shape during operation. So that's a good option. Aluminum wire can be "extracted" from electrical cables. You will have to remove the protective shell and you can use it.
Steel wire is more elastic, so it retains its shape well. It can be searched on construction market. It's harder to work with her. It is desirable that there were strong male hands nearby.

In addition to the wire, you will need powerful wire cutters and pliers to work. The frame of the lampshade usually consists of two rings and racks connecting them. The shape of the future lampshade depends on the size of the rings and the shape of the racks. Questions may arise regarding the number of racks and how they are attached. The number of posts depends on the size of the rings and how "round" you want the lampshade to be. The more posts, the more “smoothly” the fabric will lie. So it's up to you, but optimal distance between the uprights in the lower circle - about 5-6 cm.

Techniques for creating a frame for a wire lampshade
Methods for attaching the stack to the lampshade rings depend on the thickness and type of wire, as well as the tools you have. The easiest is to make a small hook at the end, then clamp it tightly. And so that the ring does not slide left and right, pre-process the wire at the attachment point sandpaper with large grains. This is for the fat aluminum wire. If the wire is steel, and with a diameter of 1.2-2 mm or more, the best way is. Thinner wire can be bent and wrapped around the ring or also made a hook.
If you make hooks, wind the wire, the appearance is far from being as ideal as that of factory frames. But this imperfection will be covered by the lampshade itself. If she still worries you, find the tape suitable color(usually matched to the color of the lampshade) and carefully wrap the resulting frame. It will get much better. The tape can be smeared with PVA glue and, wet, tightly, turn by turn, wrap the frame around.
wire mesh
If you can find a fine wire mesh, you can quickly make an almost perfect cylindrical ceiling for a floor lamp, table lamp, night lamp, lampshade for installing candles, etc. All you need is to cut off a piece of mesh of the desired length and width, roll it into a ring and fasten the wires by wrapping them around the racks.

To prevent the mesh from straightening when cutting off a piece, cut so that long free ends remain on both sides. They will fasten the ceiling of a cylindrical shape. And the imperfection of the upper and lower rings can be masked with a tape of the desired color.
From a five-liter plastic bottle
An interesting shape lampshade can be obtained from a large plastic bottle. There are bottles of 5-6 liters and even 10. Here they can be used. From the container we cut off the top or the bottom - depending on what you like best. In the cut off part we make a ring for the cartridge. If the top is cut off, a neck can be used for some cartridges. For those with a larger diameter, it will have to be cut off.

Then we cut out the excess plastic, form the rims and racks of the ceiling. In order not to be mistaken, you can first draw all the lines with a marker. Cutting will be easier. Everything is elementary. Then we just decorate. And yes, it is necessary to cut the plastic, otherwise warm air there will be nowhere to go.
We make lampshades on the frame
There are enough options on how to make a lampshade cover:

From tapes
The simplest and fast way transform an old lampshade for a floor lamp or table lamp - use ribbons. You need a frame or lampshade in the form of a cylinder. It can be "naked" or covered with fabric. If you use a "bare" frame, the light will break through the cracks, which will create interesting lighting effects, but the lighting will be uneven. Reading in this light is inconvenient - this is an interior solution. If you need even lighting, cover the frame with fabric first. It can be the same color as the ribbon, a couple of tones darker or lighter, it can be contrasting. Everything depends on your desire. And remember that the darker the fabric, the less light the lampshade lets through.
We take a tape 1-2.5 cm wide. We fix it from the wrong side of the lampshade with PVA glue, additionally fixing it with a pin. If you took a wire frame without fabric, we attach it to the upper or lower rim (you can sew it on with your hands, you can use glue). Then we begin to wrap the entire frame, from top to bottom, placing the turns of the tape close to each other, but without overlap.

Having finished the circle, we unfold the tape 90 °. We fix it in this position (with a needle and thread or PVA glue, glue from a gun, temporarily fixing it with a pin, pressing it with a clothespin). Then we skip the tape under the first tape, pull it out, lay it on top of the second one, then pull it down again, pull it up through one tape. So, gradually, we create an interlacing, filling the entire lampshade.
Alternatively, you can skip two vertical tapes. But then you need to make sure that each next row moves one crossbar. Then you get a different type of weave. Such a lampshade is ideal for floor lamps, since it will direct the light downwards, scattering through the walls will be small.

AT this option ribbons can be the same, they can be of the same color, but of different textures, they can differ by a couple of tones or be contrasting. In a circle, the tapes can be started all the way, or you can - after a certain distance. If you find a wide tape and apply it with an overlap, then horizontal ones will not be needed at all. And if you use a braided or twisted cord (in the lower photo on the right), we get a completely different lampshade in appearance. So only this technique of finishing the lampshade gives a lot of options.
Let's briefly present the ideas. There are many options for how you can design standard frames for lampshades in a non-standard way. The first method has already been voiced: you can knit a lampshade cover on knitting needles or crochet. Several options in the photo.

Not everyone knows how to knit. It is easier to work with beads, especially if you glue them. You can decorate old fabric with beads, sequins, beads different shapes and sizes. You can make such a “new-old” lampshade with your own hands in a couple of hours. You select the decorations that match the color, coat the fabric with PVA glue, stick the decorations. To complete the look, you can assemble pendants from beads and beads that are attached to the lower rim, but this is already painstaking work. Although the effect is interesting.

You can sew a new lampshade out of fabric. But it is not necessary to make it an updated copy of the old one. Fantasy must be turned on! If a lamp or floor lamp is in the girls' room, new case on the lampshade can be made in the form of a skirt. The style of the skirt is up to you. Interesting look in the fold. With and without ruffles.

In the boy's room, you can use the old geographical map. They are on thick paper. If the paper is not thick enough, first you need to stick the card on cardboard, and then glue the lampshade from such a blank.

Original shades are obtained if the finished frame is braided with threads or ropes. Ropes can be natural. In this case, they are gray, brown beige. You can find thin synthetic colored cords. Of these, more "fun" in color products will turn out. The situation is even simpler with knitting threads. They are thin, thick, textured, with a smoothly changing color. In general, there are a lot of options.
We take the frame and braid it according to a certain pattern. You can start with racks. Braid each rack with a pigtail (the length of the threads should be 3 times the height of the rack). When this work is finished, we begin to stretch the threads / ropes between the racks. They will need to be passed through pigtails, so it is more convenient to do this with threads with a needle, and the ropes can be pushed through like that.

The second option is to first entangle the entire frame horizontally, and then braid the racks. A pigtail will no longer work here, you just need to fix the turns on the rack with oblique stitches with a certain slope. This version is somewhat simpler in execution, but the “pigtails” look more decorative.
Homemade ceiling lamps without a frame
Many materials are rigid enough to hold their shape on their own, yet malleable enough to be made into something interesting. There are a lot of such homemade lampshades. And almost all of them are worth your attention. We give here only a part, the other part will go in the photo section (see below).
From knitted lace doilies
Many people have crocheted napkins and they lie in the “stash”, because it’s a pity to throw it away and they don’t know how to use it. There are very interesting idea- make them a lampshade for a chandelier on a suspension. In addition to napkins, you will need a large balloon or an inflatable ball, glue for heavy wallpaper (vinyl, silkscreen, etc.), a brush.

We soak the glue according to the instructions, wait until it swells. Inflate a balloon or take a ball, hang it up. When the glue is ready, lay out a napkin on some clean surface, coat it with glue, put it on a ball.

It is necessary to lay out with such a condition that in the center there will be a hole for the cartridge. Glue the napkins one by one. They need to be laid out so that the edges overlap slightly. When all the napkins are laid, once again coat them with glue and leave to dry. When the glue is dry, blow off the ball or ball (the ball can be pierced if you don't mind) and take it out through the hole. That's all, the lace lampshade is ready.

In some cases, there are problems with how to hang the finished lampshade on the cartridge. The problem is solved simply - take a transparent plastic bottle, cut off its neck, if necessary, expand the hole to the desired size (so that it fits tightly on the cartridge), then cut off the plastic so that you get a ring 5-7 cm wide. Lubricate this ring with PVA glue , and glue it to the lampshade from the inside of the ball.
Round plafonds made of threads
Almost the same technology can be used to make round and semicircular stylish shades. Choose the thread of the right color. Their composition is absolutely unimportant - the color, thickness and texture are important. They can be shaggy, smooth, twisted, thinner and thicker. It depends on the appearance. It is most convenient to work with cotton threads of medium thickness. They absorb glue well and then, after drying, keep their shape perfectly.

You will also need a ball or ball. This will be the base of the lampshade, which sets the shape. Choose the size of the base as you wish. The threads will need to be glued, for this you need PVA glue. It is poured into a container, diluted with water in a ratio of 1: 1.
You can use other glue. It is important that it becomes transparent after drying. These are WB-29 from TYTAN Professional and D2 joinery adhesive. If you use any of these types of glue, read the instructions.
On the ball or ball, draw a circle, which will be slightly smaller in size than the lamp socket. On the opposite side, draw a larger circle - this will be the lower edge of the ceiling. Now everything is ready, we can start.

We coat the threads with glue and wind them around the ball in a chaotic manner. It is more convenient to do this if the glue is poured into a container - you can lower the entire skein there, and just pull the thread slowly. With glue in a tube, everything is not so comfortable: you have to coat sections up to a meter long, wind them up, and coat them again. Time goes much longer. This is if you do not use PVA. But on the other hand, the products turn out to be more rigid and do not sag, do not change shape over time, as can happen with filament lampshades on PVA.
When winding threads around the ball, we carefully go around the drawn circles. If you accidentally climbed into the "forbidden territory", we simply move the threads, forming an even (more or less even) edge. When the threads run out or you decide that there is enough density, the process can be stopped. We fill the edge of the thread between others. All. Then we coat the ball with wound threads again with glue (PVA can be watered) and leave to dry (at least 2 days). To prevent the ball from rolling, we find a bowl or pan and use it as a stand.

The last stage is to blow off the ball or ball. If the ball has a nipple, press it with a thin wire, releasing air. Take out the dropped ball. That's all, you can thread the lamp inside and test the lampshade.
The technology is the same, but the appearance is very different…
According to the technology described above, it is possible to make not only round shades. Rectangular, triangular, trapezoidal. Choose a base that is easy to remove, wrap threads soaked in glue, braid, even sticks, newspaper tubes, etc. After drying, remove the base and, behold, you have made a lampshade with your own hands. A couple of examples in the photo below.


You can also use chopsticks... Just wrap the ball with cling film too and use not PVA glue, but transparent carpentry

It's pasty polymer clay in a tube, which was applied to a milk bag, then dried and the bag was removed ...
Creative homemade shades for lamps, floor lamps and chandeliers
You just wonder what people don’t make beautiful and unusual things from. Plafond from a cup, grater, bottle, beer or glass can, metal parts and beer can rings ... It seems that everything can be used ...


Lampshade from an old sieve ... stylish


Candlesticks turn into lamps ... without lampshades


You can’t tell in life, but these shades are made of hooks used to open metal cans for drinks and canned food… if they are painted, it will be even more interesting


Don't know what to do with grandma's crystal? Make plafonds out of it ...
In this article, we propose step by step master classes how to make do-it-yourself table lamps from improvised means that are always in the house. It would seem at first glance ordinary and unnecessary things, but from them you can make original and designer lamps for desktop.
The most popular and simple improvised materials are: glass bottles and cans, cardboard and paper, plastic vessels, water pipes and cement. How to make lamps out of this we will show and tell in this article.
With a simple and elegant copper table lamp, you can decorate any corner of your home with your own hands. She will fit in perfectly modern interior from loft style to rustic. Prostate and conciseness - this is the main trump card of this table lamp.

For this you need tools:
- Roulette, marker
- Pipe cutter and washcloth
- Wire stripping and stripping tool
- Pliers and a thin flat head screwdriver
- crosshead screwdriver

M materials:
- Copper pipes
- Acetone and super glue
- Copper corners 90 °, 7 pcs.
- electrical wire
- Plug and Electro chuck
- Switch and light bulb
Table lamp assembly technique
To get started, take a tape measure, marker, pipe cutter, rag, copper pipes and acetone.
Marking and cutting tubes
- Use a measuring tape and a marker to mark where you will cut the copper pipes.
- Do this carefully, accurately measuring every millimeter, because if the details are different, then in the end result they will not be as large as they should be.

- Point the pipe cutter and adjust the diameter of the pipe with the nut. Watch the copper tube, gradually readjust diameter with nut, so that the closure goes on until the pipe is cut.
- After, with acetone and a rag, you can wipe the markings from the pipe.

TIP: Our parts have: 3 cuts of 15 cm, 1 cut of 20 cm, 1 cut of 45 cm, 1 cut of 25 cm. We used 12 tubes. When designing your luminaire, please note that the size of the copper cubits will be added.
While the cable is inside, we connect the parts
Paste the pieces together and glue super glue. In order to avoid problems in the future, it is better to glue each part and put it together.

Despite the instantaneous effect of the adhesive, it is preferable to wait a few minutes before proceeding to make sure the pieces are glued perfectly.

Tip: It will be more convenient to apply glue if you use a brush. If you want the lid to be at the very top, install it first. So the first part will be ready, and the cable will go in the other direction.
Tools:
- Wire stripping and stripping tool
- incisors
- thin flat screwdriver
- crosshead screwdriver
Materials:
- fork
- electro chuck
- switch
- Copper pipes
- electrical wire
 Install electrical system
- Open the faceplate of the cover and start by stripping the insulation. Connect ground ( Blue colour) and phase (brown, gray or black) using the two screws you find inside.
- Repeat the same process in the plug and switch.
- In the switch you will find two pairs of small screws, a cable that you must cut to the height you want the switch at and connect to the appropriate sockets by going inside the small screws.
- All you have to do is screw in the light bulb to make your copper table lamp.

Finally, put the lamp in a corner or place you like, and you will see how it will become a wonderful addition to your interior, illuminating the space!

Master class: Table lampfrom paper
When I first saw the Robert Delta table lamp, it was love at first sight! The shape is amazing, it comes in various bright colors, everything I like. Recently I thought, since the accessories were amazingly durable, why not use them for the lamp?

Here are all the materials used:
- old lantern or lamp kit
- template and thick cardboard or paper, you can take polypropylene sheets
- glue and putty
- sanding block (medium + fine)
- wood block (add weight to base)
Tools:
- artistic ribbons
- metal ruler / xacto knife
- drill (can optionally replace xacto knife)
Lamp manufacturing technology
- First, print the pattern (6 of each triangle) (1 of each hexagon).
- Cut out the shapes so that they fit snugly on the board. Then use glue to attach the pieces to the back of the mat.
- Using a metal ruler and a Xacto knife, cutting board, cut each shape.
- Put them together.


- Next, glue the bottom (shapes 2 + 4) to the base (shape 6). The triangles fit together nicely and if you did everything right, they will just fall into place.

Then use small pieces of art tape to stick them together and wait for the glue to dry completely.
TIP: Use super glue, it dries instantly (we used Aleene). Apply glue lightly, and wipe off excess.

- After gluing the bottom half (forms 2 + 4 to the base, form 6 turn upside down (open end down), place the square on a flat surface and let it dry overnight, this will help preserve its area.
- The next day, start working on top lamps. Glue the 1 + 3 shape, leaving a little hole to insert the lamp inside. The top one (form 5) was glued along with the art tape, but it is not glued to the form 1 + 3 yet.
- Then reinforce the seams with glue from the inside.
Then start working on the base of the lamp.
The level at the bottom of the lamp needs to be made a little larger, so cut a few 1×4 pieces to raise it a bit. Additional weight will also be added, which will give it more stability. Use screws to attach 1×4 to existing metal base. (We swapped the existing stem with one from another lamp to get it to the correct height).

Next, drill a hole for the cord and insert the plastic sleeve from the old lamp. The lamp should be disassembled, and pull the cord and wire through the threaded rod of the hole in the new base. Glue it in the center inside the lamp.


At the top (form 5), mark the center and drill a hole for the center rod. Then glue it in place.

- After applying the adhesive, wipe off excess and, if necessary, lightly and apply a second coat after sanding.
- Medium-grit putty and fine sandpaper, finish with a sanding block. AT this moment, you will notice its strong base.


When you've finished removing the dust, apply paint! To cover the top of the threaded rod, use the top of an old lamp - it just slides over the rod. Then return back to the nest!
Everything, a handmade table lamp is ready.


Bottle table lamp


Tin lamp
Such a lamp is perfect for a home desktop, both for a student and a schoolboy. Boys will especially appreciate it, it looks more like a transformer and a robot from the future. You can paint or decorate the jar itself with paper, thread, or make it more embossed. How right.


Table lamp made of plastic bottles
Plastic bottles can always be found on the farm, so decorating an old table lamp is not difficult. Usually, when restoring old lamps, the bases are left and plastic is used for the lampshade. The lampshade mount is usually used the old one. When working with plastic bottles, remember that cutting them is easier paper cutter or construction knife. Glue is used for rubber or special for plastic.


Table lamp made of branches and cuts
Wood in the interior is always a classic - it is always fashionable and relevant. By decorating a table lamp with a cut of wood or an old driftwood with your own hands, you will get designer thing which simply has no price.
- To do this, we need to pick up any piece of wood we like, process it properly namely, dry it, apply impregnation from pests and cover it with varnish.
- The second stage is to mount the top from the old floor lamp into the base. If this is not the case, it does not matter, in stores everything for light usually sells bases for lampshades.


Other original ideas
The basis for a table lamp, in principle, can serve as any object that you do not need: these are children's toys, Sewing machines, unnecessary socks and so on. Experiment and create beauty!


