Homemade braid for the steering wheel. How to reupholster a steering wheel with leather yourself? Detailed instructions, photos and videos. Materials and tools for steering wheel braiding
01.06.2016
The steering wheel is the “steering wheel” of the car, on which the direction of movement depends vehicle. While driving, the driver's hands are on the steering wheel, and driving comfort largely depends on the quality of the surface. But this is not even the most important thing. IN dangerous situations The driver must react quickly and, if necessary, turn the steering wheel sharply. And here the main role is played by the quality of the coating and the absence of hand slipping. That's why many car enthusiasts decide to create and install a braid on the steering wheel. The only question is how to do this work correctly, and what material may be needed first.
Difficulty of choice
- type of braid fastening;
- simplicity further care;
- durability of use;
- quality of material.
The last factor is considered the most important, so we will dwell on it in more detail. There are several options:
1. Leather braid. Experienced car enthusiasts recommend using genuine leather, which has two main advantages - practicality, durability and ease of processing. The material can be of two types - perforated or without perforation. Braid with holes looks more preferable, because it provides volume and better contact with the surface. In addition, the perforated surface removes potential unevenness and eliminates problems during processing. In addition, leather is more easy to care for and hygienic than other types. similar products. This is especially true if the car is used as a taxi or has several drivers. All that is required is to treat the surface with an antiseptic, and the problem is eliminated. At the same time, the leather covering is not afraid of damage. At first glance, leather seems to be an expensive product, the costs of which are unjustified. But that's not true. This is the case when, with long-term use, the costs will pay off handsomely.
2. Fur braid. The next option, which is popular among the fair sex, is a fur braid. But the advantage of such material is only in the visual sector. The joy of tuning goes away within a few days. During active driving, the fur becomes wrinkled in areas of active use. The pile quickly becomes smeared and loses its appearance and shape. This is especially true if the product is made in light color. A large amount of dirt gets clogged between the pile, which is impossible to clean out. In such a situation, there is no point in thinking about hygiene. When driving for a long time, your hands sweat, the braid absorbs moisture, and the skin begins to slip. In general, such tuning is purely “cosmetic” and temporary.
3. Wire braid. There was a period when car enthusiasts made a braid made of wire. At the same time, the target for tuning was the usual VAZ models. The practicality of the option is that the plastic winding is durable and can withstand even active use. If we compare “wicker” in appearance with natural leather or leatherette, it is significantly inferior. In addition, its disadvantages include a low degree of hygiene. The only thing that helps restore neatness to the steering wheel is special chemical compositions. The biggest problems arise when it gets cold. In this case, the braid begins to tan, which causes additional discomfort when driving.
4. Self-made braid. If you wish, you can make a braid with your own hands. All that is required for this is a little imagination, following the algorithm and source material. In this case, the final version will 100% meet the driver’s requests. There are many options:
- Make special inserts for hand massage that will improve blood circulation in the fingers and palms;
- Provide heating that guarantees a pleasant feeling even in cold weather. In this case, the button to turn on such heating can be installed on the dashboard.
When choosing a braid, you should pay attention to a number of other criteria:
- Product color and thickness.Beginners try to choose colors as bright as possible that will catch the eye. You shouldn't do this. As practice shows, brightness quickly gets boring. Over time, you will have to re-tighten the steering wheel again. The material should be of medium thickness, which eliminates hand fatigue. If the driver rarely drives, then this factor does not matter. If a person drives often, then the hands will get tired from the “thick” steering wheel.
- Availability of volumetric inserts.You can often see how car enthusiasts install foam rubber under the braid. It is believed to provide additional softness to the steering wheel. At first, the steering wheel will indeed become softer, but the thickness will also increase. If the steering wheel was thin, for example, like on old VAZ cars, then this is only a plus, but for modern products there is no need for such an addition. Over time, the thickening will lose its appearance, and the foam itself will become bald, followed by scrolling. If you really want to make the steering wheel thicker, you can use special gaskets that have a gel filler. The advantage of the material is that it does not flatten due to the presence of an incompressible substance at the base. All that is required of the car enthusiast is to protect the steering wheel from cuts and punctures.
The greatest difficulty for many car enthusiasts is the independent exchange and sewing of braid products. In fact, everything is simple - you don't even need to remove the steering wheel. Measurements can be taken using a tailor's meter along the outside of the rim. In addition, it is worth measuring the diameter of the rim to find out the outer width of the upholstery strip.
When measuring, take into account an additional 3-5 mm that will be added to the seam. On average, the outer diameter for braiding is 36-41 centimeters. At the same time, sports cars will have a smaller steering wheel, while luxury cars, on the contrary, will have a larger one.
How to sew a braid yourself?
If you wish, you can sew a high-quality braid with your own hands. All that is required for this is to select a minimum set of tools, material and allocate a little time. Prepare:
- A leather strip measuring 12*1 cm, as well as additional flaps (smaller sizes are allowed).
- A durable nylon cord with an average length of three meters. If desired, it can be replaced with leather rope.
- Nylon cord (must be transparent). The length of such a cord should be three meters (can be replaced with twine made of high-quality leather).
- Punch for perforation for cord.
- Several sewing thimbles to protect your fingers from injury.
- A pair of needles 5 cm or more long. It is desirable that the head be as small as possible (this will allow the nylon thread to be tightened).
- A1 drawing sheet (needed to create a pattern).
- A roll of tape (cling film can be used as an alternative).
- Covering without a spoke.Here, a strip of leather is enough, the length of which is calculated using the “school” formula. The length of the diameter is multiplied by the number "Pi". In addition, using a tailor's meter, you can take measurements of the outer side of the circle. It is important here to tighten the leather until the last time you tighten the tape so that it stretches on the steering wheel.
The special ring can be made from a whole piece of material or using a combination of smooth and perforated components. If desired, inserts can be used different colors that would fit into the overall interior.
All allowances of the braid that remain for sewing it together should be coated with glue. This manipulation makes the material more durable and “hides” the threads that may be visible at the joints of the product. To remove material sagging, you should use a hammer and tap the seals with it.
An important point is preparing the holes for lacing. Here you will need a metal tube of small diameter with a sharpened edge at the end. All that is required is to place the product on one side of the skin, and on the other, tap with a hammer. Excess skin will go into the puncture hole.
After marking along the “sewn” side, it is allowed to make perforations for thread or twine. The thickness of the thread (string) should be 3-4 mm, otherwise strong tension can lead to rupture of the product. When lacing, you should find a quality awl and prepare for a long job.
- Steering wheel upholstery with spokes.If you want to sheathe the steering wheel not only around the perimeter, but also to capture the spokes, you need to prepare for more serious work. To create a pattern, you will need cling film, which will be used to wrap all areas of the new upholstery. Then secure the base with masking tape. Next, outline the places where the seam will be using a marker and number the resulting part. On separate sheet draw a diagram of the location of the necessary elements.
All that remains is to sew the braid around the perimeter using a machine. When performing work, make sure that a slight tension is maintained at all times. After this, attach the braid to the steering wheel and secure the thread. Before doing this, dismantle plastic decor and Airbag cartridge. After lacing, return everything to its original place. If necessary, glue the area between the steering wheel and the skin with glue, then dry the edges with a hairdryer.
Make your car have attractive appearance, you can do it yourself. All you need is imagination and, of course, desire. You can change or update interior elements or some parts under the hood. In this article I will tell you how to cover an old steering wheel. Do-it-yourself leather steering wheel reupholstery is the first step towards updating and improving the car's interior. Don't think that only specialists can do this. Re-upholstering the steering wheel with your own hands is not only an instructive, but also quite an interesting process.
Considering the fact that the steering wheel is a part of the car, human contact with which is made throughout the entire route, therefore, it is necessary to choose only high-quality material for reupholstery and it is desirable that it should be genuine leather. Since any other fabric will deteriorate from constant rubbing of hands on the steering wheel after just a month of using the car. The intended skin should not be very thick, but it should not be thin either. If it is too thick, then you will not pierce it with a needle, and if its thickness is small, then new case for the steering wheel can deteriorate very quickly. Optimal thickness material for the steering wheel cover – 1.3 millimeters. An ability such as extensibility should be of average value. This is very important criterion, which must be considered before purchasing. Its elasticity should allow the material to fit tightly on the steering wheel, otherwise there’s no point in thinking about quality.
You can consider the option of having perforation. This is a rather unusual and attractive look, and it is also pleasant to work with. But having such positive qualities, I can also highlight its negative side - wear and tear. The only one optimal solution for you is natural smooth skin. 
Before purchasing, make sure that the material offered to you actually has necessary qualities, and they don’t slip you a substitute. You also need to pay attention special attention And additional materials, which will be used in this case. The thread should be as strong as possible, because it will pull the edges together, so it should not break easily. Choose a strong needle, make sure it does not bend. My advice is to buy several of them.
What will you need?
For reupholstery you will need following materials and tools:
- Leather (it must meet all necessary criteria);
- Stitching needle (the needle must be strong). If possible, use Soviet-made needles, as they are really high quality;
- Strong thread (nylon is used);
- Two thimbles (it’s almost impossible to work without them). They will keep your fingers from getting punctured.
- Masking tape, sheets of Whatman paper (it is better to use thick cardboard);
- Pencil or felt-tip pen;
- Film;
- Knife (it is better to use a stationery knife).
After preparing all the material, you can proceed with the remaining processes: cutting and reupholstering.
Making a pattern
In order to correctly tighten the steering wheel, and so that the result of your work has spectacular look, you need to make a pattern. To do this, you need to make a preliminary layout (template).
It is made of adhesive tape and film, which must be used to cover the steering wheel. But before this you need to remove the steering wheel, as this will make the work easier.  The first step is to remove the cover from the signal and unscrew the fastening nut that holds the steering wheel to the shaft. After this, using loosening movements in different directions, remove the steering wheel from the splines. Now that the steering wheel is removed, you can do the preliminary layout. To create it, you need to wrap a film around the steering wheel and apply masking tape over it. Do not skimp on material, wrap it in several layers.
Once the entire rim is covered, you need to use a marker to make marks where the seam will go (where the parts join). This is done for the reason that it is very difficult to make a one-piece case, so it will be made of four parts. And those places where the parts will be connected to each other are marked with a marker. We also draw a marker along inside steering wheel It is advisable to draw all lines as evenly as possible. This will allow you to make smoother original parts when cutting. After all the lines have been drawn, the layout must be cut with a stationery knife along these lines.
After cutting, you should have four separate elements. Now they need to be leveled and attached to the cardboard to create patterns for the pattern.  After the patterns are ready, they need to be applied to the base material in order to make final version tights. But, it is important to remember that you do not need to cut it exactly to size, but give some allowances for each edge of the part and then bend it. This is necessary in order to sew them together efficiently, and so that the thread does not tear the skin during tightening.
That is, the seam will be strong enough and the skin will not tear when stitched. In addition, the folds give the new steering wheel a more aesthetic appearance. Allowances can be given immediately while you are tracing the pattern. You can also first trace, and then use a ruler to add one centimeter to each edge. This way you will maintain an even retreat on each side.
After this, you can check how correctly the cutting of the elements was done. You need to place each of the patterns in the intended place and see how they are positioned: their edges should butt together. If the stock left is too large, you can trim the edges. If everything is fine, nothing bothers you, you can begin the final process - sewing the parts together.
Step-by-step instructions for reupholstering
So, everything is ready, you can start. At this stage, it is important to follow the order of doing the work so as not to confuse anything.
- The first step is to overcast all the edges that will be sewn together. The fact is that each edge will be bent (we left indentations specifically for this purpose), and since the thickness will double at the bend, this will not have any effect. beautiful view and it is very difficult to pierce such thickness with a needle. That's why stitching is necessary. She will allow you to comply required thickness skin around the edges and thereby make the edges durable.
- We lay out our (4) parts of the future steering wheel cover on some surface. They need to be laid out exactly in the order in which they will be located on the steering wheel.
- Prepare the needle (pull the thread into it).
- Now you need to sew all the individual elements together sequentially.
As a result, you should have a hoop. - Now you need to pull it onto the steering wheel. Position it so that the seams match the cuts.
- Next, you can fix the cover on the steering wheel using glue or epoxy resin. Everyone makes this decision personally, you don’t have to stick it to them.
- Now try to stretch the leather (even it out) to determine how much to fold the edges before the final step.
The last stage is the most difficult, since here it is important to maintain uniform skin tension throughout the steering wheel. It is not only difficult, but also difficult. It is much better if you ask someone to help you (one tightens and the other sews). 
So, the first thing you need to do is decide which edge to start from. Basically, it just depends on convenience. You need to stretch the skin to form a joint; if the joint does not meet, it’s okay, thanks to its elasticity, the joint will be pulled together with thread. The entire cover is sewn together in this way.
In those places where the cover can go under the signal cover, you need to do without thread and use glue. After completion, you need to straighten the new cover on the steering wheel; if there are any folds, it’s not a big deal. After a few days they will smooth out and the surface will be completely smooth. Now you can install the steering wheel in its original place, secure it with a fastening nut and cover the signal cover.
Covering the steering wheel with leather will significantly change appearance not only this element, but will also emphasize general view car interior In addition, by doing this yourself, you not only saved your money, but also gained good experience in reupholstering, and also became more familiar with the steering structure of your car.
Video " Steering wheel reupholstery”
A video about the work of a master from the Rusty Brothers company reupholstering a steering wheel rim in the BMW M style with leather. After watching the recording, you will learn what tools you need to prepare and how to cover the steering wheel yourself with leather.
Decorative design of interior elements
The steering wheel is the central element of the car interior, which is constantly in contact with the driver. Comfort while driving and the overall appearance of the car interior directly depend on the ergonomics and design of the steering wheel, so it is important that the steering wheel has high performance and visual characteristics. Re-upholstering the steering wheel will help make driving as comfortable as possible and the car interior stylish.
Often, at the same time as re-tensioning the steering wheel, at the client’s request, specialists from the AMD plus car studio re-re-tension the gearshift knob and parking brake handle. The interior of the car looks especially beautiful and harmonious when all the elements are upholstered in the same leather and decorated in the same style - this option provides a holistic design and adds individuality to the interior. In this article we will talk about the visual design of car interior elements using decorative seams.
A decorative seam for upholstery is an integral design element that connects the joined parts, decorates the drawn elements, and emphasizes the individuality and unique style of the car interior. Reupholstering the interior elements allows you to choose an option for decoration that perfectly complements the interior of the car and appeals to you visually.
You can choose a classic seam color or a bright contrasting one, repeat the standard decorative seam provided by the manufacturer, or choose an original, less common option. At your choice, the AMD plus car studio offers more than ten options for decorative seams for reupholstering the steering wheel and other interior elements, and more than twenty types of threads of different colors and thicknesses. The choice is yours!
12 types of seams to choose from
Most studios offer only 3-4 standard types of decorative seam designs when upholstering, from which it is sometimes difficult to choose suitable option. The AMD plus car studio team is confident that each car is unique, so especially for you we present an expanded line of decorative seams, consisting of 12 items. Choose the option you like and highlight your individuality!
Macrame seam
“Macrame” is an aesthetic decorative seam for constriction, which is most often used German manufacturers car when covering the steering wheel rim. “Macrame” is made with thin threads, does not lift the skin and as a result forms an interesting ornate pattern. This is the most popular option among car owners.

Seam "BMW M"
The “BMW M” seam is identical in technique to the standard popular “macrame” seam, but differs unchanged color scheme of three shades: red, blue and cyan. This option traditionally used in all BMW M-series, but if desired, can be used as decoration for cars of any brand.

Seam "sport"
The “sport” seam is similar in technique to the “macrame” seam, but has a more frequent pattern. The main difference is that when making a “sport” seam, every stitch loop is caught, and when making a “macrame” seam, every second stitch is caught. “Sport” is most often used to decorate the interior elements of sports cars.

Herringbone seam
“Herringbone” is a popular decorative seam, which is most often used by Korean and Japanese car manufacturers. “Herringbone” lifts the skin, causing it to become convex and form a characteristic pattern. To ensure that the pattern is evenly convex and securely fixed when making a seam, thick threads are used.

Pigtail seam
The pigtail stitch is very similar to the previous herringbone stitch and is also found in most cases on Korean and Japanese cars. The difference is in the location of the stitches relative to each other - in a “pigtail” seam they are asymmetrical to each other and, when tied, form a characteristic convex pattern. The threads used for the seam are thick and dense.

BMW Alpina seam
Seam "BMW Alpina" - classic version, which is used in the design of elements in BMW Alpina cars. The seam is made in a minimalist style and is distinguished by the unchanged blue-green color scheme. "BMW Alpina" will decorate the car interior and add a unique style to it.

Seam "Infiniti"
The Infiniti seam is most often used when decorative design elements in Infiniti cars. Characterized by a minimalistic design and original version Most often it is found in white or black, but at your request it can be made in any color from those presented.

Seam "AMG"
The “AMG” seam is a stylish and unusual decorative seam that is used to decorate leather elements of powerful Mercedes-AMG sports cars. It looks beautiful when done in both contrasting and single-color versions and is suitable for decorating elements of cars of any brand.

Seam "Italy"
“Italy” is a seam that is most often found in cars of the Italian automobile industry - Fiat, Alfa Romeo. It is a seam in a strict minimalist style and visually resembles over-the-edge sewing. Looks equally stylish in either a contrasting color or a color that matches your chosen skin tone.

Butterfly seam
“Butterfly” is a seam that, like “Italy”, is mostly found in Italian-made cars. It consists of individual geometric elements that resemble the number 8 or a butterfly, for which it received the name of the same name. Does not tighten the skin and looks original on interior elements.

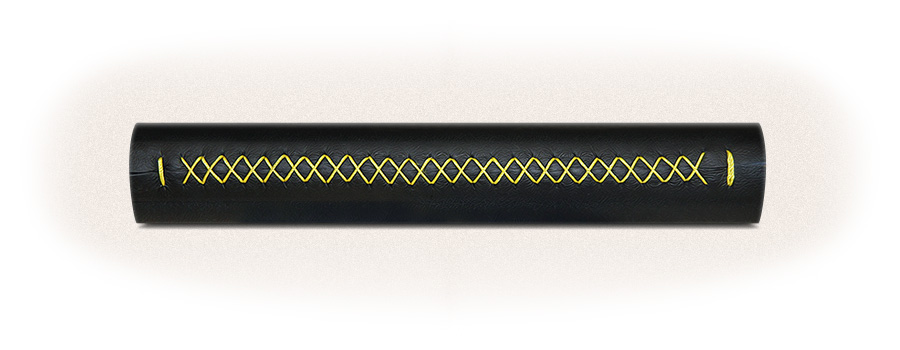
Cross seam
“Cross” is a seam that is used quite rarely compared to previous options, but it looks no less stylish and interesting on the elements, forming a continuous line of rhombuses or crosses. The “cross” almost does not tighten the skin, forms a flat seam and is made of strong threads of medium thickness.
Step seam
“Step” is a flat, neat decorative seam that is made from medium-thick threads and does not tighten the leather on the steering wheel, gear knob and parking brake handle. It looks stylish and unusual both in a single-color design and in a contrasting bright version.

Contact the professionals!
The choice of seam depends on your individual preferences and the design features of the car interior. But the most important factor, which is necessary to obtain a high result - professional craftsmen and high-quality, careful work. Therefore, to get neatly tightened interior elements with a perfectly smooth and beautiful decorative seam, contact the professionals!
Fantasize and choose the appropriate option, and the specialists of the professional car studio “AMD plus” will be happy to bring your ideas to life! We guarantee fast professional completion of the work and impeccable results!
In addition to being a design element for the car interior, the steering wheel braid is made of genuine leather has a number of others useful qualities. Firstly, such a leather case is always “warmer” plastic surface steering wheel or covers from synthetic materials. Secondly, the thickness of the steering wheel increases, which reduces finger fatigue.
It is not difficult to make the steering wheel braid with your own hands. You don’t have to buy leather in a store; just take apart an old leather jacket or bag, cut out three pieces measuring 40cm by 9cm and sew them together. Leather lacing can be cut into a spiral, which will significantly reduce the consumption of leather for making the case.

First you need to measure the diameter of the steering wheel and its thickness. The length of the braid can be calculated using the formula from the 7th grade geometry course (2Р) or measured with a centimeter tape. The average length of the braid for the steering wheel of a passenger car is within 120 cm, and the girth of the steering wheel thickness is approximately 9 cm. But since you will be sewing yourself, do not rush to sew all the parts of the cover in a circle at once. It’s better to try on the cover on the steering wheel before making the last seam, trim off the extra centimeters, then it will sit tighter on the steering wheel, with a little tension, which is desirable for such a stretchable material as genuine leather.

In addition to leather, you will need a hole punch and a cord approximately 2 - 3 meters long. Both can be bought in the store, especially since the punch is inexpensive, but it will come in handy more than once. Instead of a nylon cord, you can make a narrow leather strip and use it not only for lacing the cover, but also for decorating the surface of the braid. A case with such lacing will be much softer at the junction, and its appearance will be more solid. We will tell you how to make leather lacing below.
Since the steering wheel braid must have at least one connection, we recommend immediately dividing the total length into three equal sections of 40cm each (approximately). Firstly, a long piece of leather (120cm) can only be cut from a whole hide. And secondly, pieces of leather can be combined, for example, two gray, one black, or otherwise. You can even make 5-7 or more sectors, but this is at your discretion.

You need to connect three or more sections of the cover using a sewing machine. Any two layers of thin leather can be sewn without difficulty. sewing machine. The only thing you should pay attention to is the fit of the top layer. To reduce it, place a narrow strip of newspaper or tracing paper under the foot. After the seam is made, the paper can be easily removed.
See Leather Guidelines.

One more thing. The allowances on the wrong side must be coated with rubber (or leather) glue and pressed for several minutes. To make the seam almost invisible, you can tap it from the wrong side with a hammer or the handles of large metal scissors.
The connecting seam on the front side of the braid can be decorated with two decorative stitches, approximately 0.5 cm on each side of the connecting line. But it is better not to do this, since this will not make the connection stronger, and on the contrary, many needle punctures will weaken this area of the skin and over time, tears may form in this place. The braid connection looks quite good even without finishing stitching (photo).
Punch holes for lacing with a punch. Choose the distance between them yourself, but keep in mind that 1cm is too little, and 2cm is too much. Be sure to mark the holes with chalk (on the wrong side) or with a gel pencil on the front side. The holes on both sides should be symmetrical and paired.
See DIY Braided Belt.

This diagram shows how to perform lacing. Choose any of them and first try it on a braid without a handlebar and without tightening the cord. Then stretch the braid over the handlebars, placing the joining seams symmetrically. For example, one seam at the top, two on the sides. By the way, the wheels need to be set straight so that the steering wheel is positioned exactly as when moving in a straight line.

The easiest way to do lacing is shown in this diagram. By the way, think about what you will use to insert the cord into the holes in the braid. You can make a hook from a pin, or buy a special needle with a large eye. In a sewing accessories store you can also buy a special device for threading thin elastic bands, cords into a drawstring, belt, etc.
Do not immediately tighten the lacing too much. It is better to do this when the entire cord or leather strip is completely braided into the case. Then, by gradually tightening each stitch, you can evenly and neatly tighten the entire lacing.

Leather lacing strips will look much more interesting on the steering wheel than a nylon cord. But for such lacing you will need 2-3 meters of a narrow leather strip. It is not always possible to cut them out of leftover leather, especially if you make a braid from small pieces of leather. Then take advantage of these tips. Take a section of skin with a diameter of 8-10 cm. Tie a helium pen to the knitting needle (with tape). Place the point of the knitting needle in the center of this piece so that the pencil also touches the surface of the skin. Start drawing a spiral with a pencil, aligning the spoke with the already drawn spiral line. This will serve as a guide for the spoke. This way you can cut out a fairly long piece of lacing from a small piece skin.
The width of the leather strip for lacing must be at least 3-5mm.
5. Cord for steering wheel braid

Making leather lacing has a number of technological difficulties. Not only is it quite difficult to cut the lacing into perfectly even narrow strips, they also then need to be joined together.
In addition, it is quite difficult to pull it through the holes, and even without it turning inside out, which will be noticeable. After all, natural leather often has a reverse side that not only has a matte, untreated surface, but also a completely different color.
Therefore, it may be much simpler and easier for you to sew a braid for the steering wheel from two or three pieces of leather, punch holes, and lacing it with a regular nylon cord to match the color of the leather.
We offer you several ways to quickly and easily make a phone case with your own hands from genuine leather.
24.04.2016

The steering wheel of a car is not only one of the main controls, but also an element that you pay attention to when you get into the car and on which depends how comfortable and pleasant it is to drive the car. Intensive use of the steering wheel leads to a fairly rapid loss of its original appearance. In this article « » I’ll tell you how to return the steering wheel to its previous appearance and make it even more attractive.
To get started you will need
- Remove the steering wheel from the car (use the vehicle repair and maintenance manual).
- Construction masking tape - 1 large roll (paper tape, ordinary oilcloth tape will not work)
- Cling film or packaging film - 1 skein
- A utility knife preferably with a new blade
- Dark marker – 1 pc.
- Cardboard (preferably medium density)
- Strong nylon thread(the one used for shoe repair is suitable)
- Sewing needles, preferably hardened ones (take several, they may bend or break)
- Two thimbles for the middle fingers (will protect your fingers from punctures)
Well, the most basic material to work with is leather. Better skin brother good quality, and if you want to practice, it’s better to use leather or leather substitute from old jackets, pants, bags, etc.
Making patterns
You need to wrap the steering wheel with cling film. The film should fit snugly to the base of the steering wheel. 
 Then on top of the film as tightly as possible wrap up the masking tape so that the final result does not turn out to be a braid larger size.

We take a marker and divide the steering wheel into four parts, make a mark on the inside of the steering wheel for the inner seam, preferably straight.IMPORTANT: number or label each piece before cutting. We cut clearly according to the marks made, you should get four patterns. 
 We cut out the patterns and lay them on a flat surface, press them with something heavy, and leave them overnight so that they level out and take the desired shape. Next, we transfer the aligned patterns onto cardboard (this will make it more convenient to make patterns on the skin, NECESSARILY make a reserve of 1-1.5 cm for the length of each element), and then transfer it to the skin.
  We sew the elements cut out of leather in order from numbers 1 to 4, the first and last are sewn together to make a ring.

We try on the finished braid on the steering wheel; the blank should not dangle, but should fit snugly to the steering wheel (if it still does not fit, you need to sew it in one of the seams). If everything worked out, move on to the next stage, take the steering wheel braid and stitch the edges; it’s better to perform this procedure sewing machine, if it is not possible to stitch, you can make a winding on the edges of the product (use only strong threads).
Stitch options for tightening the braid on the steering wheel
Completion of work
To prevent the braid from slipping on the steering wheel during operation, the edges can be secured with glue or epoxy resin. After all the preparatory work has been completed, you can begin to tighten the braid on the steering wheel. Upon completion of the work, install the steering wheel back on the car and enjoy the result.
