How to put up a wooden fence with your hands. Wooden fences: effective protection of the site. Types and features of wooden fences
Since ancient times, fences have been built in Russia. They were mostly wooden. With the advent of new technologies, materials such as metal, reinforced concrete, polycarbonate, corrugated board, brick are increasingly replacing the aesthetic, but not so durable wooden fence from our lives. Those who prefer eco-friendly materials, create a rustic-style design on their site or already have a wooden house, choose a wooden fence. In addition, if you study the issue in detail, you will see how diverse wood fences differ. They can be one of the most impressive elements in your yard design.
Types of wooden fences

By a wooden fence, we often mean an ordinary picket fence, which we have long been accustomed to and which was quite common in Soviet times. Over time, the situation has changed dramatically and now wooden fences are a Christmas tree, and a cross, and chess, and a lattice. And an ordinary wooden picket fence looks great, equipped with brick posts.

Classic wooden fence

Pipes are installed along the perimeter of the site, which are concreted into the ground. Veins or girders are fastened between the pillars, made of timber with dimensions of 50x100 mm or so. Fence boards are nailed perpendicular to the veins either butt-to-butt, or at a short distance from each other.
Wooden fence ladder or herringbone

Similarly to the classic fence, pillars are concreted into the ground. Decorative wooden linings are attached to their inner and outer sides. They will become guides for the rest of the boards. Boards measuring 25X100mm are laid in the grooves between the overlays - horizontally overlapping. If you use calibrated pads, you can create a blown fence. And additional thin vertical metal stakes allow you to create another kind of such a fence.
The fence columns are covered with wooden decorative covers.
Fence "Cross"

It is possible to combine a wooden fence with reinforced concrete by constructing a Cross fence. The same 60X80 mm columns are installed in concrete-filled holes in the ground. The pillars are equipped with grooves, in which decorative reinforced concrete slabs are first installed (their approximate size is 300x300x550), and then wooden bars. Both the columns and the fence canvas are covered with decorative covers that prevent moisture from entering the structure.
Fence in a checkerboard pattern with clearance

Veins are laid between the pillars. Boards are attached to them in a checkerboard pattern - first on one side, then on the other. If you look from the side, then the fence is not “deaf”, but with gaps.
Fence "Lattice"

The base and bearing elements for this type of fence are similar - pillars. Between them, ready-made lattice sections knocked down from rails are installed. Reiki can be placed both parallel and perpendicular to the posts, and diagonally. Such a fence is enlightened, lets the sun through, does not close the space. Its function is more decorative.
Fence "Ranch"

This is a barrier when 2-4 wide boards are mounted horizontally on heavy wooden poles with small gaps. If you take well-crafted thin boards and a little more of them, you can build a beautiful fence for a wooden house.
Fence "Palisade"
Processed, smooth, not too large in diameter logs are installed vertically to each other.
If you install the pillars and the entire structure on the foundation, then this will save the lower part from interacting with the ground and moisture, and, therefore, will significantly extend the life of the fence. Fence supports can be metal pipes concreted into the ground, stone or brick poles, prefabricated reinforced concrete poles or wooden logs.
Materials for the construction of the fence
The cost of a wooden fence depends on its type and what material will be chosen: a board, picket fence, beams, logs (for a palisade). Also from the materials you will need: crossbars (wooden or metal), support pillars, formwork reinforcement, cement, sand, brick and stones for erecting pillars, nails and screws, fire retardant and antiseptic impregnation for wooden surfaces, bitumen or creosote for processing installed in the support or strip foundation of wooden poles.
Tools
To build a fence, stock up on the following tools:
- drill or shovel
- roulette
- stakes
- level
- screwdriver
- a hammer
- jigsaw
- brush
- sandpaper
How to make a wooden fence?
Before you make a wooden fence with your own hands, you need to decide on its design and how much capital construction is planned. For a fence with a foundation, the sequence of actions will be as follows:
- markup;
- foundation construction;
- installation of poles;
- fixing wooden elements;
- processing of wooden surfaces.
markup
The marking for the future fence is carried out using a tape measure and a rope. We determine the place for the placement of the gate and gate. In the corners of the site we install in poles. Between them we stretch the laces so as not to deviate from the given line when determining the places for the location of the pillars.
Foundation

The most time-consuming in the process of building a wooden fence with your own hands is pouring a strip foundation. Under a light wooden fence, the foundation is not particularly deepened. To do this, they dig a trench (depth up to 1 meter, width - 30-80 cm), deep into which a sand cushion is poured. Next, the reinforcement is knitted, the formwork is created, the pillars are set according to the level and the foundation is poured. It can be either at zero level or higher - 30-50 cm above ground level. After it hardens (after 2-3 days), proceed to further work.

Pole installation

The more often the poles stand, the stronger the fence will be. Pillars are installed in the process of pouring concrete into the foundation. The distance between them is about 2 m. The fewer pillars, the more crossbars should be. If the foundation is not planned, then in the places determined for the placement of pillars, holes are dug 1-1.5 m deep, sand (20 cm) is poured into them and water is plentifully watered. Next, with the help of a level, pillars are installed in them and the recesses are poured with concrete.


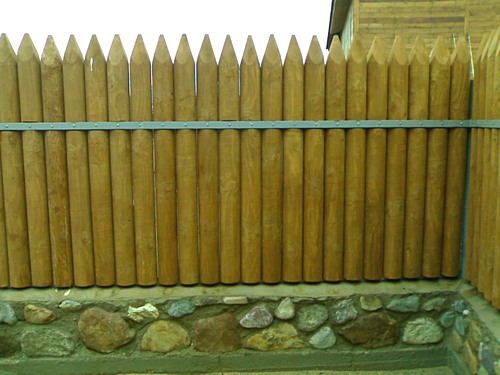
Standard fence foundation

Foundation with stones
If the post is wooden, then its lower edge is treated with bitumen or creosote to protect the wood from moisture and decay.
If brick racks are planned instead of pillars, then a place must be provided for them. After all, they will occupy square areas with a side of 1.5 bricks. To decorate the rack at the very bottom and at the top, the masonry is expanded by a quarter of a brick. In the process of laying, crossbars are mounted in racks. In this case, it is important to use a level to check whether the rack is level.

Fence installation
Next comes the installation of a wooden fence. Reiki, boards are attached either to the crossbars, or installed in the grooves - depending on the type of fence chosen. An easier option is to install sections. If the poles are wooden, then grooves are made in them for laying the crossbars; if the poles are metal, then fasteners (corner) are welded to them, to which they will then be attached to the legs.
How to extend the life of the fence?
In order for the wooden fence to serve for a long time, the wooden elements must be coated with antiseptic solutions and fire retardants, and only then - with paint (oil and water-soluble are used), stain, varnish. Impregnation is applied even before the installation of the fence. Fire-retardant impregnations will prevent fire, and antiseptics will protect the wood from the settlement of microorganisms in it and subsequent decay. They extend the life of the fence up to 30 years, protect the wood from the sun and moisture, retain the natural texture and beautiful appearance.
Fasteners fit galvanized. Before hammering a nail, it is dipped in drying oil.
In the future, periodically, at least 1 time in 2-3 years, the wooden fence must be treated with protective impregnations.
Original do-it-yourself wooden fences - photo:


A metal picket fence is an original, reliable and durable fence. The metal fence has a more spectacular design. European picket fences are an excellent choice at an affordable price.
In recent years, more and more often you can see not only new wooden houses, but also fences. The people take such a step consciously: the products are very beautiful. They even agree to tint them regularly, and how long it lasts, it will last so much. If you are one of those wood lovers, you may find photo reports of how people built a wooden fence with their own hands useful. As a rule, interesting solutions are used. Perhaps not always 100% correct, but working.
Photo report 1: a regular fence made of boards (fence)
This fence was put up with periodic help - sometimes hired, sometimes voluntary assistants, but most of the fence was assembled by the owner with his own hands. The boards were first processed, then brought to the site ready for use.
The main work was done before winter - pits were dug with a rented motor drill. The main thing is to make sure that the drill is not sharpened. Then the process is difficult even on normal soil. This is how it was for us: the first day we drilled only 6 holes and became discouraged: how much is everything else to do? Well, the neighbor suggested to replace the blade. With the new cutting part, all the rest were done in daylight hours. Drilled a little below the freezing depth of the soil. It freezes by 1.2 meters, the depth of the holes is 1.3 meters (reinsurance “just in case”), the distance between the holes is 3 m. The result was smooth.

After that, a bucket of rubble was poured into the holes, a sleeve was inserted from a roofing material rolled up in two layers. Pillars 60 * 60 mm with a wall of 3 mm were inserted into this sleeve. Sections of reinforcement were previously welded to them below - so that they would hold better, and also a “magpie” corner for fastening future logs. The pillars before installation, or rather long before it, are sanded and covered first with anti-rust, then with two layers of paint.

The most important thing is to correctly set the pillars. They also did this with a cord. We set the corner posts strictly according to the level. First, one was set up so that it stuck out 1.8 meters, then it was transferred using a laser level to the second, which stands at the same level. This operation was repeated with all "steps". The braces and stops helped to hold the key pillars for the time being, they poured in. After the mortar had set, threads were pulled between the pillars - one at the top, marked the tops of the pillars, the second in the middle of the height - they were guided by it when setting the remaining pillars.
After all the pillars were poured with concrete (in a few days), they started pouring the basement. We made a portable formwork from pine boards. Rearranging it, gradually filled the basement. They didn’t dig deep - they only removed the sod. As a result, we got pillars, between which a concrete tape was poured.

The wood was dry, painted with an antiseptic composition, which lightened the color a little. Light boards. Support bars - logs - with a section of 50 * 100 mm were attached to the installed pillars. They deliberately set the bar on top. Firstly, it looks more like it, and secondly, the ends of open-pore boards are protected. This bar was attached to the first leveled board and an auxiliary one, which was installed three meters later. Therefore, boards were attached to it one by one.

When installing the picket fence, it is important to install the first board strictly vertically. They checked it with a plumb line (I deceived the level a couple of times, so now we check it with a plumb line wherever the vertical is important). Next is the matter of technology. The boards were not mounted closely, but with a gap of 1.2 cm. In order for the gap to be maintained stably, a board (lining) of such thickness was found and a piece of the same length as the fence was cut off - 1.8 m. The work goes like this: we take the finished picket and lining strip. We apply the lining to the already nailed one, support it with a picket fence, level the top, then fasten it with two self-tapping screws to each log. As a result, the gap is the same. But such a trick is possible if the board has an ideal geometry.

Regarding the gap. The size (1.2 mm) turned out to be perfect. If you look from the outside, you can’t see anything, but from the inside, the street is clearly visible.

As for the advantages of a wooden fence: the neighbors, who were jealous: in the summer it was cool in my yard, in them - like in an oven, all the flowers burned under the fence. We have a riot of colors until late autumn.

Photo report 2: horizontal fence made of unedged checkerboard board
This fence is like from a fairy tale. It was partially assembled independently by the owner of the site. The hired workers dug holes, put posts. Metal work - cutting poles and welding tops - the merit of a friend. Everything else, including the processing of the board and the assembly of the fence sections, was done by the hands of the owner and his wife (painting).
The unedged board was used with a thickness of 20 mm, smooth edges were polished on a fox mill (by agreement), the wane was removed independently and then polished with a machine, after which it was coated with a water-based antiseptic "Dufa", teak color. Applied with a wide brush in two layers. Here is the result of the work.

Metal profiled pipes of square section were used for the poles: 60 * 60 mm, wall thickness 3 mm. Edged boards 150 * 30 mm are attached to it on both sides. They were fastened at a distance of 10 cm from the top, then at 100 cm and 190 cm. A “sandwich of two boards” was folded, drilled through, everything was fastened with a bolt with a self-centering washer.

Pillars with a total height of 3 m by 1 m are concreted into the ground. Exposed on a cord stretched between pre-installed control posts. The procedure is standard, the only unusual thing is that the top (2 meters that remain above the ground) is wrapped with a film. The decision turned out to be correct: after transportation and concreting, the film was dirty, and the wood underneath was clean. The film was removed after the concrete had dried.

The build order is:
- Choose the first board with a flat bottom edge.
- We measure the distance between the posts, saw off a piece from the board 1 cm shorter than the measured distance (so that they become normal).
- We coat the sawn off end with an antiseptic.
- We install the first board 5 cm above the ground, fix it with clamps. We twist two self-tapping screws (45 mm) into each edge from the inside.
- Vertical setting. We find the middle, insert the bar, do not rest on the ground, the edge hangs. We fix with two screws in the upper part of the installed board.
- Installing a new bar. It should overlap even the largest protrusion of the bottom. It also covers the screws that hold the middle bar.
This sequence is preserved until the very top. So the run is gradually gaining. Please note that the former wagons have beveled edges, they all look “outside”: so that raindrops roll out.

To get a smooth upper edge, they were selected, cut off, stained with an antiseptic, and fixed later - under the final, aligning all the tops in one line.
Photo report 3: wooden braided fence
Another option is made almost "solo". A do-it-yourself wicker wooden fence was assembled almost without outside participation. Sometimes the wife worked as assistants - painting the poles, the second assistant - the dog.

For a horizontal fence made of bent boards, which is also called wickerwork, sometimes Austrian wickerwork, the following materials were used:
- for pillars profile pipe 60 * 60 mm, installation step 2.7 m;
- edged board, planed 100 * 20 mm, 6 m long;
- intermediate beam 50 * 50 mm, but it is better to take less - it is more convenient to bend;
It was decided to paint the boards with an antiseptic with a dark pigment, the poles - light gray. From a distance on a dark background like stitches. Who does not like it - paint in tone with the boards.

Most of the time is spent painting and drying the boards. If they are ready, everything is assembled quite quickly: the fasteners are minimal, only the first board is attached to the level, the rest are put on it. Six-meter boards are braided around three pillars. Between the pillars, the distance is about 5.4 -5.5 m, the rest sticks out, but the result looks original.

It is more convenient to assemble a wicker fence from boards not with runs, but horizontally - weaving several boards along the entire length
The main focus is to weave the first three boards. Without intermediate bars, they simply fit: two on one side on the edge, one on the other. Then they need to be arranged so that they are one above the other. If there are two assistants, they hold the boards at the two nearest posts, and the third person bends the boards and inserts an intermediate beam. After the first three boards are installed, the bottom one is leveled and screwed to the posts (light the hole, then screw in the self-tapping screw).

If you make a wicker wooden fence from boards with your own hands, it is more convenient during assembly not to fold in spans, but to go horizontally. First, the bottom three boards were braided to the full length, set the level and secured. Then they collected the rest - as the paint dried.

This is a front view. “Tails” are visible, where the boards end and begin, but they do not spoil the picture, but add zest
A simpler option - only three poles and shorter boards - is shown in the video. Here the pillars are made of wood, the technology of their installation is shown. Good video - the whole installation process is clear.
conclusions
All three examples clearly show two stages, which, if you make a wooden fence with your own hands, take a lot of time. The first is the installation of pillars and the pouring of the foundation or basement. The second is the work of preparing wood. If the site is new, not inhabited, there are problems with preservation, and the process of painting, and, moreover, grinding, is lengthy. It makes sense to buy wood in advance and prepare and process it in a workshop or garage. When the time comes to put up a wooden fence, take the finished material to the site immediately before installation.
If all the materials are ready, you can make a wooden fence with your own hands quite quickly. The installation of wood itself does not take very much time. Of the entire construction time, 40% of the time is spent on preparing the boards, another 20% on preparing the pillars if they are metal and 10% if they are wooden, another 20% on their installation (pillars). Accordingly, the assembly does not take much time.
At the dacha - not a whim, but a necessity, the harsh prose of life ... After all, there are a lot of people who want to harvest where they did not plant it. Yes, and someone else's goat or cow can accidentally wander into an open area ... will not eat, so bites. A high solid fence will protect our property from damage and theft, and psychologically you feel your security when the territory is fenced. But what kind of fence is better to build, and how to build it? Let's try to figure it out.
What is the best fence to build?
There are many ways to build a fence with your own hands, and there is no need to talk about the abundance of different building materials! Wood (boards, picket fence), various metal meshes and sheets, bricks - you can’t count everything. In post-perestroika times, I even saw a fence made of ... ordinary skis that a savvy summer resident used instead of boards (he probably once worked at a ski warehouse))You can build a fence with your own hands from a chain-link mesh, unless, of course, you are not bothered by other people's immodest looks - after all, such a fence does not at all hide what is happening in your country house from passers-by. And you can build it from the now popular corrugated board (metal sheet) or asbestos-cement sheets of various configurations, but only the price of such a building material “bites” a lot.

Some build an almost eternal fence around their possessions - stone, but it is customary to enclose large country cottages with stone, and for an ordinary summer cottage, such fences are too solid (as it seems to me)) and, moreover, very expensive.
Let's focus on the simplest and most elegant solution: build a solid wooden fence with your own hands. It is easy to build, the costs are minimal, it is easy to operate, it requires a minimum of repair and renovation costs, and it looks very attractive. So let's get started.

For such work, you will probably need a screwdriver. You can choose it in our market, which unites large online stores. Selection.
Cordless drill driver fiolent dsha1-10-re3-18
4 049 RUB
WATCH
All tools are new
Drill metabo be 10 600133810
4 359 RUB
WATCH
All tools are new
patriot br 101li cordless drill 180201410
2 690 rub
WATCH
All Tools
Impact drill spets bdu-850 spets-1497
1 990 RUB
WATCH
All Tools
Building a wooden fence with your own hands
We will build a simple fence with our own hands from boards with a section of 150x25 mm, 2 m long. But you can choose any length of the boards, depending on how high the fence you want to build. We will move along the presented photos, to which I will give a brief but capacious description.Stage 1
Prepare several wooden pegs 60 cm long, sharpen each. Then, guided by the plan of your site, hammer them around the entire perimeter of the territory at a distance of 2 m from each other. Loop the pegs with twine, pulling it well.
Stage 2
Decide on the height of the fence. It should not be very high so as not to obscure nearby plantings, and not too low so as not to present your country life to the public)) Usually the height of wooden fences varies from 1.5 to 2.5 m. Cut (or order) boards of the desired length, process them on a grinder (you can use a conventional electric drill with a grinding nozzle). And if you want to make a semicircular or triangular profile, plan the boards by fixing them on a workbench. You can, of course, buy ready-made boards for building a fence with your own hands, but they cost an order of magnitude more expensive than an unfinished edged board.
Decide on the height of the fence
Stage 3
Now take out the pegs one at a time, and in place of the remaining holes, drill wells at least 50 cm deep under the fence supports. For these purposes, you can use an electric drill or a hand drill.
Stage 4
Now you need to dig the previously prepared supports into the ground. It can be bars with a section of 50x50 mm or 75x75 mm. Set the bars strictly vertically (use a plumb line), fill the wells with earth and compact it tightly. For strength, you can cement or concrete supports. After all, we want our wooden fence to serve for a long time with our own hands, which means that close attention should be paid to the strength of its supports.
Stage 5
Hammer a nail on top of each beam and pull all the beams together with a tightly stretched rope around the perimeter. This must be done in order to level the fence in height.
Leveling the fence
Stage 6
Now, with screws or nails, attach veins to the bars - boards with a section of 100x25 mm. Place the veins at an equal distance from each other and 20-30 cm above the soil level. Pick up nails or screws for fastening the structure in such a size that they pierce the veins through and protrude 2-3 cm from the back of the timber. The protruding parts of the nails (or screws) must be carefully and accurately bent.
Stage 7
Nail or screw pre-made boards for a wooden fence. You can make a “blind” fence by nailing the boards end-to-end, you can leave a small distance between them (from 10 to 50 mm), or you can use a thin rail instead of boards and make a palisade - whatever you want))
Stage 8
So, your wooden fence is ready! Now it remains to properly oil it, and after the drying oil has completely dried, paint it with frost-resistant acrylic paint (preferably in 2 layers).
So we finished building a wooden fence with our own hands. Now you can "wash your hands")) - relax and unwind with a cup of fragrant herbal tea, enjoying the fruits of your labor and the security of the territory.
At all times they were famous for their popularity. This was largely due to its relatively inexpensive price and ease of installation. But today the situation has changed a little, and now not just fences are made of wood, but real masterpieces.
Let's consider everything in detail.
Making a wooden fence on your own. Step-by-step procedure
The construction of a wooden fence can be divided into several stages, namely:
- Installation of support pillars;
- Installation of crossbars;
- Sheathing of the installed frame.
Each stage in the construction must be completed in full.
Installation of support poles
The installation of support pillars is carried out by backfilling. The algorithm of actions is as follows:
It's important to know! Sand with crushed stone will lie down more densely if the mixture is wetted with water.
Installation of transverse logs
Transverse logs, which are made of wood, are best installed using brackets.
The installation algorithm is as follows:

It is necessary to pay attention to the fact that the distance between the transverse lags can be reduced. However, in this case, the design may reduce its strength. The support itself must necessarily be at least 10 centimeters higher than the skin, and the bottom must be at a distance from the ground at a distance of no more than 15 centimeters.
Sheathing of the installed frame
Before you start installing the mounting boards themselves, you need to remember that there are several ways.
In one of the ways, the picket fence is installed on the logs before the latter are mounted in the supports, namely:

If we talk about the second method of installation, then it implies the direct installation of each board separately. In this case, it is necessary to prepare for a long and laborious process. After each installed board, it is necessary to measure the distance between them (if you need clearance between the boards) and check for a clear vertical. 
It is worth noting that any of the methods is popular with owners of private and country houses, so it is impossible to say which one is better. Everyone chooses an option for themselves depending on the choice of wooden fence design. 
What can be processed and painted a wooden fence
It must be understood that the installed wooden fence takes on a variable climate in all seasons. For this reason, it is mandatory necessary.
Important to remember! Before installation, all metal components of the fence must be primed and painted.
Do not forget that ultraviolet solar radiation is harmful to a wooden fence for the reason that as a result of their exposure, internal moisture is lost from wood, thereby it loses its bearing capacity and appearance itself.
Such impregnation must be processed several times on a primer with the possibility of deep penetration. After that, you can use moisture-resistant paint and varnish to give the wooden fence an attractive look.
The price of pleasure
If we talk about the cost of the necessary building materials, the average price is indicated in the table:
| Name of building material | Volume | Cost price |
| Board | 1 m 3 | About 3 thousand rubles |
| Cement | 1 kg | About 10 rubles |
| antiseptic | 10 l. | About 2 thousand rubles |
| self-tapping screws | 500 pcs. | 300 - 400 rubles |
| dye | 3 l. | About 400 rubles |
| Metallic profile | 1 meter | About 130 rubles |
| grinding wheel | 1 PC. | About 50 rubles |
| Edged board | 1 m 3 | About 4 thousand rubles |
Design options
To date, there is still no such material besides wood, which was read as malleable for the implementation of various design solutions (while wood is very affordable in price range). 
And so this fence has an internal view. No one will say that the view has become worse. 
In this version of the design solution, attention was paid to every little thing. You can see how the contours themselves are worked out, and the corners are smoothed out in full. In the photo you can see the sliding gate from the same courtyard. 
Agree, few of us know what techniques this or that designer uses to realize his fantasies. But they use: firing, create the effect of antiquity, successfully combine wood with various metal forged elements, and even tritely grind wood and paint it in various shades. 
How do you feel about brutal style? Agree, the view is simply impressive. 
To implement such a design solution, you only need a jigsaw, a grinder and woodworking skills. If you have the tools and desire, you can achieve the effect of shabby wood.
And who how to relate to puzzles? If you wish, you can initially draw a drawing on the board, and then cut it out according to the template. It is worth paying attention to the fact that this work is considered jewelry, since each board has its own clear size and bend. 
At the same time, the most difficult process in the construction of such a wooden fence is its installation (not everyone is able to make such an arrangement). 
For the construction, first of all, it is necessary to carefully consider the selection of the board. In no case should it be allowed that in any place of the board there is a different thickness or width. In this version, a distinctive feature is its affordable price, but this is offset by the enormous work that is necessary to create such a creation. 
Despite the fact that a board up to 1.5 centimeters thick is not very suitable for fences, it can be used to create an excellent fence in the form of a lattice. Agree, the view is no worse than the previous options. And if you also decorate it with green spaces that will braid it, the view will be gorgeous. 
Over the past few years, unedged board has increased in price by more than 15-20%, but this does not prevent it from staying in a low price range. At the same time, it is often used in the construction of a wooden fence in this style. 
As you can see, this example clearly shows one of the options for design solutions when working with a non-edged board. If desired, you can achieve any exclusive solution.
And how do you like the design solution in the style of blinds? Agree, the view is just a bomb. 
A selection of wooden fences
Beautiful wooden fences
With a little woodworking skills, you can create a beautiful fence in a short time.

This embodiment is popular with many owners of private houses, since its creation does not take much time and effort. Agree that the view is very attractive.

Standard fencing, which is suitable for both private houses and suburban areas. It does not require any special skills and abilities, but at the same time it has a beautiful appearance.
carved fences
To create carved fences with your own hands, you need to have wood carving skills. 
It can take more than 3 months to create such a fence, since every little thing plays a big role. But it's worth it. This type of fence is suitable for any interior. 
What about this cutting option? Surely, many people dream of such a fence, because it can not only emphasize the individual style, but also create the illusion of antiquity.
decorative fences
Decorative fences are often used to create rock gardens or simply in landscape design.

Small fences made of wood can emphasize the peculiarity of a particular plant, complement the interior of a personal plot.
If desired, you can create any decorative fence of one color or another. This does not require any skills and abilities.
Antique wood fences
Many people dream of creating a small fairy tale from their site and completely immersing themselves in antiquity. 
This version of the effect of antiquity is great for areas where wooden houses are located. In combination with such a fence, you can create a real fairy tale for yourself.

And if you add a little decor in the form of a thick rope? The view is simply spectacular. Surely the neighbors will come to the owner of such a fence with admiration.
Fences from a professional flooring under a tree
If for some reason there is no desire to work with wood, you can install a fence made of corrugated board. Thus, you can not only increase the service life, but also create the illusion of a wooden fence. 
If desired, you can use corrugated board in light colors under the tree, which is perfect for any interior. The service life of such a fence is over 25 years. 
Another option is to use corrugated board in darker tones, which allows you to create the illusion of varnished wood. Great for wooden houses, or buildings sheathed in plastic wood.
For a private house
Depending on the wishes of the owner of a private house, the fence itself can be made in any style. 
High fences have always been popular with owners of private houses. Thanks to them, you can hide everything that happens on the site from prying eyes, make the fence beautiful and exclusive. 
Another option is to install a fence with small gaps. This type of fencing is perfect for any private home, regardless of its size and style.
From a professional sheet under a tree
As a rule, the installation of this type of fence at its price is available to any resident of our country. Such fences are great for installation anywhere, regardless of whether it is a cottage or your own private home. 
In this photo you can see that the profiled sheet can combine a combination of decorative stone and the tree itself. Looks great and has a long service life. 
For those who love minimalism, the option of creating a fence from a profiled sheet under a tree is perfect. This variety belongs to the classical style and is perfect both for fulfilling a direct duty - protecting the site, and as a good element of decor.
Made of brick and wood
When creating a fence, brick and wood are combined just great. Designers often try to combine them when creating interiors in the room itself and outside it. 
The fence is made in a classic style using ordinary bricks and planks. Thanks to the successfully selected combination of color palette, such a fence looks not only rich, but also very attractive.

This composition combines the curly elements of a wooden fence with a brick one. A well-chosen color palette allows you to use it in any meta.
From stone and wood
This combination of building materials is in most cases used in country houses and cottages. 
It will be very difficult to recreate such a fence on your own, and you need not only to be able to handle this material, but also to know the intricacies of mixing a special solution. But you must admit that such fences can surprise even the most captious critic with their beauty. 
Wooden fences combined with decorative stone create the illusion of an ancient fortress. Often used for installation in country cottages or on the territory of private firms.
Wood patterns on the fence
Now in the world of wooden fences, a trend towards the use of additional patterns has begun to appear. They allow you to create something special and unique of its kind from a simple fence. 
As you can see, such a pattern is very difficult to make with your own hands, unless a person has sufficient skills in working with woodcarving. 
You can order a Chinese-style composition from wood carving specialists, as shown in the photo. This option is considered quite common in our country.
Original wooden fences
Surely every owner of his site would like to install the original fence. But what are they? 
Such an original design of wooden fences in our country is not common. This is largely due to expensive pleasure (the initial cost can be from 40-50 thousand rubles). 
Such a design solution allows not only to make your neighbors look at the fence with envy, but also makes the site very rich and individual.
Wooden fences horizontal
When installing fences, many of our compatriots often ask themselves the question - which is better vertical or horizontal? In fact, the difference here is only in taste. 
Speaking about such a vertical fence, we can say with confidence that everyone can make it on their own, while spending a short period of time and money. The classic style is suitable for fencing any area. 
The photo shows that the vertical fence is made using a complex design feature. It is very difficult to do this at home, and if you wish, you will have to seek help from specialists. But it's worth it.
Forging with a tree in the fence
At all times, they gave the fence strength and attractiveness. However, due to its considerable price, it is not very popular. 
A wooden fence using forged metal spokes in the photo makes it original in its own way. Gives the site style and beauty. Moreover, forged elements make the design of the fence very rigid, which significantly increases the service life. 
This option of combining wood, brick and, in fact, forged elements, makes the fence almost lifelong. It is not difficult climatic conditions, it is difficult to damage it, and most importantly - it is beautiful and stylish.
picket fences
Most of our citizens make picket fences. With this material you can make a very good fence. Just look at these photos. 
Of course, if this fence is painted, and then varnished, it will turn out quite well, but even so it is quite attractive. What is characteristic - it can be done in the shortest possible time (the period of its construction is no more than 1 - 2 days). 
In the presence of wild imagination and great desire of the owner of the site, you can give such a magnificent designer fence that will never cease to delight the eyes of everyone around.
wooden fence ladder
A ladder fence is not uncommon in everyday life among owners of private houses. Firstly, this variety allows you to save on the board, since small gaps allow you to reduce the amount of material, and secondly, it turns out very well in the end. 
The photo shows a ladder fence, which is still sheathed with corrugated board from the inside. Thanks to this, it looks very impressive from the outside, while the fence looks very neat inside the site. 
This type of ladder is in most cases installed in suburban private houses. The small gaps between the boards allow you to see the beautiful green spaces that can be planted behind the fence.
How to make a fence inexpensively
The video below shows how to make a cheap wooden fence.
If you walk through a modern Russian village and pay attention to the fences, you can draw some conclusions. In the case when the houses have been standing for a long time, several decades, they are surrounded by an old wooden picket fence, and if the house is new, there is a profiled sheet fence. More and more rural residents prefer this material. But a wooden fence is beautiful, aesthetic, environmentally friendly, easy to install and repair, does not heat up, it exudes warmth and reliability. If you treat the tree with a protective compound, the service life increases by tens of years. Yes, and you can decorate it in different ways. You will learn how to make a wooden fence with your own hands by reading this article.
INSTALLATION OF POSTS FOR A WOODEN FENCE WITH YOUR HANDS
We start the device of a wooden fence with. We bought a metal square profile 6 meters long on the market,with a wall width of 6 cm,and grinder cut it into pieces 2 m 40 cm. Iron covers were welded on top so that natural precipitation did not get inside, and painted with gray paint. The part that will be in the ground, 90 cm, treated with bituminous mastic.


Take a garden drill with an auger diameter of 13 cmand drill to a depth of 90 cm.

In general, having taken out the hedgehog and sent it to the forest, we will lower the pole into the pit. Align it vertically with a level and fill it with gravel, ramming it well with a heavy crowbar.

So that the posts for a wooden fence with their own hands stand at the same height of 150 cm, let's use , a device consisting of two flasks into which water is poured, connected by a hose.


For the veins, we used a metal profile measuring 2 by 4 cm, its desired length and painting. We will attach them to the poles with bolts and nuts. Drill holes in the log and pole, insert the bolt, tighten with a nut.


PREPARATION OF BOARDS FOR A WOODEN FENCE WITH YOUR HANDS
We will build a fence not from a picket fence, but from cleaves 10 cm wide, 2 cm thick. Such material seemed to us more beautiful and interesting. At the nearest sawmill, we ordered pine boards, asking them to be planed on both sides. In order to have less waste, the length of the tesin should be taken 6 meters.

The height of the fence will be 1 m 80 cm, which is enough to hide from prying eyes.
Having marked the board into segments, we cut it with an electric jigsaw. Since the planed board is only on two sides, we will process the edges with an electric planer, placing the board on the edge.


WOODEN FENCE OWN HANDS
We will fasten the boards to the logs with self-tapping screws, with a drill at the end, 41 mm long.


Let's start fixing the board from the edge of the wooden one with our own hands. Then we again take the hydraulic level and attach the second board to the logs at some distance from the first, leveling it in height with this device. We will do this along the entire length of the fence.

