Is it possible to install an air conditioner at home yourself? How to install an air conditioner in an apartment yourself. Connecting the air conditioner to the panel
Today we will discuss how to install an air conditioner with your own hands, regarding the outdoor unit. Wait a minute to call the climber, let's try not to fall out of the window. In fact, the air conditioner is started using the reserve accumulated by the system. Freon is initially accumulated by the external unit; after docking, the refrigerant is released. It is advisable to measure the temperature difference between the boiling point and the low pressure side vapors of the air conditioning compressor. The collector contains a scale for different brands of freons, equipped with the necessary information (first parameter). The second is measured with your own hands... Let's see how to install an air conditioner yourself.
Sequence of actions when installing an air conditioner
The responsible part determines the location of the outdoor unit. Enthusiasts suggest equipping balconies with a box. Avoid installing an air conditioner without forgetting to evaluate its future performance. The length of the air conditioner communications is strictly specified. Mount copper pipes ok, how much does the kit give? The difference will cause a slight change in channel pressure, causing the air conditioner to go beyond the permissible limits:
- Freon pressure is too low and cannot withstand operating temperatures. The cooling process of the air conditioning compressor will be disrupted, causing increased wear on the unit.
- Excessively high pressure raises the boiling point of freon. Some of the liquid phase will enter the air conditioning compressor, causing damage.
Masters sometimes monitor the freon pressure of the air conditioner circuit using a barometer scale, a more accurate temperature method. To the input of the external unit on the side low pressure(thick tube) attach a manifold, use a scale with marks to find the boiling point. It is enough to measure the temperature of the vapor (tube temperature), making a conclusion about excess/insufficient mass of freon. Professional craftsmen cut the tubes with a tool, roll the ends, after putting on the nuts, and carry out the installation on site. If necessary, copper wiring is increased by soldering.
Couplings are used - tubes of larger diameter. There is a flaring tool to a specific length. The tube with the treated end is put on the other.
The soldered seam comes out alone, doubling the reliability of the connection. It’s clear that you won’t be able to flare the tube without a tool; the clutch method is more suitable for ordinary people. Before soldering, the ends are cleaned and leveled to avoid the entry of foreign bodies that impede the operation of the compressor (the equipment will simply break if a solid body gets inside).
The tubes begin to lead the inner block towards the outer one, breaking through the walls in places. The junction points are isolated (as is the freon flow path). The drainage tube and the power cable of the external unit (through the internal one) go in one bundle. The copper tubes are simply screwed on with a given tension, the drainage tubes are overlapped and wrapped with plumbing tape (fumilenta, fumilenta). The electrical wire is mounted in place, behind the terminal lugs. The device is powerful; it is not recommended to plug the air conditioner into a typical outlet. They lay the wire of the 230 volt network distribution panel and carry out installation using standard methods. On the block. Try to avoid twists.
Copper tubes are connected to the external unit with nuts according to thickness. Side high pressure thinner. You will find the low pressure side service pipe by looking for a thick tube. Let's take a closer look at the joint. At the bottom of the left side of the external block there are a pair of L-shaped pipes. At the end of each there is a cover (hex key) hiding a bronze fitting (faucet). Both pipes are initially closed, and freon is collected inside the external unit.

Vacuum Tool
Before starting refueling, evacuate the system. The step frees the freon path from moisture and air. Vacuuming is carried out with a compressor (vacuum pump) until the pressure drops to zero. Then the device will work for some time (5 minutes), ensuring that condensation is removed if any has settled in the evaporator. Then you need to turn off the manifold valve. It's time to carefully release the freon. The valve of the thin tube of the external unit opens first, then the thick one. The pressure should gradually equalize, start the compressor. The adequacy of the freon quantity is assessed. The difference between the boiling point and the vapor temperature is within the range of 5-8 degrees Celsius. The difference is less than acceptable - there is too much refrigerant. Exceeding 8 degrees requires adding the required amount from the cylinder, controlling the temperature.
In a two-position manifold, a container with freon is connected in place of the pump. Moreover, you need to bleed the air from the connecting tube by opening the right valve of the manifold for a second. Then they start refueling. Rosenberger installers say: it is useful to turn the cylinder upside down, unless the freon is R22. Soldering is carried out with a silver alloy of at least 5% content, or another suitable flux. Tin and copper, or any other metal, form an electrochemical couple; when operating, avoid contact with water.

Refilling air conditioner with freon
Like in a water heater tank, the corrosion process will begin. Therefore, leaks will be possible. It’s not dangerous, like in the gas industry, you just have to call the service team to refuel. Some freons are poisonous, others destroy the ozone layer. If a leak occurs, the concentration does not reach explosive levels.
Installation of the external air conditioner unit
Leaving aside climbers and lone heroes, installing an air conditioner on a wall will be difficult for the average person. Let's watch. A typical external unit fits in the middle of the windows of a typical high-rise, with 30 cm from any frame to the bracket. A short distance by the standards of an adult. Without effort, a man can make a hole in a wall with a hammer drill and hammer in anchors. Complexity can be caused by chemical anchors, under which it is necessary to thoroughly clean the hole before laying the adhesive.
However, the techniques are rarely used. Traditional steel anchors of four or more pieces are more often used. The bracket is simple, reminiscent of the letter G. The external unit of the air conditioner is attached to the shelves of two parts with four bolts - two on each side. It is important to get the fastenings, then you can put aside your fears. Similarly, the process of docking and starting the system is carried out from the left window. Better than bending over with the key, kissing the windowsill, risking falling out.

Type of installation of the outdoor unit
Became standard installation under the window has one significant advantage: it is relatively easy to install the external air conditioner unit. It is difficult to tighten the bolts (it takes a long time), opening/closing the valves is a problem. Consequently, dismantling rusted fasteners is not easy. It is dangerous to stick your head out without insurance. In the case of installation between windows, the first difficulty is the process of installing the external unit on the brackets. Residents want to cool down their apartment in the summer, and a stack of external units is piled on top.
It is easier to install an air conditioner on the balcony; nowhere in the legislation can you find a ban. There are rumors - because the authorities were too lazy to create an information and legal portal - it is forbidden to install an external unit on an insulated loggia! If there are three windows, one is directly opposite the equipment, it seems that you can install it. We apologize for the legal confusion. Apparently, the authorities think that since ignorance of the law does not relieve one from responsibility, there is no need to educate the people. Perhaps, if a fool breaks it, it will be possible to file an administrative case. Don't believe me? Try to find in a search engine the number of the law regulating the installation, excluding common words about the need for approval (on the façade). The authors quit after a half-hour study.
There was definitely a law, there are rumors: the text was repealed in 2013, forum users are wondering what will be non-compliance with the norms. It is useless to ask lawyers; lawyers shrug their shoulders. The regulatory framework of the city of Moscow is more pleasing: the documents are available, but in the first edition. It is incredibly difficult to understand, following the amendments, where to add new lines, to read the fragment. Therefore, let’s say: in 2007, residents were required to approve the installation of any engineering equipment on the facades; God knows what next. Therefore, the question of how to install an air conditioner with your own hands would begin with the regulatory framework, then go through the options. Please note: the installer is not at all interested in the installation; the homeowner is responsible.
We hope we have clarified how to install an air conditioner yourself. We recommend that the most ardent readers visit mosopen.ru themselves. The confusion and confusing interpretation of legal terms makes it surprising that legality exists.
Step-by-step video of air conditioner installation
The cost of installing an air conditioner is high. Grows in parallel with power. The issue was discussed in detail, how the purpose of the mysterious letters that dotted the tables of installation companies, today we will see what the workers are doing, that installing an air conditioner with your own hands becomes a complex matter, difficult from a financial point of view. There is a difference between the models of different companies, but it is not significant. That's why installing a Mitsubishi air conditioner is not much different from a Samsung. It’s clear that the Koreans are now promoting quiet, durable inverter motors; it’s worth looking at the warranty first. Today washing machines, refrigerators are equipped with a 10-year warranty card. For a long time, for our reasons, a good air conditioner cools longer: you pay more, the cost of installation is steep.

Car air conditioner
Let's decide where to install the air conditioner. The first step, Samsung experts recommend... is to check the markings of the outdoor unit, outdoor unit, and box for a match. If you mistakenly placed the wrong unit, you cannot begin installing the air conditioner. The indoor unit is mounted on a special large plate. However, there are some nuances here:
- Floor-standing indoor units are deprived of the right to bear the name because they hang. The distance to the parquet should not exceed 15 cm. Mounting plate(bracket fastening) changes appearance, from a solid size steel base to a plank. The upper edge of the indoor unit of the air conditioner is mainly attached.
- Cassette indoor air conditioner units are popular due to the possibility of being built into suspended ceiling. It is necessary to calculate the strength of the ceiling so that it does not kill employees, to provide the necessary indentations and an aesthetic appearance. Fastening is carried out with four threaded pins, driven deeper into the concrete onto nuts through shock-absorbing washers. If the dampers are removed and the upper wall of the indoor unit of the air conditioner is allowed to come into contact with the ceiling, the level of vibration and noise will increase, negatively affecting the working and living atmosphere; it is simply prohibited by laws and standards to make a lot of noise. The topic of damping devices for fans was raised; those interested will study the relevant section.
The indoor unit hangs over your head. Calculating the height of the air conditioner is useless. The only thing is that it is necessary to maintain the distances from the walls and ceiling specified in the instructions. When installing the base plate, a building level is used to ensure the correct angles are maintained. It is especially important to strengthen the pins of the cassette unit and position the unit strictly horizontally. In the latter case, fixation is carried out with locknuts. The installation process of a wall-mounted indoor unit does not cause any problems. The body is simply hung on a prepared bracket.
Air conditioner communications
The indoor and outdoor units are connected by a bundle of communications, including:


The cable is stretched from the shield of the external unit to the internal shield, which contains the labeled terminals. Each ear is put on phase, ground, neutral. The cable is used for outdoor use and is more expensive than conventional PVC. There is one grounding conductor. It was explained that the neutral wire and the ground are different things, avoid confusion, changing places, turning a blind eye would be the wrong tactic. When conducting three phases, purchase a 5-core cable. The output currents are added up, the nuance is taken into account when selecting the wire. If one vein is thicker, a null (not earth) is found. We take into account the nuances when choosing a circuit breaker; typical fuses will prevent an accident.
As for the electrics of air conditioners, typical lugs are used. If it is necessary to install wires of non-standard length, we will extend them ourselves. The copper tube comes complete, the ends are cut off, and the inside is chamfered with a suitable tool. Fastening is carried out with nuts. To flare the end, a special tool is used to bend the tube outward into a cone. Afterwards, the nuts are screwed on coaxially and tightened with a wrench. Use the tools at hand. Take an adjustable wrench, avoid gas ones. A typical air conditioner installation does not provide any seals; the tightening force is indicated in the manual. Each tube is covered with a jacket, preventing heat exchange; both, along with the wire and drainage tube, are wound together. Copper tubes of unequal diameters, simplifying installation.
WITH reverse side The indoor unit has pipes, each of its own diameter, closed with plugs. Please note: when pulling communications through walls, the nuts placed on flared tubes are covered with plastic inserts so that plaster does not get inside. The drainage tube is simply pressed together and wrapped with insulating tape on top. DIY air conditioner installation continues outside, where the bulky unit sometimes has to be placed on a support high above the ground. Please note: Although there is a manual, installation will require a blueprint. The work is carried out to make sure that the walls will withstand the load, theoretically. In practice, the designer simply makes money.
The distance between the indoor and outdoor units along communications does not exceed 5 meters. Deviation from the rule makes the installation non-standard, adding cost. The maximum length of communications is indicated by the passport. As planned, the drainage goes down to the ground, copper tubes reach the outdoor unit. In practice, they forget to do this, so the condensation irrigates the underlying objects.
Refilling the air conditioner
There are rumors: sometimes there is freon inside the outdoor unit... I wanted more confidence, the installation manual gives a comprehensive answer, the taps are closed tightly...
Procedure for refilling the air conditioner:
- First, inspect the correct installation. Both pipes have taps hidden under screw caps; avoid touching the fittings. One connector (usually thick) has an input for the filling manifold. We connect the left hose, crown the central one with a vacuum pump.
- Opening the left valve, pump out the air, wait until the arrow shows 0, continue for 15 minutes. Let's close the tap. Instead of a pump, we connect a freon cylinder to fill the air conditioner.
- It's time to remove the end valve covers of the outdoor unit. Under them there are sockets, often hexagonal in shape, which are unscrewed with a special key (reminiscent of the fittings of a folding bicycle made in the USSR). To install the air conditioner yourself, turn the taps to maximum. Maintaining the position, we will carry out operation; carefully return the covers.
- Open the left manifold tap, the filling cylinder valve. Refueling is carried out based on weight. Although there are schemes (discussed above) that measure the temperature difference by releasing freon from the external unit into the circuit.
The refueling was completed, the calculation of the air conditioner power was carried out by the portal. A representative of a small class of devices that demonstrate an efficiency above 1 (much).
GOST 26963
It starts with permission. The devices clinging to the wall of the house are coordinated with numerous organizations. First of all, the owner. A person has the right to sell an apartment, not apartment building, many people live. Before installing an air conditioner, you will need to obtain permission; (before approval), make sure that the project is obtained from a certified organization. Undocumented work is illegal. Do you like the schedule? Some regions have seen a horror story: teams authorized by the administration are ironing the streets, dismantling unauthorized equipment. If you install an air conditioner secretly, a tower will come and remove the product. It’s difficult to describe the return procedure, torture the lawyers harshly. In the country, some people are more equal than others, so avoid looking up to your neighbors...

According to GOST 26963, the installation of an air conditioner is limited by the operating instructions. Really simple? You take it, install it, but a bunch of regulations prohibiting the installation of an air conditioner (as well as other equipment) are kept silent:
- if the house is an architectural monument;
- if the building adorns the central street with its facade;
- if the building has artistic value...
The list of restrictions is long, we are embarrassed to describe the difficulties, we recommend simply perplexing the local administration. If you want to damage the wall of a high-rise building, it will be enough to get permission from the HOA. For example, an antenna requires the consent of 100% of the residents of the house... just. You cannot go on someone else's property without permission. In practice, few people pay attention.
Now the power. You know, in installation companies, the value is marked with numbers in the range 07-30. Moreover, an increase in the number raises the cost of work to heaven. Why are people interested in installing air conditioning themselves? For example, for new owners of 30 models, installer services will amount to 20,000 rubles. It is clear that a rare dude wants to pay the amount, or wants to know the direction in which the money is flowing. Firstly, power. Most helplessly bite their elbows, trying to correctly calculate the parameter.

Installer 90 lvl
There are online calculators, ready-made Excel programs that allow you to get the desired figure by entering a couple of numbers. Size of the room, number of printers, photocopiers, and other household appliances. The beauty of Excel is the ability to embellish calculations with custom values by specifying power. Readers guessed it: the cooling capacity of the air conditioner is designed to recoup the excess heat generated by the equipment.
How much power is required from an air conditioner?
In light of the above, before installing an air conditioner, try to assess the cooling production needs. Boiler power calculation programs can help. The results can be used to calculate heating and air conditioning. Heat loss goes in the direction of decreasing temperature through the walls. Moreover, the value is proportional precisely to the difference, the resistance building structures. Procedure:

Please note that the calculation is carried out if you fail by searching for an air conditioner calculation program. The required figure is immediately given in BTU/1000 (graded in the range 07-20 and above). The marking contains the required parameter, so interesting to buyers, installers. Let's convert BTU/1000 to kW. You need to multiply BTU by 0.2931, you get the desired figure. Heating boilers are calculated in kW. We also mention BTU - British Thermal Unit, in English it sounds like British Thermal Unit.
Now readers know, “seven” is equivalent to 2.0 kW, “nine” – 2.5 kW. We emphasize that the figure has an indirect connection with energy consumption. Every good air conditioner will produce more cold than it will consume network electricity. This is the basis for the idea of heat pumps, however, regular readers of the portal should know and advise the authors. The calculation procedure was explained. We hope that readers will help each other with links to online resources... Visit the section regarding boilers and heaters, which provides the necessary addresses along with explanations of the process of using calculators.
I have never seen programs that take into account the presence of people. If the room is filled with a group, for each person we will add 100 watts of air conditioning power, how many BTUs will be, do the math! For gyms, we will increase the figure to 300 W; people do physical labor, which means the air conditioner will have to work harder. 80% of the energy expended by an athlete is generated heat.

Types of air conditioner installation
We want to say right away: the installation of an air conditioner can be standard or non-standard. The contents of the price lists are attributed to the first case. As for additional options, you will have to find out, simultaneously overcoming the resistance of the company's technical support. Let’s say we want to install a “two-piece”, the freon circuit needs to be increased by several meters relative to the required ones. Get ready to pay extra. Tariffs of companies vary, find out specific prices.
Why does this happen? A typical air conditioner may contain freon in the external unit. The valves are tightly closed. The craftsmen select the location for installing the air conditioner and begin drilling, chiseling, pulling, and twisting. The inlet and outlet tracts are connected, and the drainage pipe is abandoned. Before installing the external air conditioner unit, the technicians discovered that the length was exceeded.
The freon pressure is below normal, you will have to top it up - a separate hassle. After assembly, the technician will pump out the air with a vacuum pump, then simply open the valve, allowing the refrigerant to fill the system. A certain system pressure must be maintained. Loses importance in air conditioners, not on the evaporator negative temperatures, uncritical, get some steam inside.
The adequacy of the amount of freon is measured with a thermometer. The master opens the tap and looks at the meter readings. Refuels. With non-standard installation, freon may sometimes be needed. Volume is consumed along the length of the pipes. The air conditioner has a limitation on the length of the freon route; the issue is discussed before purchase. The situation in the country is interesting. It seems that it is written - air conditioners are installed in accordance with the operating manual, on the other hand, no engineering systems can be installed at home without a project from an organization that has a license (it seems possible to carry out the project, for more details, see the government decrees listing the types of activities that require a license).
Therefore, you need to go somewhere in any case. The designer will want to carry out the installation. By the way, you can clarify whether there is a practice of installing devices on the loggia. At first glance it seems stupid, in winter, when heating is required, the operating conditions of the compressor will become softer. Thus, we have no doubt: most readers can install the air conditioner correctly. However, the law requires a design, even if the drawing is redrawn from the product’s instruction manual. They traditionally forget the water that sprinkles the heads of passers-by. Masters who make money are too lazy to look at foreign methods for solving problems. The correct path will be found by pedestrians who bypass the flowing streams of half-slops.
Before other operations begin, the indoor unit of the air conditioner is installed. The box is secured with dowel nails and other fasteners. In standard models, power reaches the external unit, bypassing the internal one. In the West there are often designs where power cables go separately, the compressor is turned on by a relay controlled by a signal with an amplitude of 25 volts. It is definitely worth installing an air conditioner in your apartment if you are not accustomed to heat. We remind you that the equipment in no way replaces ventilation, so it is necessary to take a reserve of power for air circulation. Before installing an air conditioner, take the trouble to do a calculation. Save money.
Installation of air conditioners by foreign companies

Air conditioner installation by a foreign specialist
The first difference: business class houses are equipped with air conditioners. Videos showing the slums have been lost. There are excellent conditions for installing an external air conditioner unit. According to data from thematic forums, in America construction, installation work made under licenses. There is only one professional air conditioner installer per team. There is no obligation to work, he will come, look, leave, without a license or permit, work is not worth a penny. An interesting example of construction.
The external unit of the air conditioner is installed in two ways:
- Trampling on the posts a foot above the ground.
- Not high on the wall, the external unit of the air conditioner can be easily reached by two strong guys who bought a ladder or a pickup truck.
The Russian problem of authorizing state organizations disappears. The problem of cities disappears. We assume the roofs are equipped with HVAC. The difference between split systems is small. We direct those interested to read early reviews portal VashTechnik. The first thing that attracts the eye is communications. The American is used everywhere, the USA puts it in a more original way:
- Short tubes of the indoor unit pierce the wall.
- An additional package is mounted outside, exactly up to the external unit.
- Further, see RF.
Let us remind you that the Koreans do not take nuts out.
The operator missed the rolling; we assume the tubes are cut in place. The ends are equipped with nuts using a special tool. The communications are covered by a protective shell that prevents heat exchange with the environment. The drainage hose reaches the drainage system: it is cultural, it does not irrigate the heads of passers-by.
On the side of the indoor unit, it is possible to change the sidewall, from where the condensate will drain. It’s difficult to say why this is being done. Apparently, it is more convenient to start drainage after reaching the sewer. To change the side of the drain, remove the outer cover; the hose and plug are swapped. Electrical wiring is carried out with a 4-core cable thicker than 16 gauge.
Note. The USA has adopted a cable calibration system; thinner wires correspond to a larger number. It developed historically, mainly in the USA. The cable was rolled by a machine, passing through increasingly smaller holes. Accordingly, the 16 gauge went through the operation 16 times.
The wire supplies power and transmits control signals. A cable with a colored braid is used, which makes the designations clear: the wiring of the indoor unit corresponds to the external one. Ground (GND), numbers 1-3 (phases). To carry out installation, the shield is removed. On the internal block, a small cover is screwed on with screws, on the right side, on the external block there is a steel ledge on the right side of the housing. Power is supplied bypassing the indoor unit. We don't see any differences.
The USA demonstrates two differences compared to Chaliapin’s homeland:
- The location of the external unit, which is carefully installed and removed, horrific methods are not invented, such as pulling the box with a car traction using a cable to the ground. Sometimes the entire body is supported by four strong posts protruding from the soil by about a foot.
- The drainage hose goes into the sewer. By the way, the measure concerns bypass valves of water heaters.
Air conditioner installation sequence
The racks begin, the installation process was cut out by the cinematographer. We believe typical screw piles, the rest takes too much time. Concrete gains strength in 28 days. Although in this situation such precise adherence to standards may not be necessary. By the way, on top pile-screw foundation they put up country houses. It is important during installation to avoid damage to the anti-corrosion layer of the metal. Otherwise, rust will eat the pile reinforcement and the external block will fall. When installing houses, they observe the subtleties of calculating the soil and wind load; we believe that the arguments are unimportant for the mass of 25 kg represented by the air conditioner box. If only the moles and rats would stop digging the soil.
The indoor unit is hung on mounting plate, which must first be removed from the back wall. In the USA, houses are made of sandwich panels; screws are screwed into the walls without effort. Under the communications, a thin drill is used to make a through hole in a place where there is no wiring. Then, using a Forstner drill, the diameter is adjusted to the desired size. So that both copper tubes, cable and drain hose pass through.

The launch process is painfully familiar to our regular readers. Technological map indicated in the instructions:

Let us add that in America split systems with several indoor units are common. A bunch of parallel pipes protrude from the right side of the external block, a pair for each point in the evaporator room. The startup process is not much different. Will vacuuming and nitriding last longer? We see: air conditioners harmoniously simplify the life of Americans who have settled in cottages; they disfigure the streets of Russian cities, where citizens place 2-3 bars. Figuratively speaking, the technique was introduced by Asia. In England we will also see something similar; in New York, on the central streets there will be no swarm formed by myriads of ugly boxes.
The United States uses a type of air conditioner called HVAC. The fundamental difference is that the fan takes air from all sides of the cubic outdoor unit, blowing it through the mesh cover. As a result, it becomes possible to install an air conditioner on the roof. The approach strips the streets of major cities of ugly boxes clinging to the walls. At the same time, human needs are provided. It is clear that the length of communications is increasing. Most overseas houses are planned using a forced ventilation scheme. The roofs are dotted with shafts where the blades operate.
In our realities, every tyrant is too lazy to come up with a better option than installing an air conditioner for show. They explain it with health, other reasons, and avoid buying a monoblock that allows you to plug the window with a hose. Some owners think of decorating the balcony area with air conditioning. A suitable solution if you follow the instructions.
By the way, before installing the air conditioner yourself, determine the location. Façade installation will require approval. It’s not easy with balconies, the owner must do this certain conditions. Earlier in 2007, it was required by law to independently install an air conditioner according to the instructions. Recently, it has been recommended to go through a bunch of organizations. There were rumors in the spring of 2013: the law would be repealed, but people are finding it difficult to understand the regulatory background. The rules system is confusing. Think several times before installing an air conditioner yourself anywhere.
Climate control equipment and, in particular, split systems, which are usually called air conditioners, help you survive the summer heat and stuffiness. The equipment is not cheap, but the worst thing is that for its installation you need to pay an amount slightly less than for the equipment. That’s why many people think about self-installation. Installing an air conditioner with your own hands is possible, but there are many little details and features, ignorance of which leads to rapid wear and tear of the equipment. Detailed step by step instructions will help you do everything right.
Selecting a location
Installing an air conditioner yourself begins with determining the location of the equipment. Since split systems consist of two or more blocks, you will have to choose a location for both. In this case, it is necessary to take into account how the cold air will spread in the house or apartment, and also take into account the technical requirements.
Let's start with technical requirements. When choosing the location of the indoor unit, we take into account the following requirements:
- from the block to the ceiling - at least 15 cm (for some manufacturers at least 20-30 cm);
- to the side wall - at least 30 cm;
- to the obstacle against which the flow of cold air will break - at least 150 cm.

The outdoor unit is usually placed near a window or on open balcony, if there is one. On glassed balcony/loggia can be installed on a fence (if it has sufficient load-bearing capacity) or nearby on a wall. If you live on the first or second floor of a high-rise building, they try to place the outdoor unit above the window level - away from passers-by. For more high floors Can be placed under a window or on the side.
If you plan to install an air conditioner yourself in a private house, the location is usually selected based on the load-bearing capacity of the walls. If you have a ventilated facade, you can use a special fastening or hang the block on a plinth, if there is one.
When choosing the location of the split system blocks, you must also remember that in most cases the minimum and maximum distance between the blocks is standardized. Specific numbers depend on the manufacturer. For example, the minimum distance could be 1.5 m, 2.5 m ( different models Daikin) and even 3 meters (Panasonic). Some manufacturers do not regulate the minimum length, that is, it can be anything. In this case, you can install the blocks back to back. Installers call this installation method a “sandwich”.

The situation with the maximum distance between two blocks is a little simpler. It is usually 6 meters. It may be more, but then additional refilling of the system with freon will be required, and this is an additional expense, and a considerable one. Therefore, they try to invest in the required 6 meters.
What you need for self-installation
You probably know how much it costs to install an air conditioner by specialists. When asked where such prices come from, since the work only lasts 3 hours, they answer that the equipment is very expensive and its depreciation makes up a significant portion of the cost. This may be true, but most of this equipment may already be on the farm. The exception is a vacuum pump, but many teams do without it, since a normal one really costs a lot, and a bad one is of no use.

Equipment
So, to install an air conditioner with your own hands you will need the following equipment:

For an ideal installation, a vacuum pump is needed, but usually there is nowhere to get one and on routes up to 6 meters they do without it.
Materials
To connect and install two split system units you will need the following consumables:

That's all you need to install an air conditioner yourself.
Installation procedure and features of the work
There is nothing super complicated about installing a split system yourself, but there are a lot of nuances that can affect the durability and quality of operation of the equipment. First of all, before starting work, you should carefully read the installation and operating instructions that come with the equipment. You will compensate for the time spent by knowing exactly what and how to do with your air conditioner, because there are some nuances.

Getting started - installing the blocks
Before starting all work, it is worth looking for hidden wiring or heating pipes in the intended installation location. Getting caught in them while working is very no fun. Next comes the actual installation of the air conditioner yourself. You need to start with installing the indoor unit. At the selected location we place a plate for its fastening. The block must hang strictly horizontally without the slightest deviation. Therefore, we approach marking and fastening carefully.
We apply the plate, level it, and mark the places for fastening. We drill holes, insert plastic plugs under the dowels, hang the plate and secure it with dowels. We especially carefully fasten the lower part of the plate - there are latches that hold the block, so they must be firmly fixed. No backlash. Then we check the horizontality again.

Having estimated where the route will be located (it must slope at least 1 cm per meter for normal drainage installation), we begin to drill a hole in the outer wall. We also drill the hole with a slope - again, so that condensation drains normally (the angle can be greater than that of the route).
The minimum diameter of the hole is 5 cm. If there is no drill of this size, you can make several holes of a smaller diameter, bringing out not a common bundle of communications, but each tube/cable separately. In any case, it is better to drill two holes - one for the copper and electrical cable, the second for the drainage pipe. It must be laid lower than the others so that it does not leak into communications in an emergency.

If two blocks are mounted back to back, the hole must be strictly aligned (measure on your own block where the connection ports are located)
Then we install the brackets for the outdoor unit. If we are talking about a high-rise building, you will need climbing equipment and skills to work at heights. This block must also hang strictly horizontally, so when marking the holes we also use a level. When installing brackets, we install fasteners in each hole, no matter how many there are - this is a prerequisite. Standard fasteners are 10*100 mm anchors. More is possible, less is highly undesirable.

After the brackets are secured, the outdoor unit is installed. We also attach the block to all the fastenings that are available. This is the only way to guarantee that it will remain in place under any conditions.
Laying communications
The two blocks are connected by an electrical wire and two copper tubes. There is also a drainage pipe leading through the wall. All these communications must be correctly selected, connected, laid and secured.

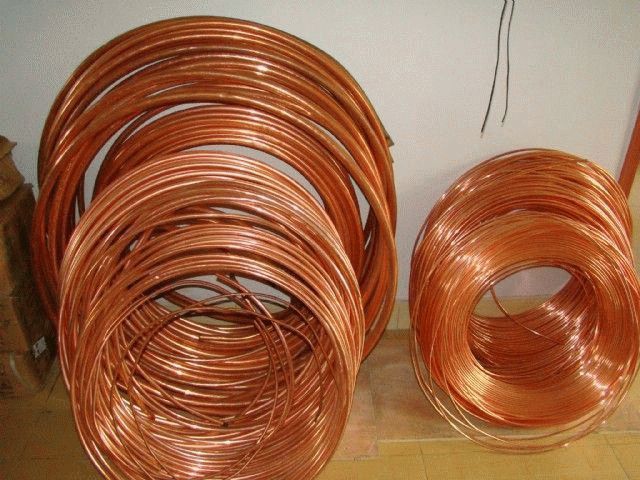
Copper tubes
We start with copper pipes. One is larger in diameter, the other is smaller. The dimensions are indicated in the instructions for the air conditioner. We cut off a piece of the required length with a pipe cutter, remove burrs from the edges with a special tool, straightening and leveling the cut. Use regular saw It is undesirable, like a file for removing burrs - there will definitely be sawdust inside the pipe, which will get into the system and quickly destroy the compressor.
Heat-insulating tubes are placed on the prepared pipes. Moreover, the thermal insulation must be continuous and extend inside the wall as well. The joints of pieces of thermal insulation must be glued with metallized tape, ensuring a very tight fit of the edges. The quality of thermal insulation is important, since condensation will form on uninsulated sections of the pipes, and it can drain inside the wall, causing frozen streaks, destroying the wall.

Copper tubes wrapped in thermal insulation must be passed through the hole in the wall. Before doing this, be sure to carefully seal the edge that will be inserted into the wall so that dust does not get inside the pipe (or it is better to plug both ends securely immediately after cutting and leave the plugs until the connection begins). This is a very important point, since dust will quickly damage the compressor.
Cable and drainage
The situation is simpler with electric cable. Each wire is terminated with special lugs, installing them on conductors stripped of insulation and crimping them with pliers. The prepared cable is connected according to the diagram in the instructions.
On the indoor and outdoor units, above the ports for connecting copper pipes, there is a removable plate, under which there are connectors for connecting cables. Before you start installing the split system yourself, remove the plates, consider what will need to be connected and where - it will be easier to work with later. Especially with an external unit.

Connecting the drainage tube is generally simple: it is connected to the corresponding terminal on the indoor unit and brought out through the wall. The length of this tube should be such that it ends at a distance of 60-80 cm from the wall. The drainage pipe must be laid with a slope towards the exit to the street. The slope is at least 1 cm per meter of length. More is possible, less is not.
The tube must be fixed every meter so that there is no sagging in it. Condensation then accumulates in them, which may end up on your floor or furniture. When you pass the tube through a hole in the wall, it is also better to plug it with something.

Indoors, pipes and cables are usually wrapped with metallized tape into a single bundle. Then they are fixed to the wall in several places, and a plastic box is attached on top. Usually it is taken white or a color matching the finish.
If you wish, you can hide all the tubes in the wall - cut a route in the wall, lay it there and, after checking its functionality, wall it up. But this is a rather risky option, since in order to repair something you will need to dismantle the wall.
Connecting blocks
In general, there are no special secrets here. We connect the communications stretched through the hole in the wall to the appropriate connectors. There are no problems with connecting the cable - you connect wires of the same color to the terminals that are already connected to them. In this case, you definitely can’t go wrong.
If the height difference in the installation of blocks exceeds 5 meters, it is necessary to make a loop to catch the oil (we lay copper pipes in this way) dissolved in freon. If the difference is lower, we do not make any loops.

Drainage
There are two ways to drain drainage from a split system - into the sewer or just outside, outside the window. The second method is more common among us, although it is not very correct.

Connecting the drainage tube is also easy. On the way out drainage system indoor unit (tube with a plastic tip at the bottom of the unit), a corrugated hose is easily pulled on. To keep it securely, you can tighten the connection with a clamp.
The same applies to drainage from the outdoor unit. Its exit is at the bottom. Often they leave everything as is, and the water just drips down, but it’s probably better to also put on a drainage hose and remove the moisture from the walls.

Outdoor unit drainage
If you are using a polymer pipe rather than a hose, you will need to select an adapter that will allow you to connect the air conditioner outlet and the pipe. You will have to look on the spot, because situations are different.
When laying the drainage pipe, it is better to avoid sharp turns and certainly not allow sagging - condensation will accumulate in these places, which is not at all good. As has been said more than once, the tube is laid out with a slope. The optimal is 3 mm per 1 meter, the minimum is 1 mm per meter. Throughout its entire length it is fixed to the wall, at least every meter.
Freon circulation system
It is somewhat more difficult to connect copper pipes. They are laid out carefully on the walls, avoiding kinks and creases. For bending, it is better to use a pipe bender, but you can get by with a spring bender. In this case, sharp turns should also be avoided, but in order not to bend the tubes.

The ports on the outdoor unit look like this. It's the same on the inside.
From the beginning we connect the tubes in the indoor unit. We unscrew the nuts from the ports on it. As the nuts are loosened, a hissing sound is heard. This is nitrogen coming out. This is normal - nitrogen was pumped in at the factory so that the insides do not oxidize. When the hissing stops, take out the plugs, remove the nut, put it on the tube, and then begin rolling.
Rolling
First, remove the plugs from the pipes and check the edge. It should be smooth, round, without burrs. If the cross-section becomes not round during cutting, use a calibrator. This is a small device that can be found in any store. It is inserted into the pipe, scrolled, leveling the cross-section.
The edges of the tubes are carefully aligned over a length of 5 cm, after which the edges are flared so that they can be connected to the inlet/outlet of the blocks, creating closed system. The correct execution of this part of the installation is very important, since the freon circulation system must be sealed. Then you will not need to refill the air conditioner soon.

When flaring, hold the pipe with the hole facing down. Again, so that copper particles do not get inside, but spill out onto the floor. It is clamped in the holder so that 2 mm sticks out. Exactly like that, no more, no less. We clamp the tube, install a flaring cone, and tighten it, applying considerable effort (the tube is thick-walled). Flaring is complete when the cone goes no further. We repeat the operation on the other side, then with the other tube.

If you haven’t rolled pipes before, it’s better to practice on unnecessary pieces. The edge should be smooth, with a clear continuous border.
Port connection
Connect the flared edge of the pipe to the corresponding outlet and tighten the nut. There is no need to use any additional gaskets, sealants, or the like (prohibited). This is why they take special tubes made of high-quality copper so that they provide sealing without additional means.

You need to make a serious effort - about 60-70 kg. Only in this case will the copper flatten out, crimp the fitting, and the connection will become almost monolithic and completely airtight.
The same operation is repeated with all four outputs.
Vacuuming - why and how to do it
The last stage that completes the installation of an air conditioner with your own hands is the removal of air, moisture, and argon residues from the system. During installation, moist air from the room or from the street fills the copper tubes. If it is not removed, it will end up in the system. As a result, the compressor will work with greater load and heat up more.

The presence of moisture also negatively affects the performance of the system. The fact is that freon, which is used to fill air conditioners, contains a certain amount of oil to lubricate the elements from the inside. This oil is hygroscopic, but when saturated with water, it lubricates the insides less effectively, which leads to their premature wear.
From all this it follows that the system will work without air removal, but not for very long and with possible shutdown due to overheating (if there is such an automatic system).
There are two ways to remove air from the system: using vacuum pump or a certain amount of freon released from the outdoor unit (it is charged at the factory and has some excess freon - just in case).
Spritz method
We unscrew the valve plugs on the ports of the external unit (they are indicated by arrows in the photo).

We will carry out operations with the lower port (larger in diameter), which sticks out perpendicular to the body. Under the cover there is a hexagon socket; select a suitable size key.

Under the cover there is a valve with a hexagon connector
Next, use this key to turn the valve 90° for one second and return it to its previous position. We let a little freon into the system, and it created overpressure. We press our finger on the spool, which is located on the same port. By doing this we release a mixture of freon and the gases found there. We press literally for seconds. Part of the mixture should remain so as not to introduce a new portion of air inside.
You can repeat this 2-3 times, no more, the second time you can turn the valve located above. With a track of 2-3 meters, you can do it 3 times, with a length of 4 meters, only two. There won't be enough freon reserves for more.
When the air has almost been removed, we screw a plug onto the outlet with the spool (filling), and open the control valves (with a hexagon) completely, releasing freon into the system. We coat all joints with soap foam to make sure that they are airtight. You can run it.
Vacuum pump
This operation requires a vacuum pump, a high-pressure tube, and a group of two pressure gauges - high and low pressure.
Without opening the valves on the control valves, we connect the hose from the vacuum pump to the inlet with the spool and turn on the equipment. It should work for 15-30 minutes. During this time, all air, vapors, and nitrogen residues are drawn out.
Then the pump is turned off, the pump valve is closed but not disconnected and left for another 15-20 minutes. All this time you need to monitor the readings of the pressure gauges. If the system is sealed, there is no change in pressure, the pressure gauge needles are frozen in place. If the arrows change their position, there is a leak somewhere and needs to be fixed. You can find it using soap suds and tighten the connection (usually the problem is in the place where the copper tubes are connected to the outputs of the units).

If everything is normal, without disconnecting the pump hose, fully open the valve located below. Some sounds are heard inside the system - freon is filling the system. Now, wearing gloves, quickly twist the vacuum pump hose - a certain amount of icy freon may escape from the valve, but you don’t want frostbite. Now completely unscrew the valve at the top (where the thinner tube is connected).
Why in this order? Because when filling with freon, the system is under pressure, which quickly closes the filling port when the pump is disconnected. That's all, do-it-yourself air conditioner installation is complete, you can turn it on.
To be fair, it must be said that such an operation - vacuuming - is carried out only in Russia and nearby countries. In Israel, where air conditioners work all year round, they do nothing like this. Why is a question to ponder.
Installing an air conditioner requires experience in such work, as well as theoretical training. In most cases, malfunctions in the operation of this system occur due to non-compliance with installation and connection rules.
Self-installation of air conditioning
Before installing an air conditioner, you should know the sequence of steps:
- Selecting a location for installation.
- Hang the indoor unit and then the outdoor unit.
- Laying communications.
- Settings proper operation systems.
What you need to install an air conditioner yourself
In order to do all the work yourself, you will need a set of tools. For installation you will need:
- High power hammer drill. With its help, through holes are made that allow pipes and cables to be routed to connect the outdoor and indoor units.
- Pipe cutter It is useful for cutting copper pipes. You will also need a file to remove burrs on pipes.
- A pipe bender or spring to give pipes the required shape.
- Drill and drill bits of different diameters.
- Flaring machine and calibrator.
- A wall chaser, which is useful when laying a groove in a wall. It can be replaced with a hammer or sledgehammer, but this will make the work much more difficult and time-consuming.
- Screwdrivers, hexagons, level, hammer and other tools that may come in handy along the way.
- Construction level.

What may be useful for installing an air conditioner
In addition to tools, you will also need materials:
- Copper seamless pipes, which are necessary for the refrigeration and air conditioning system. Typically, the length of the pipe is equal to the length of the route in the wall plus 30-40 cm. The diameter will depend on the requirements of the air conditioner manufacturer.
- Electrical cable - its quantity is usually indicated in the instructions for the device, but it is better to take it with a reserve.
- Drainage pipe - this will require a special one or a polypropylene water pipe. Its length should be 80 cm longer than the track.
- Pipe insulation - a rubber sleeve is best suited.
- Plastic box - it will be needed to hide the route in the wall.
- Fasteners for the outdoor unit - usually ready-made corners and brackets are purchased.
- Bolts, fasteners.
How to install air conditioning in an apartment yourself
First you need to decide on the installation location and its method. Air conditioners are installed in apartments, the external and internal units of which are connected by a pipe containing wires and freon.
Important! It is better to install an air conditioner yourself in the spring or summer.
To install correctly, you should first read the instructions. There are indicated necessary materials that will be required during the work process. It is better to purchase them in advance.
The sequence of actions will also be indicated there; in almost all cases they are identical:
- The locations of the block, route and all other devices are marked on the wall.

Route for system devices
- It is necessary to mark the locations of the wiring in the wall. This can be done using a special device.
- Next, the plate of the indoor unit is attached. It should be horizontal (a building level will help to level it). Then the plate itself is applied and the places for drilling holes are marked. After that, they are drilled and fasteners are inserted there.
- Then the plate is put in place and carefully secured.
- The outdoor unit is installed using the same scheme.
- The evenness of the installation is checked and everything is carefully secured.
- Using a puncher, a through hole is made through which communications will pass.
After these steps, a route is laid in the wall.
Important! The number of fasteners should be equal to the number of holes in the block. Otherwise, the structure may not support its weight.
How to install an external unit
All work begins with the installation of the condenser; suitable brackets are selected that will support the weight of the air conditioner. It is better to attach them to the wall itself, and not to the insulation or cladding of the room.

Mounting the system on the facade of a high-rise building
To protect the system from adverse environmental influences, it is covered with a visor.
The drainage pipe from the external unit must be discharged into the sewer.
How to install the indoor unit
The distance between two units should be proportional to the power of the system. The smaller it is, the better the system works.
It is for this reason that the indoor unit is installed on the same wall as the outdoor unit. If this cannot be done, then the closest location is selected.
It is important to consider that:
- Air conditioners cannot be installed above the bed.
- The distance to the ceiling must be at least 10 cm.
- Do not place above windows or radiators, or in an unventilated area.
- The air conditioner should not be placed close to furniture.
You should ensure free access to the device, this will improve its performance and allow it to be cleaned in a timely manner.
Installation of the indoor unit is almost the same as the external one. First you should choose a location, then attach the brackets, and the evaporator on them. The only difference is that before installing the indoor unit, you need to drill a hole for the freon tube.
After installing the entire system, the two units are connected and the air conditioner is connected to the network.
How to connect blocks
The air conditioner units must be connected by copper pipes (2 pieces) and cable. They can be laid on the wall and hidden in a special box, or in a groove. In this case, you will need to make a groove. But first you need to drill a hole in the wall, which is made after installing the fasteners. Then the connection of blocks begins, for this you will need:
- Pipes with larger and smaller diameters on which thermal insulation is applied.
- They are then pushed through the hole in the wall and bent using a pipe bender.
- Special tips are put on both sides of the pipes to protect them.
- The wire is also inserted into the hole and connected according to the instructions. Each block has terminal blocks, to which the wires will be connected, according to their colors.
- Then it is connected to a specific output of the indoor unit drainage pipe. Its second end is led out onto the street.
- The drainage must be carefully fixed to prevent it from sagging.

Connecting system blocks
If installation of a plastic box is required, then all communications should be tied into a bundle. This can be done using zip ties or metallic tape.
How to connect an air conditioner to the mains
At the final stage of installation, the copper pipes are connected to the electrical network according to the diagram. With the latter, things are much simpler; there is an outlet at the bottom of the indoor unit, and that’s where the drainage is inserted.
After this, you need to connect the copper pipes. You need to start work with the indoor unit. There are two ports on its side wall, one with large fittings and the other with small ones. You can start with anyone.
The whole work process is as follows:
- You need to remove the nuts from the copper pipe connection points.
- Then the plugs are removed and the edges are checked for evenness.
- Union nuts are put on the pipes. It is important not to confuse the direction of the thread.
- The edges of the pipes are flared and clamped in the holder.
- The roller is installed and the screw is tightened.
- Rolling should be completed after the cylinder stops descending.
- The flared edge is guided to the outlet of the indoor unit and connected using a union nut.
- The external unit is connected in the same way.

Connecting the air conditioner to the power supply yourself
The electrical circuit for connecting an air conditioner at home can only be single-phase. This can be done through an outlet or using a wire connected to the electrical panel.
Using a socket
First you need to lay the cable from the evaporator to the outdoor module. To do this:
- A wire is laid to connect the blocks.
- A line is drawn to the electrical panel. This includes a cable and a circuit breaker for overload protection.
- If the devices have average power, then they can be connected without such a line. This is done directly into the outlet.
Important! The air conditioner can operate at different powers, so the circuit breaker should be installed on the connection line and near the outlet.
How to choose a socket
It must meet the following requirements:
- Have reliable grounding.
- Comply with the air conditioner manufacturer's specifications.
- All wires must be copper.
- The socket must be connected to the panel via a circuit breaker.

Socket for air conditioning system
Using a separate cable
This method is considered the most reliable and safe, especially if you install a shutdown protection device that will protect the system from voltage surges.
Requirements for this connection:
- Mandatory presence of a device or circuit breaker.
- All components must be copper.
- The diameter of the wires must correspond to the size specified by the manufacturer.
- A separate ground must be created for the entire line.
Then all cables are laid, and the operation of all components of the system is checked.
Height from air conditioner to ceiling
Most optimal height, on which the air conditioner is hung, is considered to be 10 cm from the ceiling. This will ensure the correct flow of cool air passes through the top. In this case, there will be enough space for air circulation. However, for more powerful air conditioners, this distance can be increased by 5-10 cm.

The distance is calculated from the baseboard
How to install a mobile air conditioner
A mobile air conditioner is much easier to install than any other. But here, too, some work skills will be required. The following set of tools is also required:
- Dense plastic (thickness 10-12 mm). It will be needed to create a barrier between the cool air in the room and the warm air outside.
- Saw for plastic.
- Masking tape or tape used to secure the sheet.
- Polyurethane foam or any seal that will ensure water and air tightness.

Mobile device installation option
It is best to place the mobile air conditioner near a window, while avoiding breaks in the air outlet hose. The installation sequence is as follows:
- All necessary measurements and the diameter of the air vent are taken.
- A hole is cut for it. It should be 3-4 cm smaller than the pipe itself. This will help secure it tightly.
- The plexiglass is being sealed. This can be done using adhesive tape, sealant or foam.
- You need to open the window frame and fix the plexiglass insert there. This can be done using the same tape or sealant.
- After this, you can install the monoblock itself. To do this, a place for its installation is selected, a drainage hose is inserted into the air vent, and it is inserted into the exhaust hole of the monoblock. The other end of the hose goes outside.
- After 2-3 hours you can.
Installing an air conditioner without a vacuum pump
If the length of the route is less than 5 meters, then the air conditioner can be installed without a vacuum pump. To do this you will need:
- Unscrew all plugs on the ports.
- Next, take a hex key, which is selected according to the size of the lower port.
- Next, the key is inserted into the port and rotated 90 degrees. At this time, freon comes out, which, together with air and freon, creates excess pressure.
- There is a spool on the port, which is compressed for a while. At this time, a mixture of gases emerges, which removes air and argon.
- Next, we repeat the previous steps. If the route is 4 meters, then this will be enough, if 3, then it should be repeated again.
- A plug is screwed onto the outlet with the spool.
- Using a hexagon, the lower and upper ports are opened, into which freon is admitted.
- The system is ready for use.
Installing air conditioning on high floors
Installation of air conditioning on the top floors of the house can be done on the roof. The distance between the blocks will be approximately 15-20 meters. This can be done using a crane and a sliding ladder.
If this option is not suitable, then the system can be installed on a balcony or under a canopy. In this case, the following points must be taken into account:
- The walls where the system is installed must be strong and able to withstand heavy weight.
- Installation should not be carried out on aerated concrete walls.
- Do not attach the system to a ventilated facade, as this will lead to noise and vibration.
- Everything should be installed smoothly and without distortions.
- The distance between the external unit and the wall must be at least 10 cm.
- You should not install the air conditioner on a glassed-in balcony, as this will impair its performance.
- Be sure to install a canopy over the external unit, which will preserve the integrity of the system.
Requirements for installing air conditioners
In order for the air conditioner to bring maximum benefit, you must follow some rules:
- Choose exactly the model that matches the parameters of the room (size, availability of equipment, etc.).
- Correct installation.
- Compliance with the rules of operation and prevention.
The air conditioner has two blocks, each of which is assigned specific functions. The outer one is the condenser, and the inner one is the evaporator. They are connected using wires and tubes in which freon operates.
It is very important to choose the right location to install the system. In this case, you should take into account the weight of the block, free access to it, etc.

The air conditioner should be installed closer to the window
The outdoor unit must be located on a strong wall that can support a weight of more than 60 kg. Installation should not be carried out on aerated concrete. The external unit must be protected from environmental influences. This can be done with the help of fences and canopies.
When installing the indoor unit, please consider:
- The distance from the external to the internal unit should be minimal. This will ensure higher efficiency.
- The evaporator must not be obscured by curtains, furniture, etc.
- There must be a distance of at least 3 meters between the furniture and the indoor unit.
- The system cannot be installed above batteries.
- Provide free access.
- The distance from the block to the ceiling must be at least 10 cm.
It is necessary to ensure tightness and reliability of the air conditioner mounting. If a line is used to connect the blocks, then vacuumization of the connections will be required.
What is the maximum length of the air conditioner route?
As is already known, the larger the route, the less power operation of the entire system. The air conditioner's passport indicates the maximum route distance. Typically the vertical distance is 7 meters and the horizontal distance is 15 meters.
How to hide an air conditioner in the interior
Typically, an air conditioner is installed during renovation, so it is better to choose an option that will seamlessly fit into the interior. If this fails, you can try:
- Paint the air conditioner the same color as the wall.
- Place it above the front door.
- Purchase a built-in split system that can be hidden in a suspended ceiling.
- A floor-standing air conditioner can be hidden in decorative panels.
- Place the air conditioner in a shelf or cabinet where free air circulation will be ensured.
- You can make a niche for the block.
In this case, everyone decides which option will be more convenient. In any case, you should not heavily block the passage to the fan, as this can lead to overheating and rapid failure.

You can hide the air conditioner under the ceiling
During the hot season, air conditioning is a must. It is very important to install it correctly, otherwise the entire system will not be able to function and will quickly fail. If you do the installation yourself, you should follow all the rules, and before doing so, study the manufacturer’s installation instructions. This will help you get all the work done quickly and easily.
The air conditioner is a unit designed to create favorable climatic conditions indoors. It is used to reduce temperatures in the summer. Connecting the air conditioner to the electrical network has great value for proper operation of device elements. You can perform this procedure yourself, following the instructions and safety rules for handling electric current.
- the distance between the device body and the ceiling is at least 15-30 cm;
- between the side surface and the wall - about 30 cm;
- space for exhaust air - more than 150 cm.
Show all
Connection methods
U household air conditioners electrical diagram connection differs from more powerful ones industrial units. The latter are usually connected to a three-phase network, while domestic ones are connected only to a single-phase network. Two main methods are used electrical connection air conditioner:

In the first case, the connection is made as in the situation with any other electrical equipment. The disadvantage of this method is the excessive load on the outlet if the device has high power. In addition, protruding wires do not look very attractive and spoil the interior. This method is suitable for mobile and low-power units. The second method is more labor-intensive, but allows you to hide excess wires in the wall groove and connect more powerful devices.


Equipment installation
Structurally, air conditioners are produced in the form of monoblocks and split systems. The second type consists of an external (compressor-condensing) device and an internal (evaporation) device. Before installation internal device first you have to choose suitable place for installation. The following rules must be taken into account:


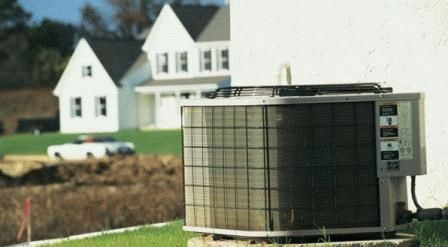
To install external structure choose a place next to a window or balcony. It can be installed on the wall inside the loggia if there is free space. On the ground floor of a high-rise building, the device can be mounted above a window, placing it out of reach of passers-by.
For installation on upper floors it is necessary to involve installers with special equipment. During installation, it should be taken into account that the maximum permissible distance between the device blocks should be no more than 5 m.
Self-installation of air conditioning part 3


Connecting blocks together
The electrical circuit of a split system includes the installation of electrical wiring between two air conditioner units. After installation, they immediately begin to connect them together. For this, a copper wire with three cores and a cross-section of 2.5 mm² is used. It is advisable to use a cable with multi-colored cores to avoid mistakes. Otherwise, determine the desired core you will have to use a tester. The algorithm of actions is as follows:
Before installing the covers, it is advisable to use a tester to ensure that the wires are connected correctly.


Socket for mobile air conditioner
To connect a mobile or low-power air conditioner, you need to purchase a three-core VVG cable with a cross-section of 2.5 mm², a three-core PVS wire of 1.5 mm², a grounded socket and a plug. If there is no free circuit breaker in the electrical panel, then you should buy one too.

 A cable is pulled from the panel to the electrical installation box along the groove. The socket can be installed at any convenient height. The cable is fixed with a solution in the channel, the machine is installed in the panel, the stripped copper ends of the wire are connected to it. When the solution has hardened a little, proceed to installation and connection of the socket.
Then the PVA connecting wire with a plug is assembled, and the other end is connected to the air conditioner. To do this, remove the panel and protective cover, loosen the terminal screws, insert the stripped ends of the wire one by one and tighten them securely.
The cover and panel are installed in place. To check the correctness of all connections, a test run of the unit is carried out. To do this include electric machine and air conditioning. It is advisable to check the device in all operating modes.


Attaching the cable to the electrical panel
The connection diagram for the split system to the electrical network involves the use of a three-core copper cable. If the air conditioner has a power of less than 3 kW, then its cross-section is allowed to be 1.5 mm². With a unit power of 3 to 5 kW, the wire cross-section should be 2.5 mm².
A cable marked VVG, which is protected with polyvinyl chloride insulation, is considered more reliable. Its service life is about 30 years. If you plan to lay the wire in a groove, then would be better suited flat cable VVG-P. For installation in a cable duct or in a corrugated pipe, non-flammable VVG-NG wire is used.

 After installing the air conditioner, the line of the future groove is marked with a pencil from the housing to the electrical panel. A channel is cut with a wall chaser. The bottom shelf should be parallel to the floor so that the cable does not fall out during installation. During installation the wire can be fixed with alabaster, as it hardens faster.
The entire channel should be sealed with cement mortar or liquid gypsum with a plasticizer. The ends of the cable should have a small margin to make it easier to connect them to the air conditioner and the switchboard.
Using a Circuit Breaker
In the connection diagram of the air conditioner to the electrical network, the mandatory elements are protection (RCD) and a circuit breaker. In addition, there are differential circuit breakers that simultaneously perform the functions of an RCD and a circuit breaker.

 The choice of switch is based on the available space on the electrical panel, the cost of the devices and the ease of installation. The differential switch will take up two places in the electrical panel, and the protective device and circuit breaker will take up three.
If there is not enough free space, then a differential machine is installed. It is much easier to install than protection and a machine gun. But it is more convenient to determine faults in the electrical circuit if there is a protective device, since the differential machine is not able to identify the cause of the failure.
When performing repairs in an RCD system and a machine, you can replace one element, which will be much cheaper than replacing a completely universal switch. If several air conditioners are installed, then the use of a protective device is mandatory, since this device can serve several lines at once.
INSTALLING AN AIR CONDITIONER WITH YOUR HANDS
In the panel, circuit breakers are mounted on a DIN rail. It should be borne in mind that if several switches are installed nearby, their performance deteriorates due to poor cooling. In addition, as the air temperature in the room increases, the load capacity of the machines also changes for the worse. If you are not confident in the success of self-installation and connection of the device, you should seek help from specialists.
So your dream has come true - you now have an air conditioner in your house, now you won’t be afraid of the heat in the summer and the dampness in the room in the off-season, when the heating has not yet been turned on, and there are prolonged rains outside. Immediately after installation, the air conditioner is connected to the electrical network - it must be carried out strictly according to the diagrams indicated on the internal covers of the modules. The operating instructions also contain recommendations for making connections and specify the basic requirements for the electrical network of the installation site.
It must be remembered that the electrical connection diagram for an air conditioner used in everyday life differs significantly from the similar connection of semi-industrial models that are installed in offices. Pets only have single-phase connection.
In practice, there are two main ways to connect a split system:
- direct connection via socket;
- separate wiring to the electrical panel.
The first option is ideal for everyone household devices- they are everywhere put into operation only in this way. Connecting any air conditioning system is carried out in several steps, which must be strictly followed when you decide to do everything yourself.
Connection diagram of the air conditioner to the electrical network
The figure shows a diagram of connecting the air conditioner to the electrical network, as well as various connections between the system modules; in addition, you will definitely need a circuit diagram of the air conditioner of the purchased model.
First way
Before you begin connecting the product to the network, you must install cables from the evaporator to the outdoor module:
- we lay the wire that will connect the two blocks;
- we draw a separate line to the electrical panel for powerful systems, which includes a cable and an overload protection circuit breaker;
- Medium power devices are connected directly through an ordinary outlet.
The last option for connecting an air conditioner is used in certain cases:
- the power of the product is low;
- window or mobile class climate system;
- the apartment has a network of sufficient power;
- temporary location of the unit;
- No other household appliances should be connected to this line.
Important! To connect the indoor unit, you need to use reinforced sockets and install a circuit breaker nearby.
It should be taken into account that the air conditioner operates on different modes, its power varies from minimum to maximum value, so separate protection must be installed on the connection line.
Before sending a product for sale, each manufacturer attaches instructions to it, which include:
- product operation diagram;
- connection diagram - general;
- electrical diagram for connecting the external and internal units.
There is similar information on the surface of the remote unit housing and the evaporator cover, but it is applied from the inside. This greatly simplifies the independent connection of any air conditioning system at home.
Under the front panel of the evaporator there is a special box where the terminals for connecting wiring- this air conditioner unit or split system is always installed indoors.


The wires from the evaporator are connected to the contacts of the outdoor unit, guided by the numbering; the free wires are carefully insulated with special tape. Schematic diagram will help you figure everything out correctly. Before connecting the air conditioning system, you must check insulation of each core so that the normal operation of the air conditioner is not interrupted by a short circuit.
Important! If the system diagram is unclear to you and you have no practice in working with electricity, then it is better not to try to connect the split system yourself, but call a professional.
There are reasons that do not allow connecting any air conditioning system to the electrical network of an apartment or country house:
- old wiring where aluminum wire was used;
- the cross-section of the wires is too small - they will not withstand the load;
- the condition of the wiring requires its urgent replacement;
- There is no high-quality grounding or basic protection against voltage surges.
Air conditioning systems are rather delicate devices, so they should only be connected to working electrical network so as not to spend the family budget on very expensive repairs.
Second way
Experts advise using the most reliable and safe option for connecting an air conditioner - an individual cable, which ensures stable operation of the device. If you install separate protection - RCD (device protective shutdown), then it will protect the product from any voltage surge or network overload, and an individual line will allow you to place system modules anywhere.
Standard requirements for the components of a separate electrical line:
- Necessarily presence of RCD or AZO(residual circuit breaker);
- all conductors must be made of copper;
- the diameter of the wire must correspond to the size prescribed by the manufacturer;
- equip separate grounding for the entire line.
Electrical harnesses are passed into a protective hose, then placed in a specially designed plastic box so as not to violate the integrity of the walls. Watch how the professionals make the connection in this special video:
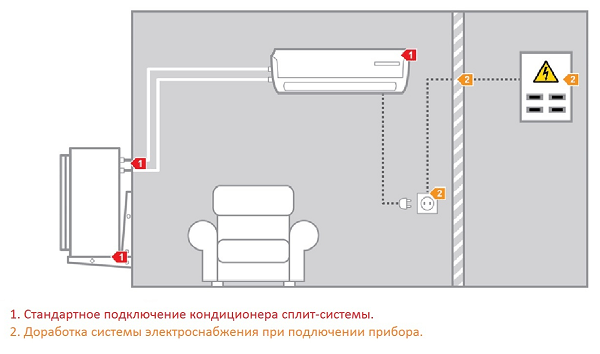
Work algorithm
When a home master is confident in his abilities and knows perfectly well how various household appliances are connected, then he can safely begin work according to a fairly simple scheme.
- Selecting a set the necessary tool and the necessary materials.
- We study the schemes proposed by the manufacturer.
- We lay the cables to connect the terminals of the external unit to the similar connectors of the air conditioner evaporator.
- We check the proper operation of all components of the product.
It does not depend on the design of the product where the cable for connecting to the outlet comes from - from the evaporator or the external module.
Choosing an outlet
A home outlet must meet certain requirements:
- Availability is welcome differentiated relay or reliable grounding;
- it must fully meet all the requirements and parameters drawn up by the manufacturers, according to the appendices in the instructions for using the split system;
- if the socket is supplied with electricity using aluminum wires, it must be replaced with copper analogues with a normal cross-section;
- it must be connected to the panel via a circuit breaker.
Modern standard euro sockets are ideal for connecting high-power household appliances, but all work on connecting the air conditioner must be performed by a specialist with the appropriate approval, otherwise the product warranty will be void. If you moved to a new place and decided to install a product that was already working, especially since you carried out the dismantling yourself, then follow the recommendations and do everything carefully.
Selecting the wire
To correctly connect the air conditioner with your own hands, you must use a wire only of the cross-section specified by the manufacturer individually for each model. Household products require the use of a cross-section within the range of 1.5-2.5 square (mm 2), and the current strength will correspondingly be up to 18 amperes or more.
If the distance between the system and the electrical panel is up to 10 m, then a cross-section of 1.5 mm 2 is suitable, when the distance is greater, then the cross-section increases.
For efficient work climate systems are used copper wires : for single-phase connection - 3 wires, for three-phase version - 5 wires.


Wires are not laid near pipes heating system and gas supply, the standard distance between communications is no closer than a meter. Electrical harnesses, assembled in a protective corrugation, are placed in grooves and secured with special clamps.
When laying communications using ducts, glue and screws are used to secure the wiring. When they do hidden wiring, then the cables are secured in the grooves with special clamps, and then plastered with construction plaster so that they can be quickly opened in case of emergency.
Connecting the evaporator
In principle, the method for connecting system modules is identical, with the exception of minor nuances, so we present a detailed method for connecting the internal module, and the external one - by analogy with it.

After completing the connection of both modules, check again correct connection, checking the diagrams, only after a scrupulous check is a trial and short-term switching on of the air conditioner performed.
In conclusion, I would like to warn all users once again: electricity does not forgive mistakes and inaccuracies, so when self-connection use your skills adequately so that you don’t have to deal with extinguishing wiring and repairing expensive climate control equipment later.
