Support for bushes made of plastic pipes. Beauty and order in the suburban area: we make fences for bushes and beds. Garden board and constructor
Greetings, dear visitor!
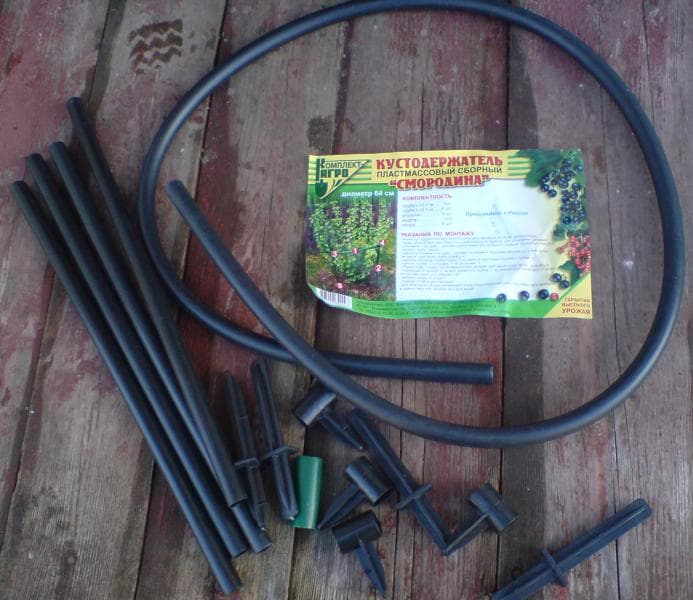
In this post I will tell you in detail how I remade the bush holder into a high, convenient design that successfully holds long branches of a currant bush, not to mention short ones.
You understand in the currant bush, branches of different lengths grow and too long, under the onslaught of the crop, bend over the low hoop of the bush holder and touch the soil or mulch. And some branches are bent so that they are ready to break.
Shortly speaking, of two bush holders of different designs, I made one, but higher. True, as a result of altering the bone holder, there were small nuances that I had to solve in the process of work. I will also tell you about them, so you don’t have to think or think about how to solve these problems.
So, If you are ready, then I will start from the very beginning - bush preparation and about determination of the diameter of the lower and upper hoops already finished bush holder.
In the photo below already trimmed black hoop with a waste tube and a drill with a diameter of 20 mm. for metal.

In the next video I start drilling an additional hole in the lower bush holder tee as planned.

But after fitting and inserting vertical racks (tubes) into this tee, it seemed to me that the racks themselves would be held unreliably, because the distance for them in the tee turned out to be too short. The point here is that I turned the tee 90 degrees and the part that held the hoop, in my opinion, should now hold the vertical tubes.

All in all, the design would have turned out to be unreliable, and therefore I began to think about how to lengthen the size of the green tee (exactly the part where the vertical tubes will be inserted) or replace it with something else, but suitable in size and design features.
Solution found in a few minutes, and his wife prompted me. She offered to go to the nearest village to a hardware store and buy a tee, which is used in the installation of nylon pipes for water or heating. Which, by the way, we did.
But before the trip I took a green tee with me to make sure that the length of the purchased (nylon) tee will be longer than the green one. After the saleswoman gave me a nylon tee in my hands, I compared it with the “green”, the sides of this one turned out to be 3 mm longer. in every direction - which is what I needed.
Besides the inner diameter of the kapron tee was 1 mm. narrower (19 mm.) than the outer diameter of the tubes (20 mm.), which allowed the vertical tubes to stay in it much stronger and more reliable.
Arriving again at the cottage, I drilled holes in the new tees in the same place where I drilled in green. Only then there was a problem with the fastening of the tee itself during drilling. You understand what's the matter. It was inconvenient and unsafe to drill and hold the tee with your hands at the same time, because during the very process of drilling the nylon heated up and could stick to the drill and turn along with it, causing injury.
I just got out of this situation. On the board where the tee was supposed to be drilled, I nailed 2 rails in parallel so that the tee fits between them and would be, as it were, in a vice. You can pre-drill the holes and use a real vise or other clamping device for this procedure. I was in the country, and I didn’t have anything like that at hand (I mean a vise), so I got out of the situation like this.


Then, I processed the burrs that were formed from drilling with nozzles, which you can see in the photo below. You can remove the burrs with a simple round file, needle file, or in extreme cases with a regular penknife.


Then, the time has come to put these ready-made tees on the hoop of the first (green) bush holder. It will not be easy to simply put on and drag the tees along the hoop, because the holes in the tees are straight, and the hoop is bent. Therefore, in order to facilitate this work for myself, I used a lubricant ...

After the location of all the tees along the hoop I started to stick tubes from the upper bush holder into them, but before that I cut off the conical part of the tubes at a right angle and sharpened the cut point into a cone so that the tubes fit into the tee more easily.


And since you remember that the inner diameter of the tee and the outer diameter of the tube differ by 1 mm., then I used the same lubricant, but I hurried a little and I had to do the same job twice. So keep in mind - take your time and do everything right.
After, As I inserted all the tubes from the upper bush holder into the green hoop, I wanted to insert the finished structure on the spot (directly on the bush) onto the green tubes sticking out of the soil around the bush. But it wasn't there. I decided to pull the tubes out of the soil and assemble the whole structure completely on a solid surface and fix the green hoop junction.
you can fasten the junction of the hoop is not in one place, as I did, but in two places for greater reliability, if this, of course, will be necessary. See for yourself whether to do it or not.
Now, as for the installation of this structure in its rightful (former) place, it is better, of course, to perform this action together, since the assistant will support the structure itself somewhere, correct the tilted branch somewhere, etc. in general, together lighter and more convenient.
The photo below is the final result of all the work.


Here, basically, and the whole procedure for reworking the bush holder. If you decide to remake your bush holders or plan only to purchase and install them, then you have the opportunity to do everything efficiently and correctly. Subsequently, your bushes will look not only compact from the side, but also withstand the grown crop on their branches without any kinks, kinks and damage.
Dear visitor, if you had a similar experience in reworking plastic bush holders, then unsubscribe in the comments about this.
What if If you have any suggestions, wishes or questions, then I also ask you to express them in the comments to this post.
See you!
Sincerely,
Sergey Dyakov.
Ivan Stoletov made a wide variety of tapestries and pergolas on his site, which perform not only decorative, but also utilitarian functions.
Shalers and pergolas are structures that are easy to make with your own hands, do not require much time and materials for construction, provided, of course, a rational approach to this issue. At my dacha participation, these designs made it possible to ensure order, make caring for plants convenient, and most importantly, they do not take much time to maintain them in working order.
TRELLIS- a special lattice along which a plant winds or to which tree branches are tied to give them a certain shape. PERGOLA(Italian Pergola from Latin Perqula - canopy, extension) - in gardening: a canopy of climbing plants to protect the passage or terrace from the scorching sun.
- The pergola near the summer kitchen forms a green corridor on the way to the greenhouse.
- Decorative vineyard on trellis at the entrance to the cottage.
- Wooden lattice hanging trellises on the kitchen veranda.
What to make trellises and pergolas in the garden?
Materials for the manufacture of trellises and pergolas can be very diverse - brick, concrete, metal, plates, wood. If there is a desire to do something similar with your own hands, first of all you need to determine the purpose of such a structure. For example, on my site (Fig. 1) there are several similar structures. Some of them are purely decorative: from the side of the entrance gate to the dacha, at the entrance to the house and in front of the kitchen shed. Others are intended for growing white sweet grapes or to hide outbuildings from view (near the summer kitchen) and as elements of arranging recreation areas. And there are also universal ones that combine all these functions - near the greenhouse, pool, kitchen.
Different designs of pergolas and trellises
Depending on the purpose, I made different pergolas and trellises, which differ in design. Firstly, these are high wind-resistant trellises of outdoor fencing along the road and at the entrance gate. I made them from metal racks and tension cables.
At the entrance to the house, I built a pergola using used drainpipes. Near the greenhouse and summer kitchen there are tapestries made of thin-walled galvanized profiles, as well as lattice wooden hinged ones. For raspberry and blackberry bushes, greenhouse plants and climbing roses, I made combined designs.
On hot summer days, a pergola successfully serves as a gazebo or a shady canopy over garden paths, where you can always enjoy the coolness. If the site is large, then several pergolas and trellises installed at different ends of the site will create a beautiful landscape. And openwork decorative lattices at any time of the year will be able to set others in a romantic mood and provide a good mood.
- Rice. 1. Scheme of placement of pergolas and trellises on the site: 1 - trellis of the external fence; 2 - trellises for white grapes; 3 - pergola at the entrance to the house; 4 - wooden gratings; 5 - supports for raspberry bushes; 6 - supports for blackberry bushes; 7 - temporary support for Jerusalem artichoke; 8 - trellis for climbing roses.
- Rice. 2. Arrangement of trellises for external fencing: 1 - fence posts made of steel pipes Ø 80 mm; 2 - extreme racks of trellises made of steel pipes Ø 40 mm; 3 - intermediate racks of trellises made of steel pipes Ø 25 mm; 4 - steel cables in a plastic sheath; 5 - lanyard; 6 - decorative cast-iron sections of the fence; 7 - plinth of a fence made of rubble stone; 8 - steel wedge.
- Grapes that have grown over the outer fence practically hide the trellises themselves.
- Cable tension on the trellis of the external fence with the help of lanyards.
Do-it-yourself site fencing
The trellis, installed on top of the outer fence, is very simple in design. Since the fence posts are made of metal pipes Ø 80 mm, I used them as a base, inserting trellis supports into them - steel pipes Ø 40 mm. To firmly fix the support pipe inside the fence post, I pinched it with a metal wedge (Fig. 2). The length of the supports is approximately 2.5 m. I pulled cables between the supports, the tension of which was provided with lanyards. I installed intermediate metal racks from pipes 0 25 mm in increments of about 3 m - this ensures the rigidity and stability of the structure and prevents the cable from bending.
Pergolas for white grapes
Compared to dark grapes, white grapes are less curly and grow less, and the yield is weaker, so it is less loaded on the trellises. This made it possible to use inexpensive galvanized light steel profiles for the manufacture of tapestries, designed for fixing drywall, and in order to ensure reliable resistance to strong winds (hurricanes also happen), he applied simple but reliable technical methods.
The rigidity and stability of the structure is ensured by metal roof girders, which redistribute horizontal loads to separate more powerful racks reinforced with steel pipes Ø 4 mm (Fig. 3). An important role is also played by the choice of the step between the racks (about 80 cm) and the reliable connection of the frame elements with self-tapping screws.
Pergola racks were installed in pre-dug holes 0.6 m deep, but not concreted, but covered with gravel and stones and rammed. It took me several hours to install these pergolas.
Rice. 3. Pergola device
from galvanized steel profiles:
1 - profile racks; 2 - horizontal crossbars; 3 - steel pipes 0 40 mm;
4 - self-tapping screw; 5 - transverse beams from a light profile; 6 - longitudinal runs from pipes and light profiles; 7 - stud with nuts.
Top view of a lightweight trellis-pergola located between the greenhouse and the utility room (separates the economic zone from the general one).
Pergola at the entrance to the house with their own hands
I made this support for plants (Fig. 4) from water pipes 0 25 and 40 mm, but I also use it as scaffolding, that is, scaffolding for house maintenance (if necessary, wash or replace the panels on the facade of the house). I concreted the bases of the racks in this design.
Temporary tapestries
I have sets of trellises for temporary use. I install them as needed and clean them in the fall. These are trellises for Jerusalem artichoke and individual bushes of climbing roses (Fig. 5). Jerusalem artichoke with a height of 3 m or more loses stability in strong winds and lies down on the lawn. To protect the Jerusalem artichoke from lodging, and the lawn from fallen plants, which eventually become moldy, I put up supports around the end of July, when the plants will gain a height of more than 2 m.
The design is simple and very convenient - it is a cable with loops at the ends, which I lift along two steel rods (something like a crowbar about 3 m high. The rods are driven into the ground at an angle of about 75 degrees, so when the cable is lifted, the necessary tension is provided. To to disassemble such a trellis, it is enough to hit the hinges with a hammer - and the cable itself falls to the ground.
Raspberry and blackberry
I made supports for raspberry and blackberry bushes from metal cables stretched between two horizontal guides (Fig. 6). The cables are stretched along each row of landings. Metal horizontal guides are attached to support pipes that take all the loads. All metal structures are made from used water pipes Ø 40 mm. Considering that my raspberry and blackberry bushes are tall, I pulled the cables in two tiers vertically for each row: in this case, the trunks and branches of both undersized and tall bushes are provided with support. Please note that it is necessary to securely fasten the end posts - drive into the ground to a depth of at least 1.2 m.
Greenhouse
The design of supports for plants in a greenhouse resembles the design of supports for raspberry and blackberry bushes - these are the same cables stretched between horizontal crossbars (Fig. 7) at the ends of the greenhouse. Steel pipes Ø 40 mm were used for the cross members. fixed at a height of approximately 2.2 m. At this height, they do not interfere with the passage and work in the greenhouse. The crossbars are attached with clamps to the powerful greenhouse posts in the corners.
I tighten the cables by tightening the nut on the tensioner bolt. If you loosen the cable tension, the tensioner can be moved along the cross member. This ensures the exact position of the cables over the rows of bushes of tomatoes or cucumbers. The garters of each bush made of strong thin rope are fixed on cables and serve as guides for plants.
Each cable is tied in two or three places to the metal truss of the greenhouse with a thin knitting wire. This prevents uneven deflection of the cable during fruit ripening, when the weight of the green mass of the bushes also increases significantly. I note that the height of tomato bushes reaches 2.5 m.
Summer kitchen trellises
Wooden hinged lightweight screens (Fig. 8) for the summer kitchen canopy I made from waste wooden lining. Screens here are not only a decorative design element: they serve as good wind protection and support for climbing plants.
It took me several hours to manufacture and install all the decorative grilles. I sawed the lining boards into two equal planks 5 cm wide. I connected the diagonal and framing planks with nails (screws). To protect against atmospheric precipitation, all wooden elements were covered with protective varnish-based impregnation. To the details of the canopy (beams - at the top, cast-iron fence - at the bottom), the trellises were fastened with mounting metal tape and hooks made of 6 mm wire.
Rice. 4. Pergola at the entrance to the house: 1 - fence post; 2 - pergola stand from a pipe 0 80 mm; 3 - longitudinal run; 4 - pergola beams from pipes 25 mm.
Rice. 5. Collapsible support for Jerusalem artichoke: 1 - steel reinforcement 30 mm; 2 - cable.
Rice. 6. Scheme of supports for raspberries and blackberries: 1 - stand made of steel pipe Ø 40 mm; 2 - crossbars made of steel pipes 40 mm; 3 - cables in a plastic sheath; 4 - turnbuckles.
Rice. 7. Arrangement of a frame for tying plants in a greenhouse: 1 - cross member made of steel pipe Ø 40 mm; 2 - cables in a plastic sheath; 3 - device for cable tension; 4 - crossbar of the greenhouse frame, used for a suspended structure made of cables; 5 - a suspension from a knitting wire.
Rice. 8. The device of a decorative lattice for a canopy of a summer kitchen: 1 - strips 50 mm wide; 2 - piping of a lattice of slats 50 mm wide.
Tapestry for climbing roses.
Flowers
For tall climbing roses, I use several types of trellises. The most popular is a trellis, consisting of racing aluminum tubes (waste after the reconstruction of the greenhouse). A plastic mesh is attached to them, to which I tie the plant.
In conclusion, I will say that I made all the designs based on purely practical considerations. They do not pretend to a special design, but nevertheless, in spring and summer, the entire site turns out to be green, not inferior in design to estates with expensive branded structures.
It would seem that there is nothing difficult in growing currants: planted a seedling and that's it, wait for the harvest. If you do not surround the plant with care, as well as full care, and even neglect some requirements, you can not even count on abundant fruiting. The stage of formation of bushes on the site deserves special attention, for which such a device as a bush holder for currants was created.
Installation Features
Stands for bushes in horticulture are very important, experienced farmers are well aware of this. With the help of a simple device, you can arrange any, even the oldest and most branched bush of useful berries correctly. Moreover, the use of bush holders also provides such advantages as:
- shrub branches begin to grow straight up, they no longer lie on the ground, which allows the plant to fully develop, and the bush itself looks more attractive, because the shoots are no longer intertwined with each other, and it is much easier to collect ripe fruits from such a bush in the future; in addition, in the fall, after harvesting, you can cultivate the land around the currant without much hassle (loosen, fertilize);
- thanks to the bush holder, ripening berries do not fall - the fruits will always be clean, while they will not rot from constant contact with wet ground;
- strong winds and showers will cause minimal damage to shrubs.


Varieties
The appearance of fences for berry bushes is different, since many summer residents do not consider it necessary to buy such devices, but make them with their own hands from those materials that are cheap or freely available.
Such bush holders are a good alternative to factory devices, although what is made in artisanal conditions does not always look attractive. And this must be taken into account before you start building a fence for currants with your own hands. However, whether it is a store-bought product or a DIY product, the best are plastic or metal bush holders.


It is worth considering each type in more detail.
- Plastic holders delight buyers with an acceptable cost, although budget devices, for all the attractiveness of the price, cannot impress with reliable durability. As a result, the service life of such samples is quite short. Even during the installation process, you can easily damage the fragile structure: if you press or push a little harder, the support will deform or, even worse, burst.
And if you leave such a holder in the ground for a period of winter, in the spring you can see that under the influence of temperatures below zero, the plastic collapsed. True, there are models on sale made of a higher quality material - a composite that will last much longer.


- metal frames on top they are treated with a special agent, so such devices are not only reliably protected from corrosion, but also have an aesthetically attractive appearance. The main advantage of metal bush holders is their strength, and, consequently, a long period of operation. Such garden tools can not be stored in winter, although periodic installation and dismantling will not affect its condition in any way. Forged elements on metal supports make props for bushes a work of art, an additional decoration of the land space.
True, the cost of such a device is much more than a plastic one, but the money spent in this case should be considered an excellent investment, since such a holder will last for a single year.


The material of the bush holder plays an important role in its choice, but when buying garden tools of this kind, you need to pay attention to its design characteristics.
- The number of "legs". The main supports can be a different number. If the bush is sprawling, large, it is better to choose a bush holder for it with the maximum number of legs and, conversely, if the currant bush is young, it can not be supported by a massive fence.
- Support form. The part of the bush holder that directly supports the bush can be in the form of a ring, half ring, square, rectangle, triangle and other shapes. There is not much difference, the main thing is that the chosen stand harmoniously fits into the general view of the garden plot.
- The design is one-piece or collapsible. If time is lost, and the plant has branched out very much, it will be quite difficult to “put on” a solid support on it. In this case, it is better to use structures that can be assembled and disassembled at any time.


Requirements
It is extremely important for every gardener that a plant tied with a support not only pleases the eye, but first of all develops well. That is why the supporting structure must be selected correctly. It is worth considering the following requirements that support for bush plants must meet:
- reliability and strength b - the support should not deform under the weight of the plants, but stand firmly in the ground;
- convenience- the support should allow the shrub to completely fill its internal space, nothing should look beyond the edges of the holder, but there should not be crampedness inside the fence;
- practicality- at retail outlets, they often offer buyers, albeit beautiful, meanwhile unstable support options, so sometimes it is more rational to make a bush holder yourself;
- safety- it is better to buy or create garden tools from environmentally friendly, natural materials;
- attractiveness- when creating the exterior of a land plot, one should not forget that such an auxiliary detail as a holder for berry bushes should harmoniously fit into the overall idea.


Design options
Today on sale you can find different coasters for bushes of fruit and berry plants, although in this form they appeared not so long ago. Basically, gardeners have used homemade fences made of different materials for many years. Some models of bush holders from non-professionals are simple and unpretentious, not requiring much time and effort to build. Making a currant support with your own hands is not very problematic.


Of course, such garden tools can be bought, but sometimes it makes no sense to spend extra money when a great frame can be made at home. The main thing is to decide from the whole variety of possible options which model will be the best for the existing currant bushes.
- Pegs fence. Around the bush, you need to hammer four pegs (or more) so that about half a meter of their length remains above the ground. Any available material is tied to the first support: wire, twine, rope, thick fishing line.
- Branch holder. Four thick 70 cm spears are dug along the perimeter of the currant bush. The base of the support can be replaced with thick branches. Straight branches are laid on top. In appearance, this design should resemble a wicker fence.
- metal fence- this is the most durable and reliable device for supporting berry bushes. Making such a frame will not be difficult. It is necessary to take 4 steel pipes, drive them around the bush, hammer the upper holes with a fitting so that moisture and foreign debris do not get inside. The walls of the structure can be built from what is available.


- Supports for bushes from plastic pipes. To create a fence, you will need fiberglass reinforcement, plastic pipes, pipe plugs. This design is beautiful, durable, and most importantly - will last for many years. The manufacturing process includes the following steps:
- from pipes you need to cut 7 racks of 50 cm long;
- drill a through hole in each pipe at a distance of 4–5 cm from the top;
- pass fiberglass reinforcement through the holes;
- evenly hammer pipes around the perimeter of the bush;
- align the reinforcement, close its ends;
- install plugs on all racks.

- Fence from metal-plastic pipes. A simple but reliable stand for currants is easy to make from metal-plastic pipes. To complete the frame, you will need the following materials: metal-plastic pipes, a hose, screws, wooden pegs, a screwdriver, a penknife, a hammer. The manufacturing process should be carried out as follows:
- two rings of the same diameter are constructed from the main pipe;
- the ends of the pipe are connected by a piece of rubber hose, while the pipes must fit tightly into it, not dangle or fly off;
- legs-racks approximately 80 cm high are sawn off from the same pipe; for the frame to be stable, three pieces are enough (you can do more);
- all holes in the racks are filled with bushings;
- the first hoop is attached to hammered wooden stakes; it will serve as the top of the support;
- the second circle is fixed to the supports from below.

- Another option for a do-it-yourself bush stand involves assembly of garden products without the use of screws. However, you will need a soldering iron for polypropylene products. To make such a fence, you must perform the following steps:
- cut two pieces from a metal-plastic pipe and make two hoops out of them;
- cut legs;
- put fittings of suitable size on the legs and solder them with a soldering iron;
- finished racks are attached to a metal-plastic pipe;
- the pipe is put on the bush and connected with a rubberized hose;
- for increased stability of the rack, it is advisable to install it on steel pins buried in the soil.


- Wooden fences. You can make a wooden stand for currants with your own hands. It is worth remembering that all wooden products must be treated with antiseptics, varnished or painted. All these measures extend the life of such a structure. For work you will need a wooden beam, paint and varnish products. You need to follow these steps:
- 4 pieces at least 60 cm long are cut from a wooden beam, one end of each part is sharpened;
- four meter boards are cut from the same timber;
- pointed racks are driven in at the same distance (for a more attractive look of the product) around the bush, planks are attached to their upper ends.


In addition to the listed models of supports for currant bushes, craftsmen make frames from car tires, sports hula hoops, bicycle tubes and other materials that can be found on the farm.
An overview of the bush holder for currants, see below.
The process of growing currants in your summer cottage is a rather laborious task. It would seem that there is nothing complicated in each of the stages of caring for this plant. Nevertheless, if you do not provide everything correctly, and if you completely bypass some requirements, you are unlikely to have to count on a generous harvest. Particular attention should be paid to the formation of bushes of a berry plant. Most domestic farmers at the present stage use special props for currants. They come in different types, so you should take a closer look at which one will be the best option for you.
Why do you need support for bushes
Currant on a trellis is a shrub, the direction of growth of shoots of which sometimes needs to be adjusted. For example, the plant develops quite normally, but during the period of formation and ripening of berries, the branches begin to sag under their weight. In this case, it is necessary to take care of the currant bushes and build a special support for them. And not only currants need such a "maintenance" of shape. This kind of framework is also used for other shrubs: raspberries, viburnum, blackberries, gooseberries. Sometimes they are used to create a neat shape for bushy flowers (roses or peonies).
If we consider in more detail the key advantages of adaptation, the compactness of plants can be attributed to those in the first place.
The presence of a backup will allow you to significantly save space in the garden. In addition, a fairly important advantage is also the correct formation of the crown of plants. Therefore, a bush holder for currants is a necessary device that every gardener will certainly appreciate.
Benefits of a currant prop
Why is it worth using bush stands in gardening? With their help, you can arrange the bushes correctly. As a rule, farmers use such devices, as this provides several advantages at once:
- branches of shrubs grow upwards and do not "spread out" on the ground. In this case, the plant will continue to fully develop, but will not grow randomly. You get a decorative look of a shrub, and in the future it will be much easier for you to harvest from it. In addition, in the autumn period, you can cultivate the soil around the bush without any problems;
- berries ripening on currant branches will not go down. That is, you will eventually collect clean fruits, and they will not rot, which often happens when berries touch wet ground;
- the harvesting process will be greatly simplified;
- much less damage to shrubs can be caused by heavy rains or strong winds.
The benefits of currant top dressing will certainly affect the decision of an experienced farmer. The main thing is that your efforts are not in vain, so it is very important to purchase a backup or build it at home. We are talking about yield indicators and the health of currant bushes, so you have something to worry about.
5 ways to make your own hands
Do-it-yourself props for currants are not too difficult to make. Of course, such devices can be freely purchased in specialized stores. But why spend extra money if you can easily build an equally effective frame at home? The main thing is to understand the main varieties of these items, as well as determine which of the stands will be the best option specifically for your currant bushes.
It is considered quite simple to implement the method of making a stand from wooden pegs. If you follow all the recommendations of experts correctly, such a device will become your faithful assistant for at least several years. Pegs must be driven into the ground around the bush. Use 4-5 pieces. Next, a wire or strong twine is attached to the resulting supports. Another similar method is the use of horns. They are driven in around the shrub, and then even branches are placed on top. Very often, strong branches cut from a fruit tree are also used as spears.
Metal coasters are considered to be in demand among experienced gardeners. To do this, use scrap metal pipes. They play the role of pegs: they are driven into the ground, and then slats are attached to this structure. All this is ultimately fixed with self-tapping screws. A plastic support for currant bushes is also widely used. It is durable and at the same time it has a decorative appearance.
You can also apply in gardening, it would seem, spoiled solar lanterns. Using this material will allow you to build a completely stable structure, but it will not work for too large loads. However, if you need to support young currant bushes, the plastic construction is a good solution.
The most decorative and at the same time strong enough is a support made of metal-plastic pipes. They are recommended to be cut into three identical parts. The rest of the material is converted into two circles. It is best to purchase green pipes: in this way, the design you have made will merge with the green foliage of the currant. Remember: currants on a homemade trellis are a great solution for any gardener.
Video “Supports, supports, garters for garden shrubs”
From this video you will learn how to make high-quality supports, supports and garters for garden shrubs on your own.
5918 09/18/2019 6 min.
The need for fencing and tying currant bushes arises 4-5 years after planting the seedling. By this time, the bush has already formed more than 20 shoots, which are actively growing and at the time of fruiting begin to touch the soil. This situation negatively affects both the crop and the shoots themselves. As a result of contact with wet soil, fungal diseases can begin to develop, and pests that live in the soil spread to the green part of the bush.
This can be avoided by simply tying or fencing. Such events not only protect the culture, but also contribute to the formation of the correct shape of the crown, and also give the entire backyard a beautiful aesthetic appearance.
Requirements for holders
Not only the appearance of the plant, but also its development depends on the choice of the design of the bush holder, therefore a number of requirements are put forward for this type of device:
How to DIY
Many gardeners do not buy shrub fences, preferring to make them with their own hands, or use them. At the same time, they can choose not only the optimal design, but also choose the materials and design they need.
It is not difficult to make a bush holder on your own, especially since there are more than enough materials for its manufacture.
Pipe supports
Metal, plastic or polypropylene pipes can be bought at any hardware or plumbing store. Read also about grafting currants on cherries.

Often, zealous owners also have old materials after a major overhaul of a house or cottage. All this can be used by making original, durable, and most importantly, inexpensive bush holders for currants.
Plastic
With the help of plastic pipes, you can make a simple, reliable and quite aesthetic design. For this you will need:
- fiberglass reinforcement 4-5 mm thick (4-5 m long);
- plastic pipes cut into 7 pieces of 0.5 m each;
- plugs for pipes.
Holes are drilled in each of the 7 supports at a distance of 4 cm from the edge, through which fiberglass reinforcement is threaded. The supports are evenly installed around the entire perimeter of the shrub, the reinforcement is aligned parallel to the ground, and the pipe openings are closed with plugs. Everything is simple and fast. Learn about green currant varieties.
Polypropylene
Lightweight and inexpensive polypropylene pipes can also be an excellent fencing material. To build a support you will need:
- 4 corner "tees";
- 4 - 4.5 meters of plastic pipes of medium diameter.
The pipe section is divided into 8 parts of 50 cm each. Further, with the help of “tees”, the structure is assembled into a cube without a base.
The height of the stand can be adjusted to your preference, however, this will affect the amount of starting material.

For greater strength, the attachment points are glued with hot glue or fixed with screws. Such a bush holder will last a long time and will not spoil the appearance of the bush.
metal
Fences made of metal attract with their strength. They are more durable and reliable. In order to make such a device, it is necessary to prepare 4-5 scraps of metal pipes 45-50 cm high, as well as slats, fittings or any other type of fencing.
Metal pegs are driven into the ground around the perimeter of the bush, and then slats or reinforcement are attached to them using self-tapping screws. The top of the pipe should be covered with a fitting so that moisture and dirt do not get into the cavity.
metal-plastic
Metal-plastic pipes are a universal material. It combines the reliability of metal products with the lightness of polypropylene. You can purchase green pipes, the fence of which will not be conspicuous. Learn about the best varieties of blackcurrant from.
For the manufacture of a bush holder from metal-plastic, it is necessary:
- hose (2 pieces of 10-15 cm each);
- metal-plastic pipes (4-5 m);
- screwdriver;
- screws;
- small pegs made of wood, matching the diameter of the pipes;
- a hammer.
 From a part of the pipe, 2 rings of the same diameter are constructed. It is allowed to manufacture an expanding structure. Then the diameter of the upper ring will be larger. The ends of the pipes are connected by pieces of a rubber hose. When choosing a hose, make sure that its diameter matches the diameter of the pipe, which must fit snugly into the hole in the hose.
Legs-racks 70-80 cm high are made from the residual part of the metal-plastic pipe. Up to 5 racks can be made for greater stability. Pegs-sleeves are inserted into the holes of the pipes, on which the first ring-hoop is attached with a screwdriver. The second circle is fixed at a distance of 40-50 cm from it with shurpas. It turns out a fairly high stand, which reliably and firmly holds the side currant pagons.
Fences from pegs and branches
One of the simplest fences that you can make with your own hands is considered to be a bush holder from ordinary wooden pegs or branches. Both wooden and metal structures can act as a support. And they can be easily removed.
With iron base
The design, which is based on an iron support, is elementary in manufacture. For one such bush holder, you will need 4-5 metal rods or scraps of old pipes and twine. The rods are driven into the ground around the bush and tied on top with twine.
Wooden
This type of device is also very simple. 4-5 pegs of 60 cm are cut from a wooden block, and then evenly installed around the perimeter of the bush. From above, a flexible wire is attached to the supports, and preferably a thick twine, since it is not capable of injuring the branches.
Enclose bushes and branches of fruit trees in the form of spears. To do this, you need to pick up branches of the same size, drive them into the soil around the currant, and put even strong slats or the same branches into natural recesses. For greater strength, you can secure them with twine.
When working with wood, it must be remembered that it is subject to the influence of weather conditions, as well as insects, so the pegs and slats are treated with an antiseptic solution and varnished or painted. Such measures will significantly extend the life of wooden fences.
Purchased
You can buy bush holders today in any specialized store, hypermarket, and even on the Internet. Most often, metal and plastic structures can be found on sale. The range is wide not only in design and color, but also in shape, design and price. He will tell you about pruning red and white currants.
metal fences
Metal bush holders enjoy a well-deserved reputation for reliable and durable fences. They vary in height, the number of supports and the shape of the base. The latter can be round, square or rectangular. Round fences are the most popular as they are easy to work with and follow the natural shape of the bush. As for color, black, green and gray designs are most in demand. Special coating protects products from rust and moisture. Read about planting currants in the fall.
Special mention should be made of forged bush holders. Most often they are made to order in order to support the overall landscape design of the site. They are more expensive, but also look more original and spectacular.
Plastic coasters
You can also fence the bushes with plastic props. They are lighter and often presented in a collapsible form, so that they are more convenient to transport. As well as metal, plastic fences are most often green and black. They are easy to assemble, cheaper in cost, but also less reliable. Also, they do not take up much space, so other cultures are possible.
If the service life of metal products reaches several tens of years, then plastic products at most - 6-8 years.
Benefits of using
The use of fences allows not only to save the crop, but also gives the shrub the opportunity to develop correctly. Similar designs have long been used by gardeners, due to the advantages, such as:
- aesthetics(the bush does not lie spread out on the ground, but maintains a neat shape);
- ease of harvest(no need to lift each branch in search of a bunch of currants);
- preservation of berries(without constant contact with wet soil, rot does not develop);
- uniform growth up, not to the sides;
- damage minimization from heavy rains and strong winds.
Video
Video about a bush holder for currants.
conclusions
- and bush holders must be strong and securely fix the bush.
- Supports protect the crop from death and the bush from disease, form a crown and set the direction of growth.
- Fences made of metal are more durable than those made of plastic and wood, but also more expensive.
- You can make any design for the fence yourself, spending a minimum of material and time.
- When making supports from wood, do not forget about the special processing of wood.
