Table tags in html examples. TABLE tag attributes, borders, dimensions and others. ALIGN and VALIGN attributes
A table is a grid of cells that form rows and columns. Examples of tables include various financial reports, results sports competitions, calendars, schedules, etc. An individual grid block is called a table cell. Table cells can contain a wide variety of information, including numbers, text, and even video and audio objects. By using HTML language tables are written row by row.
Element
serves as a container for elements that define the contents of the table. To create a table row, you need to add inside the element
paired block tag
(abbreviated from the English “tablе row” – table row). How many tags
you add, there will be so many rows in the table. Opening tag
marks the beginning of a new table row. Elements are placed after it
(abbreviated from the English “tablе data” - table data), each of which specifies a separate cell in this row. Inside an element
you put your content (text, numbers, images, etc.) displayed in this cell. The end of the line is indicated by a closing tag
.
Element
(abbreviated from the English “tablе heading” - table heading) - an optional table element that is used in exactly the same way as an element
, however its purpose is to create a row or column header. Typically, the element
placed in the first row of the table. Browsers display text in an element
in bold and center it relative to the cell. Application in element code
helps people who use screen reader programs, and also improves the performance of search engines indexing tables.
Let's consider a simple table, which consists of three rows and three columns, with the cells of the first row being the headings of the corresponding columns. By default, tables are usually displayed without a border:
Example: Simple HTML Table
Try it yourself »
Heading 1
Heading 2
Heading 3
Cell 2x1
Cell 2x2
Cell 2x3
Cell 3x1
Cell 3x2
Cell 3x3
Table Border
We already know that by default tables are displayed without a border. To add a frame around a table, you need to specify several simple rules style sheets. Property border controls the display of table grid lines and also sets the thickness of the border around the table in pixels. A border appears around the table and between cells. Let's add a one-pixel thick frame to the already created table by setting the property border for all table elements, for example, like this:
Example: Applying a Property border
Try it yourself »
Frame around the table
Heading 1
Heading 2
Heading 3
Cell 2x1
Cell 2x2
Cell 2x3
Cell 3x1
Cell 3x2
Cell 3x3
Single frame for table
By default, adjacent table cells will have their own border. This results in a sort of "double frame" as seen in the example above. To get rid of the "double border" add CSS propertyborder-collapse to your style sheet:
Example: Applying a Property border-collapse
Try it yourself »
Frame around the table
Heading 1
Heading 2
Heading 3
Cell 2x1
Cell 2x2
Cell 2x3
Cell 3x1
Cell 3x2
Cell 3x3
Table fields and intervals
By default, the size of table cells adjusts to their content, but sometimes it is necessary to leave a little padding around the table data. Because spacing and margins are data presentation elements, this space is customized using CSS stylesheets. Cell field ( padding) is the distance between the contents of the cell and its border (border). To add it, use the property padding to element
or
. Cell interval ( border-spacing) is the distance between them (
or
). First assign a value separate property border-collapse element
, and then set the distance between cells by changing the parameter value border-spacing. Previously, attributes were responsible for the fields and cell spacing cellpadding And cellspacing element
, but they were deprecated by the HTML5 specification.
Usage example padding And border-spacing:
Example: Applying Properties padding And border-spacing
Try it yourself »
padding and border-spacing
Cell 1
Cell 2
Cell 3
Cell 4
Table width
The width occupied by the table in the browser window can be specified using the property width CSS, in pixels or percentages. Specifying the width of the table in pixels allows you to determine its exact width. The percentage ratio allows you to make the table flexible, i.e. it will "stretch" or "shrink" depending on what other elements are on the page and the size of the browser window. Here is an example of using the property width:
Table (width: 100%;)
Example: Applying a Property width
Try it yourself »
Cell 1
Cell 2
Cell 3
Cell 4
width: 100%
Cell 1
Cell 2
Cell 3
Cell 4
Merging cells (colspan and rowspan)
One of the main features of table structure is cell merging, which involves stretching a cell to span multiple rows or columns. This allows you to create complex table structures: headers
or cells
are combined by adding attributes colspan or rowspan. Attribute colspan determines the number of cells over which a given cell extends horizontally, and rowspan— vertically.
Merging Columns
Combining columns is achieved using the attribute colspan in elements
or
— the cell stretches to the right, covering subsequent columns. In the following example, the attribute value colspan equals 2, which means the cell must span two columns.
Example: Applying an Attribute colspan
Try it yourself »
colspan attribute
colspan="2">Cell with two columns
Cell 1
Cell 2
Cell 3
Cell 4
Concatenating Strings
Strings concatenated using attribute rowspan, behave exactly the same as merged columns, except that the range of cells is specified from top to bottom and spans multiple rows. This example stretches the first table cell down two rows:
Example: Applying an Attribute rowspan
Try it yourself »
Two-line cell
Cell 1
Cell 2
Cell 3
Cell 4
rowspan attribute
rowspan="2">Cell with two lines
Cell 1
Cell 2
Cell 3
Cell 4
Table title
A paired tag is used to create a table title or caption
(from the English caption - signature). Element
designed to organize the table header. Located immediately after the tag
, but outside the row or cell description.
Example: Applying a tag
Try it yourself »
Caption element
This is the table header
Two-line cell
Cell 1
Cell 2
Cell 3
Cell 4
Tags for grouping table elements
Tags are used to group table elements
,
And
. Just as a web page can contain a header, body, and footer, a table can contain a head, body, and footer. To logically group rows at the top of the table (that is, to create the top header of the table), use the tag
. Table headers must be placed in the element
, For example:
Heading 1
Heading 2< /th>
The main content (body) of the table must be inside the element
(there may be several such blocks in the table). To logically group rows at the bottom of the table (that is, to create a “footer” of the table), use the tag
(no more than one tag is allowed in one table
). In the source code the tag
placed before the tag
. In addition to logical grouping, one of the reasons for using elements
And
is that if your table is too long to be displayed on screen (or printed) at once, then the browser will also display the header (
) and the last line (
) when the user starts scrolling your table.
Example: Tags
,
And
Try it yourself »
Tags thead, tbody and tfoot
This is the table header
This is the table footer
Cell 1
Cell 2
Cell 3
Cell 4
Even though we are in front of
added
, it nevertheless appears at the end of the table. This comes from the fact that
may contain many lines. But the browser needs to render the bottom of the table before receiving all the (potentially numerous) rows of data. That's why
in the code it is written before the element
.
Tasks
Remove double table frame
By default, the table border has a double border effect, change the code so that all the lines of this border become single.
Thanks to the versatility of tables, a large number parameters that control their appearance, tables have long become a definite standard for the layout of web pages. A table with an invisible border looks like a modular grid, in the blocks of which it is convenient to place web page elements. However, this is not a completely correct approach, because each HTML object is defined for its own purposes, and if it is not used for its intended purpose, and everywhere, this means that there are no alternatives. This was the case for a long time, until layers replaced tables in website layout. This does not mean that layers are now used all the time, but the trend has already clearly emerged - tables are used to place tabular data, and layers are used for layout and design.
Creating a table
A table consists of rows and columns of cells that can contain text and pictures. Tables are typically used to organize and present data, but tables are not limited to that. Using tables, it is convenient to layout page layouts by arranging fragments of text and images in the desired way.
To add a table to a web page, use the tag
. This element serves as a container for elements that define the contents of the table. Any table consists of rows and cells, which are specified respectively using tags
And
. The table must contain at least one cell (example 12.1). Allowed instead of tag
use tag
. Text in a cell styled with a tag
, is displayed by the browser in bold font and aligned to the center of the cell. Otherwise, the differences between cells created through tags
And
No.
Example 12.1. Creating a table
TABLE tag
Cell 1
Cell 2
Cell 3
Cell 4
The order of the cells and their appearance is shown in Fig. 12.1.
In this chapter we will talk about table tag attributes.
summary- this attribute defines general information about the purpose and structure of the table for non-visual (speech) browsers, i.e. provides brief information about the contents of the table. At first glance, it seems that this attribute is not required for beginners, but this is not the case, the validator issues a warning about its absence, so set it to at least empty summary="".
summary="Brief information about the table.">
first row, first cell
first row, second cell
I scattered the information over three lines, you don’t have to do this, you can do it in one line, I just showed that this syntax is acceptable.
border- this attribute specifies the thickness of the border around the table, as in pictures, in pixels.
border="5">
first row, first cell
first row, second cell
first row, first cell
first row, second cell
if the value of this attribute is greater than zero, then it is possible (but not advisable) to insert another attribute bordercolor="#FFAA00" with the color of the border.
align- this attribute serves to align the table and can take one of these values: left or center or right.
height specifies the height of the table in pixels. This attribute is set only in cases where we need to set a specific height.
width- sets the width of the table in pixels or as a percentage relative to the width of the browser window.
cellspacing- sets the distance between cells in pixels
cellspacing="10">
first row, first cell
first row, second cell
first row, first cell
first row, second cell
cellpadding specifies the distance between the cell and its contents:
cellpadding="10">
first row, first cell
first row, second cell
bgcolor as in the body tag, sets the color for the table.
background makes the image the background of the table like the body tag.
Let's create a page table.html :
tables in html
first row, first cell
first row, second cell
second row, first cell
second row, second cell
Now let’s look (opens in a new tab) at what we got. With this example I wanted to draw your attention to the fact that if we set the size of the table, then the cells divide this size equally. Also, please note that our text is stuck in the center... Not in order!!!
valign- this attribute serves to vertically align the contents of the cell and can take the following values: valign="middle" the text is located in the center, you don’t have to specify it because this is the default value. valign="top" the text is located at the top of the cell. valign="bottom" the text is located at the bottom of the cell. Homework: independently substitute the valign, cellpadding and cellspacing attributes with different meanings in the file table.html.
A table is one of the main tools for creating web pages.
Without using CSS, only using tables you can create pages with complex design. If you have completed the series of lessons Making a website - the first steps, then you understand what we are talking about.
Any table is a set of rows and columns, at the intersection of which there are cells. For example:
Let's look at our table from an HTML perspective:
the table itself is specified using tags
,
the table has a name - tags
,
the table consists of rows - tags
,
each row consists of columns - tags
,
columns have names located in the first row - tags
.
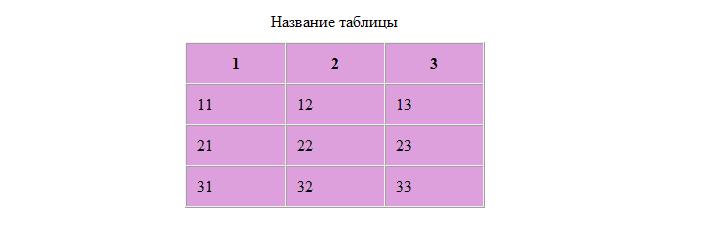
Let's create a table where we indicate the intersection of row and column numbers as the content:
Result:
As you can see, it didn’t turn out very nicely, we’ll decorate it.
HTML table parameters: indentation, width, background color, frame
For this purpose the tag
There are a number of parameters:
width- sets the width of the table (in pixels or % of the screen width),
bgcolor- sets the background color of table cells,
background- fills the table background with a pattern,
border- sets a border of the specified width (in pixels) around the entire table,
cellpadding- sets the padding in pixels between the cell border and its contents.
Let's apply these parameters:
Result:
This is better, but our table is pressed to the left edge of the window, as is the text in it. Let's fix this by adding three more parameters:
align- sets the table alignment: left (right), right (left), center (center),
cellspacing- sets the distance between table cells (in pixels),
cellpadding- sets the distance between the text and the inner border of the table cell (in pixels).
Let's apply these parameters:
Result:
Please note that the table has double borders. If you specify cellspacing="0", then the boundaries will take the usual form:
Result:
In general, two parameters are responsible for boundaries:
frame- sets the type of frame around the table and can take the following values:
void- no frame,
above- only the top frame,
below- bottom frame only,
hsides- only the top and bottom frames,
vsides- only left and right frames,
lhs- left frame only,
rhs- right frame only,
box- all four parts of the frame.
rules- sets the type of internal table boundaries and can take the following values:
none- there are no borders between cells,
groups- boundaries only between groups of rows and groups of columns (will be discussed a little later),
rows- borders only between lines,
cols- boundaries are only between columns,
all- display all borders.
Using these parameters, you can set the boundaries the way you want. Here we will give only one example, experiment with them all yourself.
Result:
It should be noted that the boundaries in different browsers are displayed slightly differently.
HTML tags tr and td
Tables are formed row by row. Therefore, the parameters specified in the line (tr) extend their effect to all cells (td) of the line. Strings can have three parameters:
align- aligns text in cells horizontally, can take values: left (right), right (left), center (center),
valign- aligns text in cells vertically, can take values: up (top), down (bottom), centered (middle),
bgcolor- sets the color of the line.
Let's look at an example:
width- sets the column width (in pixels or in percentage, where the width of the table is taken as 100%),
height- sets the height of the cell, and all cells in the same row will become of this height.
For example, let's add to our code, in the tags
these parameters
1
2
3
Result:
It should be noted that if you do not set the width and height, the table will be formed according to the content (this was the case in the previous examples).
This lesson is over, practice creating and designing tables, you will need these skills in the next lesson, where we will create tables of complex structures.
It became popular, web designers mainly used the table layout method and got very good results.
Tags used to build a table in html
table- a required tag that opens and closes the table caption- optional tag indicating the table title th- an optional tag, the opening and closing tags of which contain the column name. Typically appears bold tr- a required tag that opens and closes the line td- a required tag indicating the opening and closing of a cell in a row
The lesson on tables is very important! Thanks to tables, you can arrange not only text, but also images, links and much more. In the table you can specify background(or its color), indentation, width, border And other parameters that will give her a beautiful appearance. Table - Your first step to understanding web design! Previously, many sites were entirely laid out as tables, that is, everything that the user saw (side menu, top menu, content) was the content of the cells of a large table. On that note, let's move directly to the attributes that make the table beautiful...
Properties and parameters of html tables: indentation, width, background color, border (frame)
U table tag there are the following attributes:
width- table width. can be in pixels or % of screen width. bgcolor- background color of table cells background- fills the table background with a pattern border- frame and borders in the table. Thickness is indicated in pixels cellpadding- padding in pixels between the cell contents and its internal border As before, we write the attribute value in quotes.
Let's look at the use of these attributes using an example. To do this, let's create a table (but already without the extremely rarely used caption and th tags) and set the parameter to the attribute border, width (width of table, row or cell) And bgcolor (cell color)
HTML table
Stobets 1
Stobets 2
As a result, the following table will be displayed in the browser: frame- an attribute indicating the frame around the table. There are the following values:
Void - no frame, above - only the top frame, below - bottom frame only, hsides - only the top and bottom frames, vsides - only left and right frames, lhs - left frame only, rhs - right frame only, box - all four parts of the frame.
rules- an attribute indicating the boundaries within the table, between cells. There are the following values:
None - there are no borders between cells, groups - boundaries only between groups of rows and groups of columns (will be discussed a little later), rows - boundaries between rows only, cols - boundaries only between columns, all - display all borders.
Let's look at the code example
HTML table
Stobets 1
Stobets 2
Text in the first cell of the first column
Text in the second cell of the second column
Result
Now let's try to create a beautiful table. To do this, let's start using table alignment. To do this, there are the following already familiar parameters:
align- table alignment. It can be placed on the left (left), on the right (right), in the center (center) cellspacing- distance between table cells. Specified in pixels (default 0 pixels) cellpadding- padding in pixels between the cell contents and its internal border (default 0 pixels) Let's look at an example
HTML table
Stobets 1
Stobets 2
Text in the first cell of the first column
Text in the second cell of the second column
The browser will display a centered table that looks like this:
tr rows and td cells in HTML tables
Let me remind you again that tables are formed row by row (tr). The rows (tr) already contain cells (td). If you specify a parameter for a string (tr), it will be valid for all cells(td) in this line, if for a specific cell, then only for it. In the examples above, I specified the color for the row; this parameter was distributed accordingly to all cells.
Stobets 1
Stobets 2
For tr and td tags there are the following
align- alignment of text inside a cell. Left edge (left), right edge (right), center (center) valign- vertical alignment of text inside a cell. Up (top), down (bottom), center (middle) bgcolor- sets the color of the line width- column width (all cells below will take this parameter) is specified in pixels or as a percentage, where 100% is the width of the entire table height- cell height (all cells in the row will accept this parameter)
Let's look at the code where the contents of the cells (td) are aligned along different edges: in the first one to the left, in the second to the right:
HTML table
Stobets 1
Stobets 2
Text in the first cell of the first column
Text in the second cell of the second column
Result
Using tables you can create a very good page. Don’t forget that you can insert not only text into cells, but also images, links, etc.!)
Thank you for your attention! I hope the material was useful!
 It should be noted that the boundaries in different browsers are displayed slightly differently.


